LED Diffuser for RetroTINK 5X
prusaprinters
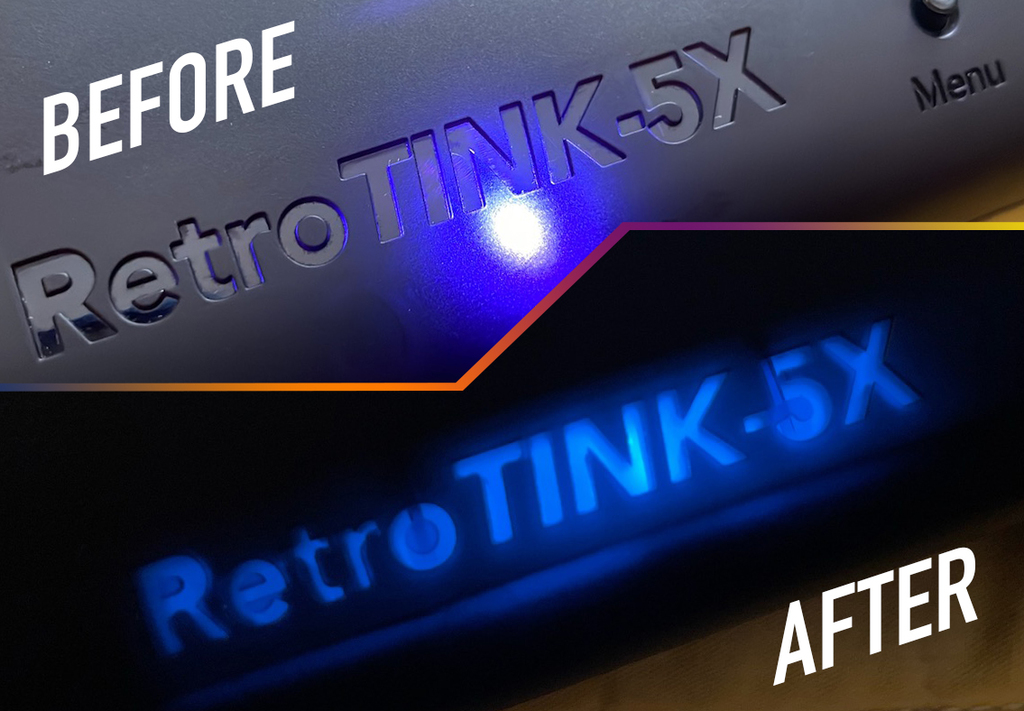
<p>The all-mighty RetroTINK 5X by Mike Chi has a small issue - the internal LED has no diffuser. The single glaring LED leaves a bit to desire, so I took this opportunity and designed this diffuser to even out the light and emphasis the text on the outer shell.</p> <p>However, before everything -</p> <h3>!!!DISCLAIMER!!!</h3> <h3>By attempting to open up your 5X, you risk damaging the shell and the internals of the device. There will be no way to purchase a replacement shell from Mike, since he does NOT stock up on it separately.</h3> <h3>You've been warned!</h3> <hr/> <h3>How to open the shell</h3> <h3>Required Tools</h3> <p>At least THREE guitar picks. The slippery ones are the best.</p> <p>The top and bottom shell are snapped together with 7 clips. You will need at least 3 guitar picks to insert and release those clips.</p> <p>First, grab the shell and squeeze the top shell backwards as shown in the photo. You will be able to create a small crack. Try massaging the shell if it won't budge.</p> <p>When the crack is big enough, shove one guitar pick downwards into the crack and keep the angle, while trying to slide it around a bit, in order to undo the #1 clip in that area.</p> <p>Once you hear the pop, stop, and leave the guitar pick in there.</p> <p>DO NOT try and pry the top shell upwards by bending the guitar pick. You risk snapping the clips or even the shell itself.</p> <p>Undo the clips in the indicated order (1>2>3) with multiple guitar picks. Leaving them in place instead of removing them will ensure the shell doesn't snap back into the lock position.</p> <p>Note the red part.</p> <p>Never try to pry from the red spot or you risk damaging the IR receiver on the mainboard of the 5X.</p> <p>Undo the #4 clip with the same technique.</p> <p>Undo #5 but not #7 yet. It's too stiff to try at this point.</p> <p>Undo #6.</p> <p>And at last, slightly wiggle the two shells to make #7 undo itself.</p> <h3>DO NOT try to take the mainboard out of the bottom shell. This is not necessary to install the diffuser.</h3> <hr/> <h3>Printing & Preparing The Parts</h3> <p>Print the two parts in their original orientation.</p> <p>DO NOT use support. Try enabling bridging in your slicer.</p> <p><strong>Deal with Light Leakage</strong></p> <p>Light will leak from the printed parts. If you wish to contain all the light, apply black electric tape on all four sides of the printed parts.</p> <p>Personally, I think the light leak also has its own merits. So make your own choice here.</p> <p><strong>Apply Double-sided Tape</strong></p> <p>Apply double-sided tape to the bottom of the reflector (bowl) piece.</p> <h3>Parts Installation</h3> <p><strong>Affix the reflector</strong></p> <p>Note the square hole on the bottom and the notch on the upper left side of reflector.</p> <p>Put the reflector down on the PCB with the LED going through the square hole, while the notch touching the part sticking out of the side of the SCART port. Make sure the reflector is parallel to the edge of the PCB.</p> <p>Press down and make sure the double-sided tape does its job.</p> <p><strong>Snap in the plate</strong></p> <p>Note the hole and the notches on the plate part. It should snap fit into the inside of the top shell.</p> <h3>Close up the shell</h3> <p>Put the top shell over the mainboard, line up the button poles through the 3 holes, align the clips and press the top and bottom back together without forcing too much on them.</p> <p>The installation is finished.</p> <p><strong>LED brightness in lit room</strong></p> <p><strong>LED brightness in dark room</strong></p> <p>LED light appears much dimmer in a dark room and less distracting.</p> Category: Electronics
With this file you will be able to print LED Diffuser for RetroTINK 5X with your 3D printer. Click on the button and save the file on your computer to work, edit or customize your design. You can also find more 3D designs for printers on LED Diffuser for RetroTINK 5X.
