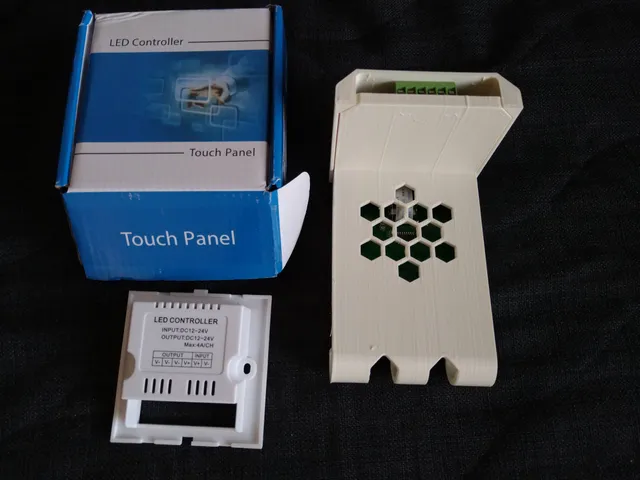
LED Controller Touch Panel (TM06-M003 model) enclosure modification for room dividers
prusaprinters
Story behind the designAfter buying an IKEA KALLAX and using it as a room divider, I wanted to improve the lighting in the now divided living/office room so I decided to use a good CRI daylight 24 volt LED strip on the top. To control the LED strip I needed something easily accessible on the IKEA KALLAX and I found the following controller/dimmer:LED Controller Touch Panel - amazon link(The model name on the box ticked is TM06 and in the manual it is named M003. Other than this I can't provide more information for the name of the product modified.)This is designed for a recessed mount, but I did not want to make any holes on my new KALLAX and when I saw that the PCB is separate from the glass panel, I immediately had the idea to make a custom mount. While I was designing the PCB holder I also thought to design the hooks under the switch to have additional functionality. Design details and instructionsThis is a two part design with proper orientation for durability (especially for the hooks) and minimal need for supports. Included in the files is the .3mf file with painted on supports. Use of snug supports setting in PrusaSlicer 2.4 is recommended. The glass panel with plastic frame is friction fit into place and the pcb is screwed on the part with the 2 self-tapping screws that come with the controller. Just be careful when disassembling the controller to not damage the ribbon cable and/or its' connectors. Because of the disassembly, this does void the warranty of the LED controller. However you are not permanently altering the product, you can screw it back together and use it as originally intended, if you change your mind. This also means the modification is safe to do, as you are only changing the enclosure of the product and not doing any risky electrical modifications. The top cover flex snaps on the main body from the top and it then slides to the front flush to the glass panel. For the flex and durability I recommend using PETG or ABS/ASA material, although PLA can also work and there is not a lot of heat generated to create issues. I used ABS to print mine. Double sided tape secures the assembly in place. I used cable channels and guides to route and hide the 24 volt dc power supply cable towards the back of the KALLAX and the wall.In theory this should work with any room divider and use case scenario that has a similar geometry involved.Happy printing!
With this file you will be able to print LED Controller Touch Panel (TM06-M003 model) enclosure modification for room dividers with your 3D printer. Click on the button and save the file on your computer to work, edit or customize your design. You can also find more 3D designs for printers on LED Controller Touch Panel (TM06-M003 model) enclosure modification for room dividers.
