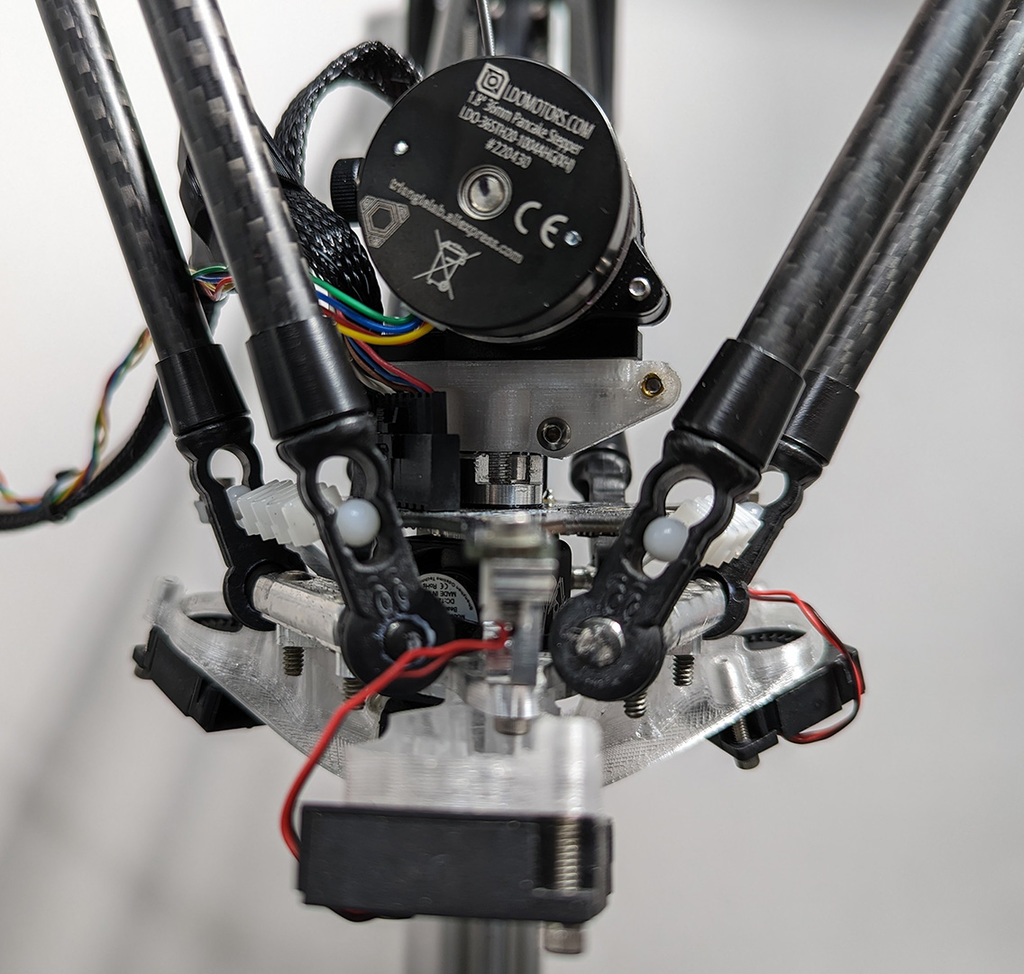
LDO Orbiter v2.0 SE300 Mount
thingiverse
*** UPDATE: I've moved most of my designs to [Cults3D](https://cults3d.com/en/users/EtherBunny/creations) *** This is a mount to attach an LDO Orbiter v2.0 to an SE300 hotend found on SeeMeCNC such as the BOSSdelta 300, 500, and Artemis 300. A few notes... <b>Printing</b> This will be best printed upside down with the top of the models on the build plate (see image). This is due to the very thin spots surrounding the filament hole and printers are good at printing thin layers, but not extruding thin walls. Use as small a layer height as you're reasonably able to so the holes and radii come out cleanly. Lastly, use plenty of infill and walls to provide structural support for the [heat-set inserts*](https://www.amazon.com/uxcell-Knurled-Insert-Female-Embedding/dp/B09MCWTBCC?tag=etherbunny-20). I would also print in a material that has a high heat deflection rating if you print higher temperature filaments and/or in an enclosure (e.g., ABS, nylon, PC). I used [Polymaker Polycarbonate*](https://www.amazon.com/Polymaker-Filament-1-75mm-Polycarbonate-Cardboard/dp/B09KKMLKRF?tag=etherbunny-20), but [their ABS*](https://www.amazon.com/Polymaker-Filament-1-75mm-Resistant-Cardboard/dp/B09DKQR8HD?tag=etherbunny-20) would work as well. <b>Assembly</b> You'll need 4 [M3x8mm screws*](https://www.amazon.com/uxcell-M3x8mm-Machine-Stainless-Fasteners/dp/B07Q4N4V1V?tag=etherbunny-20), 4 [heat-set inserts*](https://www.amazon.com/uxcell-Knurled-Insert-Female-Embedding/dp/B09MCWTBCC?tag=etherbunny-20) and 2 [M3 lock nuts*](https://www.amazon.com/100Pcs-Stainless-Self-Lock-Inserted-Clinching/dp/B075ZZW7VL?tag=etherbunny-20). The inserts linked are shorter (~4mm) than many other options. You can use longer inserts, but they'll stick out a bit and that annoys me :). Install the heat-set inserts from the inside (not from the outside), make sure they're flush, then file the surface down so the two sides mate well. This ensures the M3 screws have the full thread depth available while making sure the inserts aren't proud of the surface preventing the two halves from meeting fully. Once the inserts have been installed, put the M3 lock nuts into one side of the mount with the flat side facing up, and attach the two halves of the mount around the PTC adapter (I think that's what it's called). It can be tricky to keep the nuts in place while you tighten the sides together. To help with this you can thread longer M3 screws into the nuts to give you something to hold them in place while you're snugging everything up. IIRC, you can use the supplied hardware (i.e., M3 screws) to mount the Orbiter to the mount, screwing into the M3 lock nuts. If the supplied hardware doesn't work, just use M3 screws of appropriate length. Now all that's left to do is adjust E-steps, do some testing, and you're off and running! <i>*affiliate link</i>
With this file you will be able to print LDO Orbiter v2.0 SE300 Mount with your 3D printer. Click on the button and save the file on your computer to work, edit or customize your design. You can also find more 3D designs for printers on LDO Orbiter v2.0 SE300 Mount.
