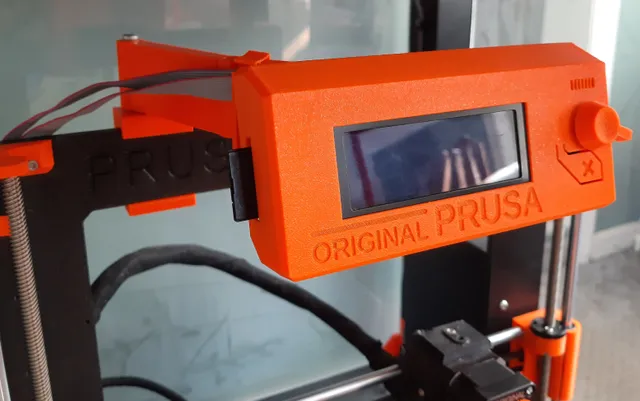
LCD Top Mount for Prusa Mk3
prusaprinters
After building an enclosure for my Prusa i3 Mk3, the LCD Panel prevented the doors from fully closing. I moved the LCD to the top frame to give it and the enclosure doors more space. The Parts:Base snaps onto the top frame of the Prusa i3 Mk3. The model for this was modified from the original Prusa spool holder, which snaps onto the frame in the same way.Post is inserted into the Base and held by an M4x25 bolt and nut.Swivel1 slides onto the Post.Swivel2 attaches to the smaller post on the end of Swivel1.Bracket attaches in the same way to the small post on Swivel2.Support parts (left and right) attach to the circuit boards of the LCD panel. These are based on the original supports that attached the LCD panel at the front of the heatbed.Cable Holder attaches the ribbon cable to Swivel2. The Build:Carefully remove the LCD panel from its original mounting position and removing the ribbon cables. Disassemble the panel case and remove the support pieces that mount to the printer frame. Replace the supports and reassemble the panel cover. The EINSY door needs a narrow piece cut from its top to allow the ribbon cables to exit and travel up the frame to the top of the printer. This can be accomplished either by modifying and printing standard EINSY door with a small cut in it, or by removing the door and cutting out the corner with a utility tool.Move the ribbon cables within the EINSY box to exit via the new cut. Use one of my Ribbon Cable Frame Holders to attach them to the printer frame.Assemble the Base and Post pieces and connect them together with an M4x25 bolt and nut. Post has a protrusion on one side that aligns with the cutout area of Base. This ensures that these two pieces are oriented properly. The nut only needs to be finger tight. It is meant only to hold the bolt and Post in place. Snap this assembly onto the top frame of the printer, just above the engraved Prusa name.Attach Swivel1 onto Post, then attach Swivel2 and Bracket. Reattach the ribbon cables to the back of the LCD Panel, then attach the LCD panel to Bracket using the new Supports. The ribbon cables should run beneath Bracket.Attach the Ribbon Cable Clip to Swivel 2Please refer to the photos to assist in assembly. Printing:All parts were designed to not require supports. Depending on your printer and settings, you may find that supports are needed. The gcode file includes all necessary parts, oriented for best printing. Please see my separate Ribbon Cable Clip model for attaching the ribbon cable to the printer's frame.
With this file you will be able to print LCD Top Mount for Prusa Mk3 with your 3D printer. Click on the button and save the file on your computer to work, edit or customize your design. You can also find more 3D designs for printers on LCD Top Mount for Prusa Mk3.
