Layer Stool
thingiverse
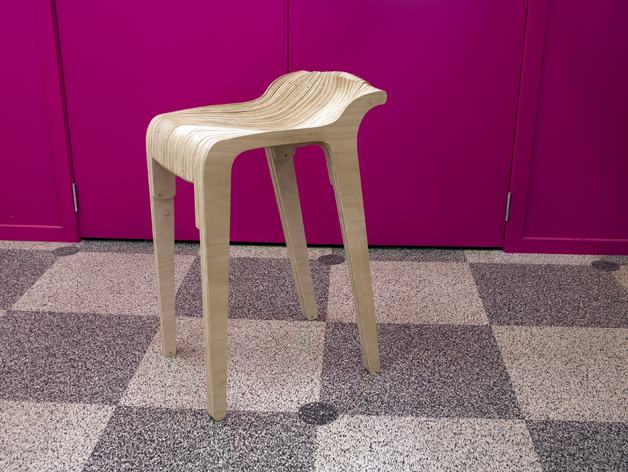
This stool was crafted after attending Fab8 at the Wellington Fablab, inspired by Grasshopper and Jens Dyvik's Layer Chair. The open-source file served as a starting point for experimentation, leading to this unique outcome. Constructed with 18mm plywood, PVA glue, and 25mm wood screws, the stool was cut using a Shopbot. The original Layer Chair files can be accessed here: (http://www.dyvikdesign.com/site/portfolio-jens/the-layer-chair-amsterdam-edition.html) To assemble, ensure you utilize 18mm plywood and follow these steps: first, cut "screw holes outer" at a depth of 10mm using a 6mm end mill to conceal screws with wooden pegs. Next, cut the "screw holes," followed by "trim 1" at a depth of 6mm in two passes and "trim 2" at a depth of 12mm in three passes. You can add your text or skip this step. Finally, cut the "cutting lines" as a profile cut on the outside of the lines, ensuring all parts are securely positioned before gluing and screwing each profile to the one below. Clamp the stool for optimal fit and consider adding a footrest dowel for extra comfort.
With this file you will be able to print Layer Stool with your 3D printer. Click on the button and save the file on your computer to work, edit or customize your design. You can also find more 3D designs for printers on Layer Stool.