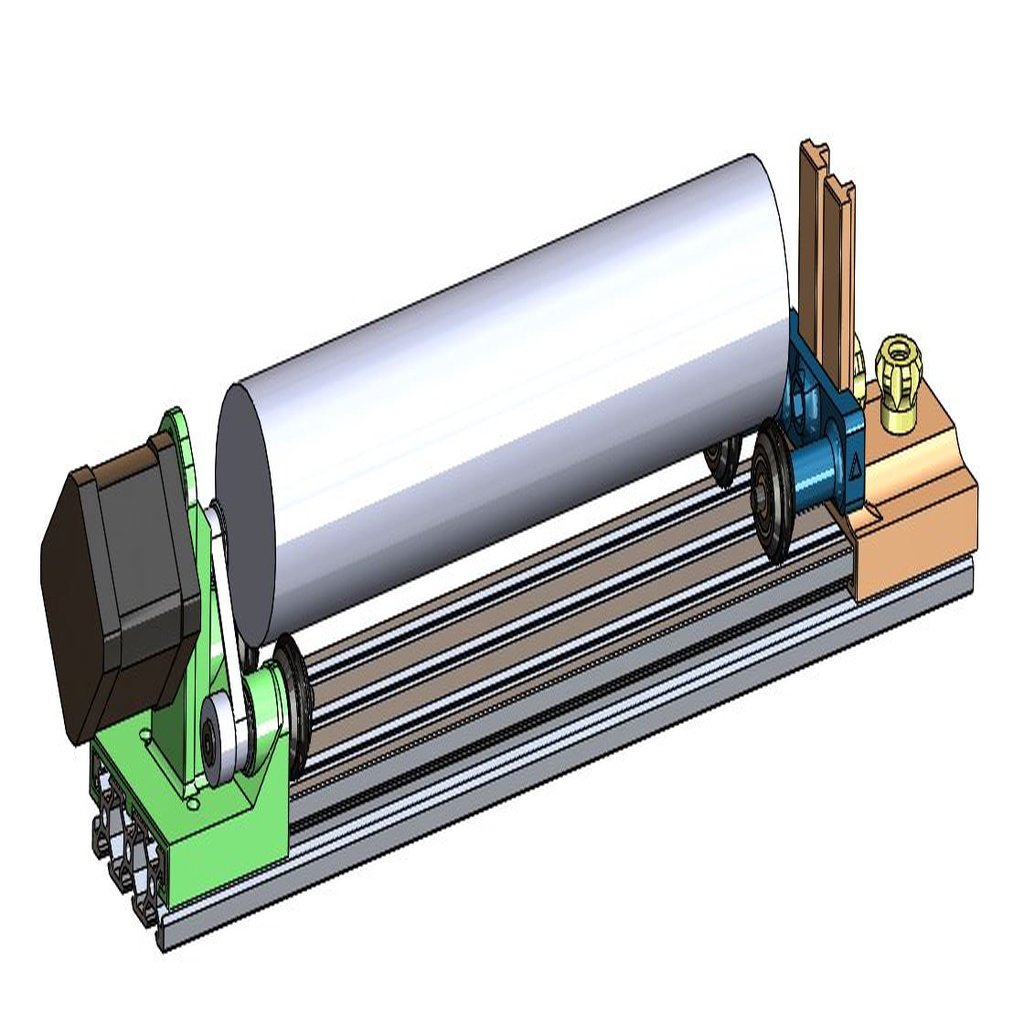
Laser Rotary Axis
thingiverse
This is a fully functional low-profile wheel-style rotary axis for Laser Engravers/Cutters that's packed with innovative features. Most of the interesting components are 3D printed, while a few purchased parts add to its functionality. The motor is a standard NEMA17, which I replaced in my Y-Axis setup (make sure your power is turned off before attempting this). The idlers are fully adjustable for position along the rail and height on their support bracket. Thumb locks are provided, and all nuts are captive for added security. A double-tire wheel (optional) is included for use on either or both ends of the axis. This works perfectly with the narrow foot of a typical wine glass. The Drive Wheel Plug (two per wheel) replaces the bearings at the motor end, allowing it to be clamped and driven by the M5x50mm screws that have pulleys on them. Tighten the M5 nylon locknut to secure in place. Take note of the 1mm thick precision shims used throughout to mate components like pulleys and wheels to their respective bearings, ensuring a smooth ride. For full assembly details, refer to the exploded view below. When assembling, don't forget to insert the 6MM spacer between the bearings in the motor mount! I use LightBurn to drive this setup, but RDWorks is also compatible. Parts that need to be purchased are listed below. CAD models are available upon request. Feel free to share your comments and suggestions – I'm eager to improve and update this design as I continue to use it. A suggestion: Turn off "Homing" on your laser to avoid running into the idler bracket. Also, I recommend using "Current Position" in Lightburn to minimize unnecessary movement. Note that I've flipped the orientation of the M5x50mm screw in the cutaway illustration for better clarity. Either way will work, but it's easier to mount the pulley and other components as shown. Here are some videos showcasing my results with this setup: a couple of 20 oz powder-coated tumblers that I etched on my 100w machine, demonstrating excellent results; and a video of the actual etching process with some cleanup. I used water-based ("Household") Goof-Off to clean after etching. I learned the hard way that when cleaning powder-coated stainless steel, using regular Goof-Off is best. Parts needed: 1. V-Slot linear rail (20x60mm) 2. Delrin V Wheel Kit 3. Tee-Nuts (5mm for 20mm rail) 4. 2GT-2mm Pulleys (20T, 5mm bore for 6mm belt) 5. 2GT-2mm Belt (80Teeth, 160mm long continuous, 6mm wide) 6. Aviation plug connectors 7. M3x7 (or M3x8) cap screws to mount motor 8. 6mm Spacers 9. Ball bearing: 625 2RS 5x16x5 (four required in Motor Mount) 10. Nylon Insert Hex Locknut - M5 11. Precision Shim - 8mm OD, 5mm ID, 1mm thick The powder-coated 20 oz stainless tumblers I used were purchased from Amazon. These generics look great and are much less expensive than the name-brand (Yeti), but time will tell if they're as good:
With this file you will be able to print Laser Rotary Axis with your 3D printer. Click on the button and save the file on your computer to work, edit or customize your design. You can also find more 3D designs for printers on Laser Rotary Axis.
