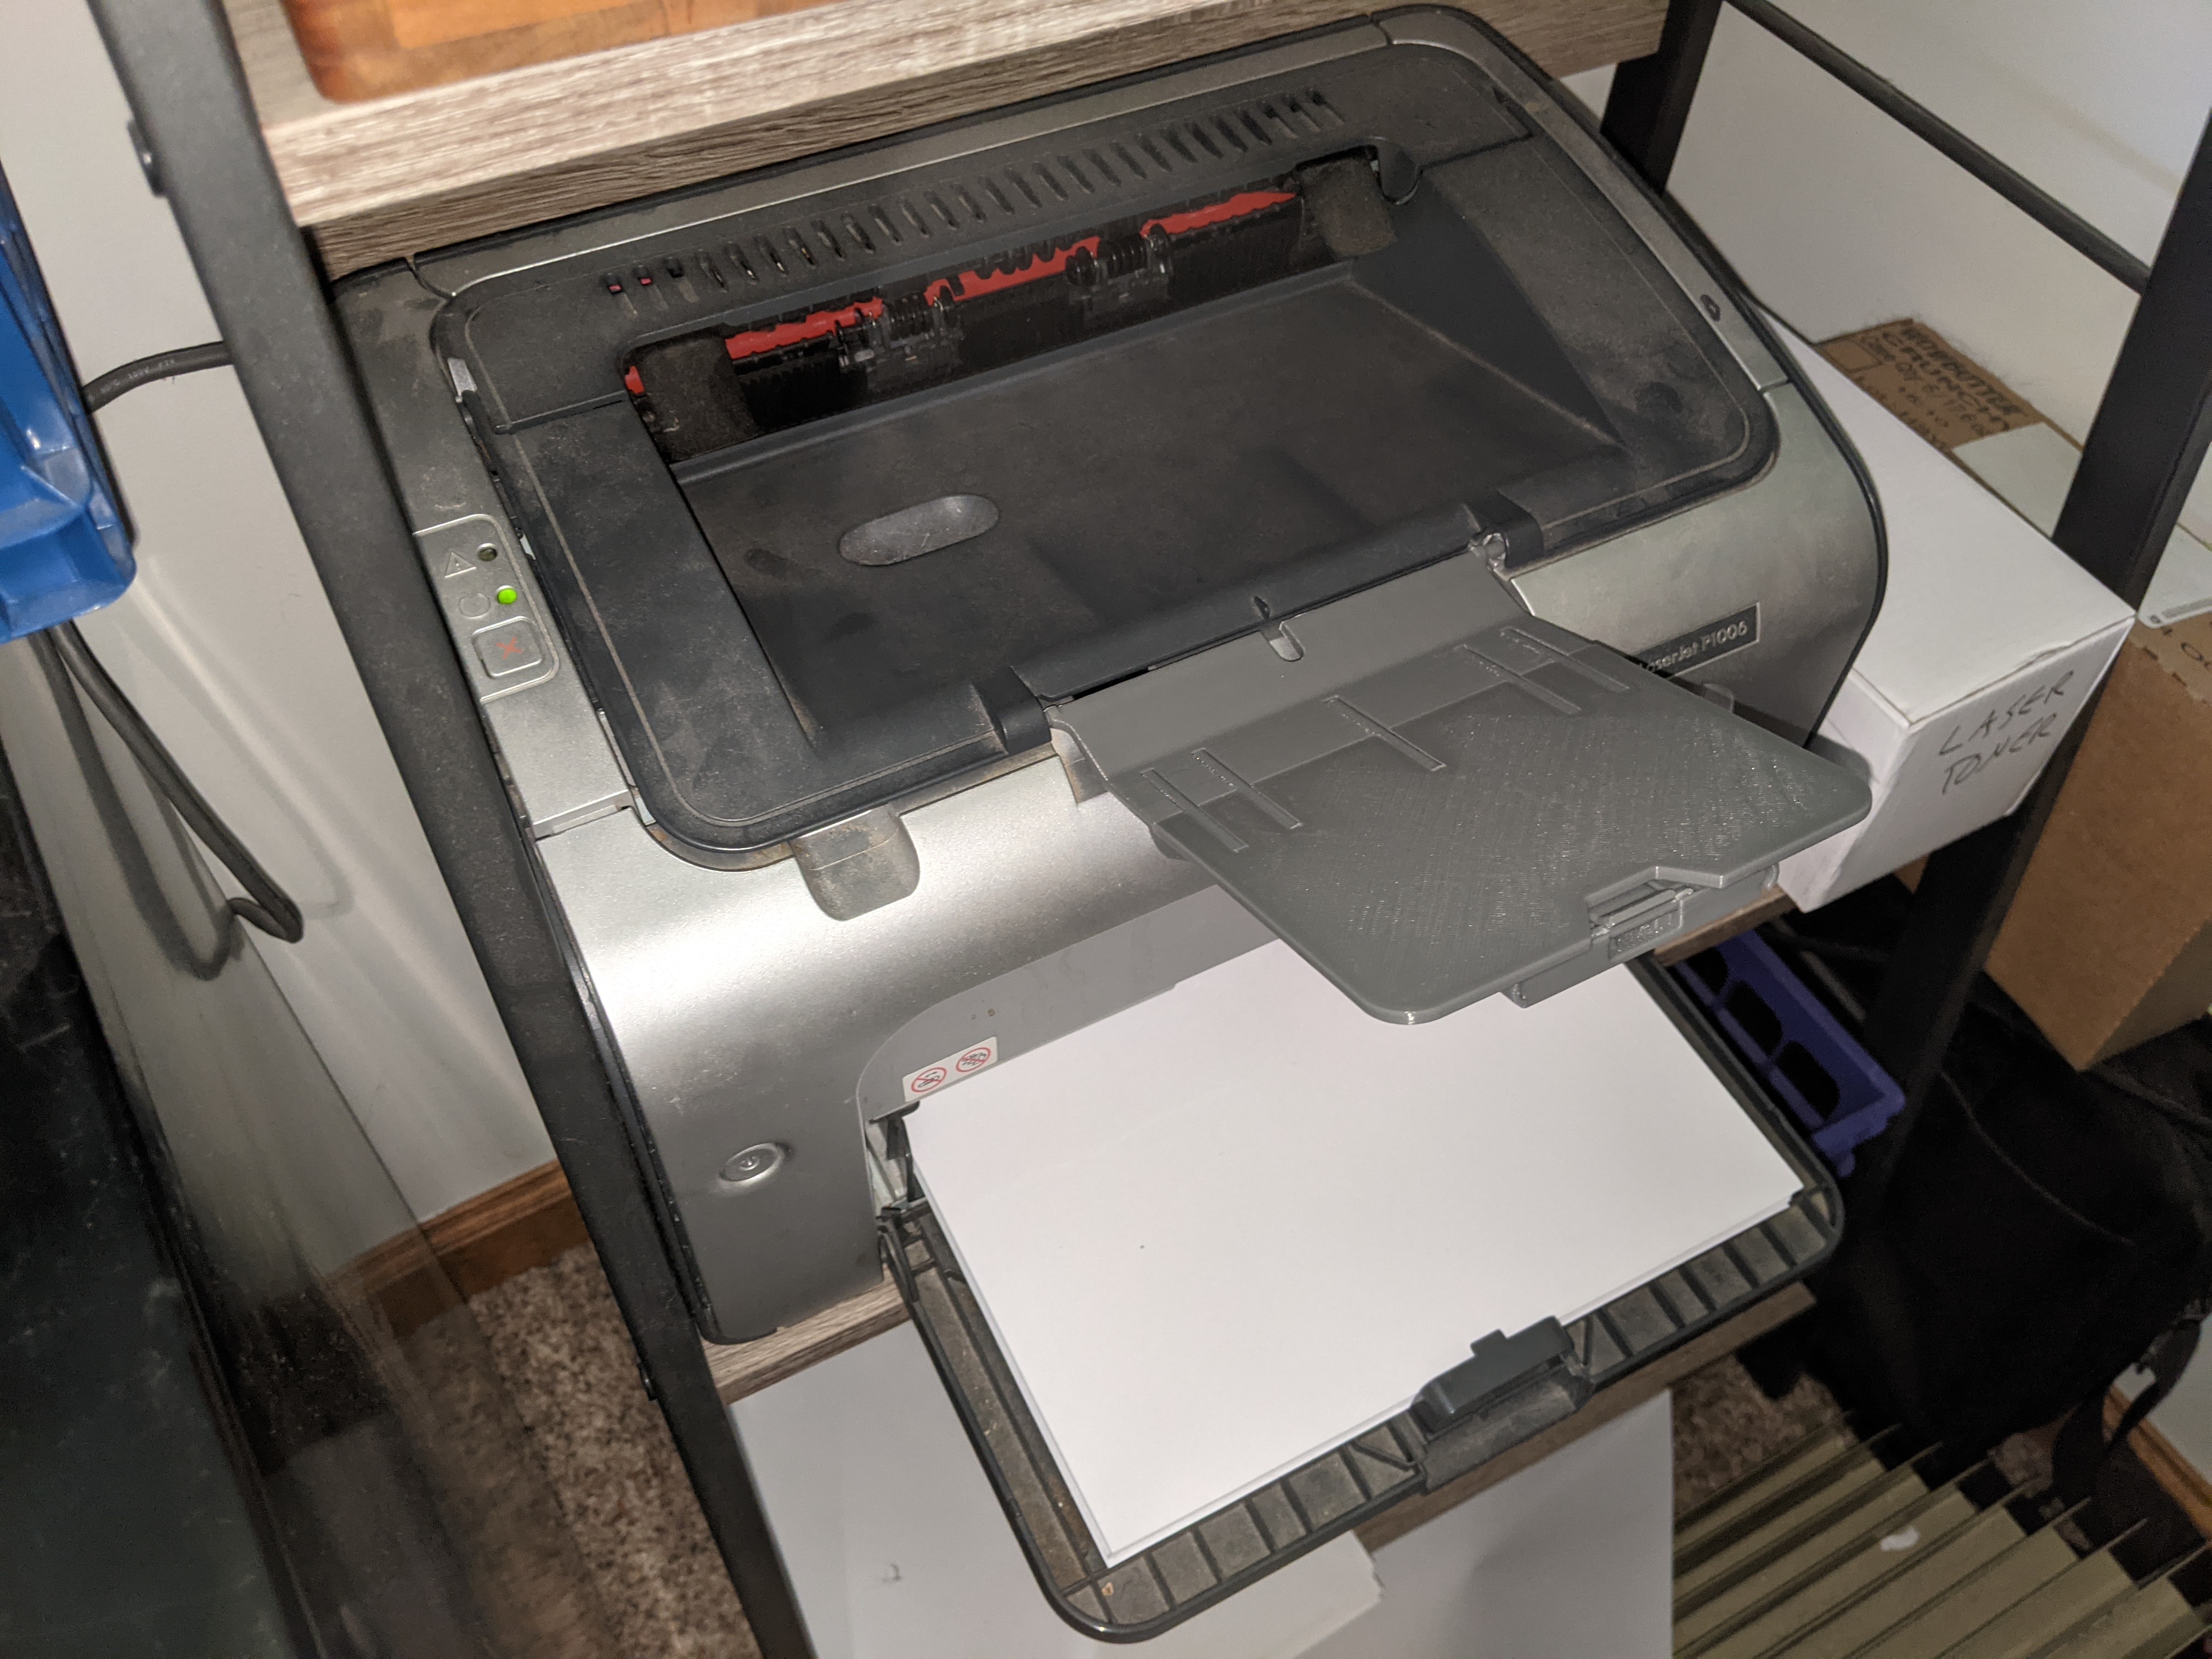
Laser Printer Paper Delivery Output Tray Assembly for HP P1006 (and others)
prusaprinters
<p>This is the upper tray for a small laser printer (see photos). This tray will probably work with the following laser printers : HP P1102 P1102w P1102s M1536 P1005 P1006 P1007 P1008 P1106 P1108 P1107</p><p>This is not an exact copy, of course, but it is a fairly close working replacement.</p><p> </p><h4>Assembly</h4><p> </p><p>There are several parts to this print :</p><ol><li>Tray Base</li><li>Tray Extend</li><li>Central Fin (1)</li><li>Fin2 (4)</li><li>Slide</li><li>Flip Tab</li></ol><p>The “fins” and the tray pieces can be glued together if necessary, but I found that the friction fit did not require glue.</p><p>Start by inserting the Slide into the slot on the bottom of the Tray Extend. The slot in the Slide should be towards the top side of the Tray.</p><p>Next, add the Flip Tab to the Slide, by placing the tab pins over the slots in the slot. Press down on both pins at the same time to insert them into the slots. Note there is a raised section at the back of the tab; this should be up when inserting the tab pins. When properly inserted the Flip Tab will rotate up and stop at a fixed angle.</p><p>Now insert the Central Fin (the one with the short fin) into the center slot on the Tray Extend. The fin should be toward the outside of the Tray Extend (see photos).</p><p>Insert the four “Fin2” pieces into the remaining slots on the Tray Extend (again with the fins toward the outside.</p><p>Finally, insert all five fin pieces into the corresponding slots on the Tray Base, and push the two tray pieces together. Done!</p><p> </p><h4>Use Instructions</h4><p> </p><p>The output tray has two pins which fit into recesses in the laser printer - lift the top cover of the laser printer to access these recesses. Fit one pin into a recess, and “bow” the tray in the middle in order to fit the second pin in place; bend the tray just enough to fit the pins in place. This will be a tight fit, but it will in fact fit.</p><p> </p><h4>Print Instructions</h4><p> </p><p>Print in PLA using the 3mf or gcode file provided. Most of the parts will print with no brim, but I had better luck with the Tray Base piece when using a brim.</p><p>I recommend printing each of the fin pieces one at a time. I printed these successfully on a smooth plate with just a tiny bit of glue stick to ensure good bed adhesion. You may need to trim the “bed end” of the piece a bit to remove “elephant's foot;" so that the piece will fit into the tray sections. I printed the Central Fin with a brim, just to be on the safe side.</p><p> </p><h4>CAD</h4><p>The OnShape 3D CAD files for this are here :</p><p><a href="https://cad.onshape.com/documents/8e05f545b1e64bf38f286ee0/w/38bb8934a6467767a857e8a4/e/21f8644337eb8577fc9b8ffc">https://cad.onshape.com/documents/8e05f545b1e64bf38f286ee0/w/38bb8934a6467767a857e8a4/e/21f8644337eb8577fc9b8ffc</a></p><p> </p>
With this file you will be able to print Laser Printer Paper Delivery Output Tray Assembly for HP P1006 (and others) with your 3D printer. Click on the button and save the file on your computer to work, edit or customize your design. You can also find more 3D designs for printers on Laser Printer Paper Delivery Output Tray Assembly for HP P1006 (and others).
