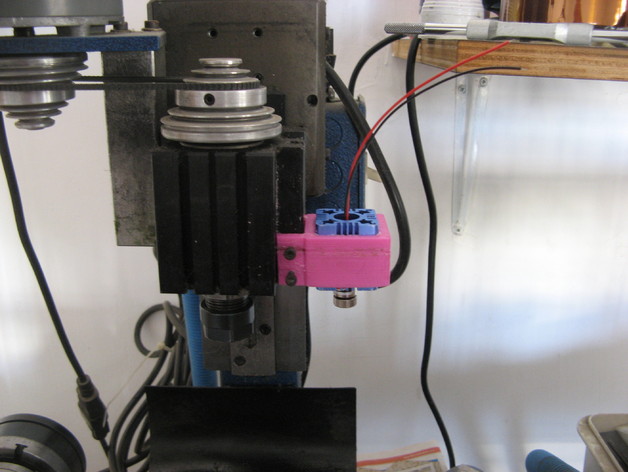
laser engraving Holder for taig mini mill
thingiverse
Custom laser engraving Holder for Taig mini Mill and Printing the Cord Line Switch Holder. Get inspiration from my latest video on YouTube showcasing a detailed project on how to create this custom laser engraving holder for your Taig mini mill. If you haven't checked it out yet, now is the perfect time! Click here: [www.youtube.com/watch?v=wfqJQNfk6bI](http://www.youtube.com/watch?v=wfqJQNfk6bI) and also take a look at this another great video on my YouTube channel [https://www.youtube.com/watch?v=GjjVeW4gizk](https://www.youtube.com/watch?v=GjjVeW4gizk). So, let's get started with the instructions on how to make your very own custom laser engraving holder. This is a DIY project that requires minimal expertise but maximum creativity. What you need for this project: 1. A 2-way switch (250 V, 2 Amp) 2. Sata cable (15-pin Molex, IDE) and power cable (4-pin female connector) 3. Cooling fan - mini brushless DC type with 30 mm outer diameter and a two-pin configuration 4. Heat sink/Heat sync with inner diameter of 13 mm to keep your laser diode module cool and at the right temperature 5. Buck step-down power module - LM2596 (converter DC, 4-40 V to 1.3-37 V) along with a digital led voltmeter for precise measurements 6. Fan from Toshiba satellite L100 and SUNON GB0506PGV1 with an output of 8A at 5 Volts and a power rating of 2.0W The entire process can be completed in just a few steps. To create this custom holder using simple 3D printing technology is indeed feasible for anyone who's even remotely familiar with this process,
With this file you will be able to print laser engraving Holder for taig mini mill with your 3D printer. Click on the button and save the file on your computer to work, edit or customize your design. You can also find more 3D designs for printers on laser engraving Holder for taig mini mill.
