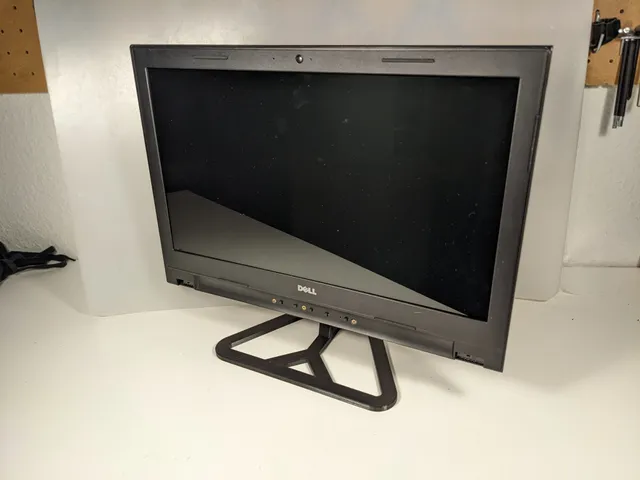
Laptop screen conversion kit with a VESA mount
prusaprinters
This is the second part of my project converting my daughter's old laptop into an Octoprint server. Since I had the laptop's screen left lying around after I took the motherboard out, I decided to make a standalone monitor out of it.Bill of materials:A screen from an old laptop you are not using anymoreAn LCD control board made for your screen4x M2.5 and 4x M4 threaded inserts. I used this kit: https://www.amazon.de/dp/B09B7F2XM34x M2.5x10 or M2.5x8 laptop screws. The heads should be as flat as possible to avoid pressing against the LCD panel.Assembly instructions:Disassemble the laptop and detach the screen from the rest of the case. Remove the wifi antenna, the webcam, the cables and all the mounting hardware. Take out the LCD panel, check its model number and find a suitable LCD control board. I used this one from Ebay: https://www.ebay.de/itm/152840924153 If your board has the same dimensions, print the parts as they are. Otherwise you can modify the model using the attached fully parametric Fusion 460 file, or the STEP file in your CAD software of choice. Install the threaded inserts into the printed case. Be careful with the insert in the rectangular part, since it is very close to the edge and can become easily misaligned. Once it cools down though, it is held quite securely. Mark and drill holes in the back part of the laptop screen matching the holes in the control board PCB. Don't forget to take the LCD panel out first :) Make a slot with a Dremel tool or a file to route the ribbon cable for the LCD panel. The case has 1mm of clearence on the side of the ribbon cable connector to account for this. Make sure that the ribbon cable can lie flat inside of the screen without pressing against the LCD panel. It helps to tape it using some aluminium tape (see pictures). Use the M2.5 screws to mount the case with the LCD control board to the back of the laptop screen. The printed spacers go onto the screws between the PCB and the laptop screen, and this part becomes a lot easier if you stick them to the PCB with some double-sided tape or a glue stick. Route the LCD ribbon cable above and around the PCB, and the cable that goes to the screen buttons through the slot on the side. The slack in both cables can be later carefully pushed into the case, as there is sufficient space above the PCB for this. Find a convenient place for the screen buttons and install it there using screws or adhesives. I chose to drill holes for each individual button in the bottom of the laptop screen. Plug the ribbon cable into the LCD panel and reassemble the screen. Check that nothing presses against the panel from the back, as this can lead to a distorted image or even damage. Find or print a monitor stand with a 75x75 VESA mount and screw it on using M4 screws. I used this stand by choosecool: https://www.thingiverse.com/thing:3808242 Enjoy! All comments and/or feedback are welcome and appreciated. Happy printing!
With this file you will be able to print Laptop screen conversion kit with a VESA mount with your 3D printer. Click on the button and save the file on your computer to work, edit or customize your design. You can also find more 3D designs for printers on Laptop screen conversion kit with a VESA mount.
