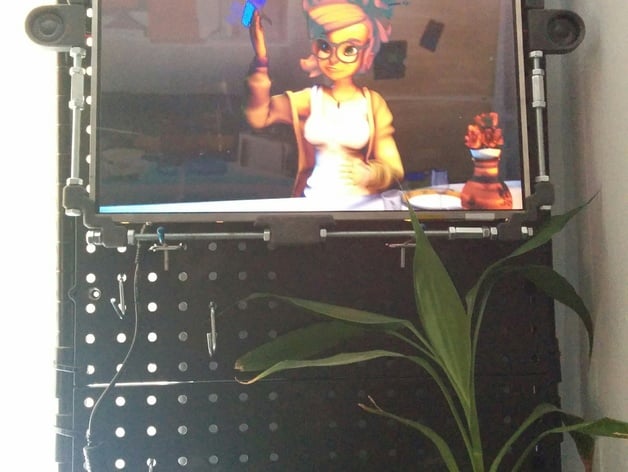
Laptop LCD Panel Skeleton Frame
thingiverse
I salvaged a dead laptop a year ago and saved the screen with hopes of bringing this project back to life. Finally having some free time and a solid design in mind, I crafted a skeletal frame for Frankenstein's monster-like display rig. The idea was to utilize off-the-shelf 1/4 inch nuts, bolts, rods, and couplers along with custom clamp pieces I designed specifically for the screen panel. Once everything was tightened up, the frame felt sturdy and comfortable in my hand. Next, I created panels that could attach to the frame to hold all the necessary circuit boards to bring this project to life. Using the clamp parts I had already designed, I fabricated small panels that could be attached to any side of the frame and also secured to the screen panel to prevent movement. Instead of drilling holes into the models, I opted for a quick and cost-effective approach by shaping the panels correctly and then using a drill to add the necessary holes for mounting the boards. Regardless of which screen you're working with, simply search for LCD panel controller boards on eBay, contact the top sellers about your specific panel, and they'll inform you if they have compatible products. This worked perfectly for me! After setting everything up, I had a fully functional LCD display that could be connected to HDMI. Since I had a spare Chromecast, I decided to transform this panel into a streaming screen that I could control from my phone. To power the device, I found a 12v to 5v converter on Amazon and purchased a new 12v power supply with a splitter to route power to both the controller board and the converter board. Don't worry; the entire rig only consumes 2 amps, and my current supply is rated for 5 amps. A quick trip to RadioShack yielded a 5.5mm power socket, which I soldered onto the converter, allowing it to be connected directly to the power supply. Since the controller board supported two 1-watt speakers, I picked up some from Amazon and added sound to the LCD rig, which receives its audio through the HDMI port from the Chromecast. That's a basic overview of the project. In the future, I might add adjustable legs so that it can be placed on a table, but for now, it's mounted on my pegboard. I uploaded the STL and FreeCAD files if you need to adjust the sizes or create a simpler rig from a spare LCD panel lying around. Unless I'm the only oddball who had this type of screen just collecting dust, making this project pointless. Side note: With the 5v power supply, you can power more than just Chromecast; you can also run Raspberry Pi or any other device that can output video to the panel. The possibilities are endless, which is why I designed a skeleton frame – it gives people the freedom to modify and upgrade over time. Either way, happy making!
With this file you will be able to print Laptop LCD Panel Skeleton Frame with your 3D printer. Click on the button and save the file on your computer to work, edit or customize your design. You can also find more 3D designs for printers on Laptop LCD Panel Skeleton Frame.
