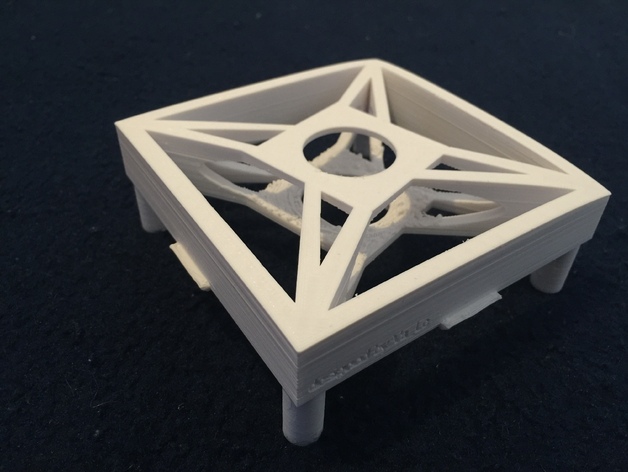
Laminate-Lamp v2.0 designed & created by Va_Le
thingiverse
I was searching for a unique gift - a lighting technician's perspective - a creative solution for grandma, dad, mother, and more that would never get boring! Here it is! All mothers, grandmothers, and family members will be thrilled to receive personalized photos from loved ones, sweet messages, and custom-designed textes. Now you can give a special birthday or Christmas gift with a new cover that will never ever get old. This is the second version of my "Laminate Lamp" design. The first one used too much filament and took forever to print. I've been thinking about creating a wooden lamp for a long time, but it's a lot of work! So, I used my awesome Dremel 3D printer to create this amazing lamp. **How to Create:** This lamp is designed specifically for DIN A5 landscape paper format. To make the lamp base, you'll need: * Your 3D printer and white filament * An LED lamp that won't get too hot (E14 socket) * A lamp socket with E14 size for the LED lamp * A cable with a switch (if you want) to electrify the lamp The holes in the lamp base are created with 29mm diameter - remember to buy a matching socket. For the design, you'll need: * A lamination device and laminating sheets DIN A5 * A writing program like Word * A normal laser or ink printer to print your personalized photos or messages Create the custom design you like using Word in portrait mode. Add columns for two sides, and fill them with whatever you want. Only go up to half of the DIN A4 paper. Print your creation on two sheets of A4 paper. Note that this will result in a duplicate image - you can print one side and then reverse it. Cut the printed sheets into DIN A5 size and assemble them back-to-back, infilling the lamination foil. Finished laminating? Place your creation in landscape orientation and cut off the top and bottom welded parts. Now, you can open it like a tube. Assemble the remaining pieces together, folding between the two columns at the middle to form a cube with four sides, each containing a custom-designed column. The final step is to put on the custom lamp cover! Switch on the light, and enjoy sharing happiness! **Important Safety Information:** Be cautious when dealing with electricity. Never overestimate your abilities or underestimate the power of electricity. If you're unsure about electrical components or currents, call an electrician! This design is for personal use only. Please don't sell it. Any unauthorized commercial sale will result in my engagement. **Current Design Status:** I'm working on version 2.1 with minor fixes and changes. **Comments are appreciated!** Print Settings: Rafts: Doesn't matter Supports: Yes Resolution: Highest 0.1mm Infill: 35% Notes: Dremel 3D Idea Builder settings: Resolution: High Layer Height: High: 0.15mm First Layer Height: 0.25mm Wall Thickness: 3 Fill: Infill: 35% Filling Kind: Line Speed: Print Speed: 60mm/s Walk Speed: 70mm/s Temperature: Extruder: 220°C Others: Fan ON?: Yes Overhang: 45° Print Time: 9 Std. 1 Min. Material Used: 33,00m **How I Designed This:** The "Never gets boring-lamp" is designed specifically for DIN A5 landscape paper format. **For the Lamp-Basement you need:** Your 3D printer and white filament An LED lamp that won't get too hot (E14 socket) A lamp socket with E14 size for the LED lamp A cable with a switch (if you want) to electrify the lamp The holes in the lamp base are created with 29mm diameter - remember to buy a matching socket. **For the design you'll need:** A lamination device and laminating sheets DIN A5 A writing program like Word And a normal boring laser or ink printer to print your personalized photos or messages.
With this file you will be able to print Laminate-Lamp v2.0 designed & created by Va_Le with your 3D printer. Click on the button and save the file on your computer to work, edit or customize your design. You can also find more 3D designs for printers on Laminate-Lamp v2.0 designed & created by Va_Le.
