Lack Rack Stacking Mount
prusaprinters
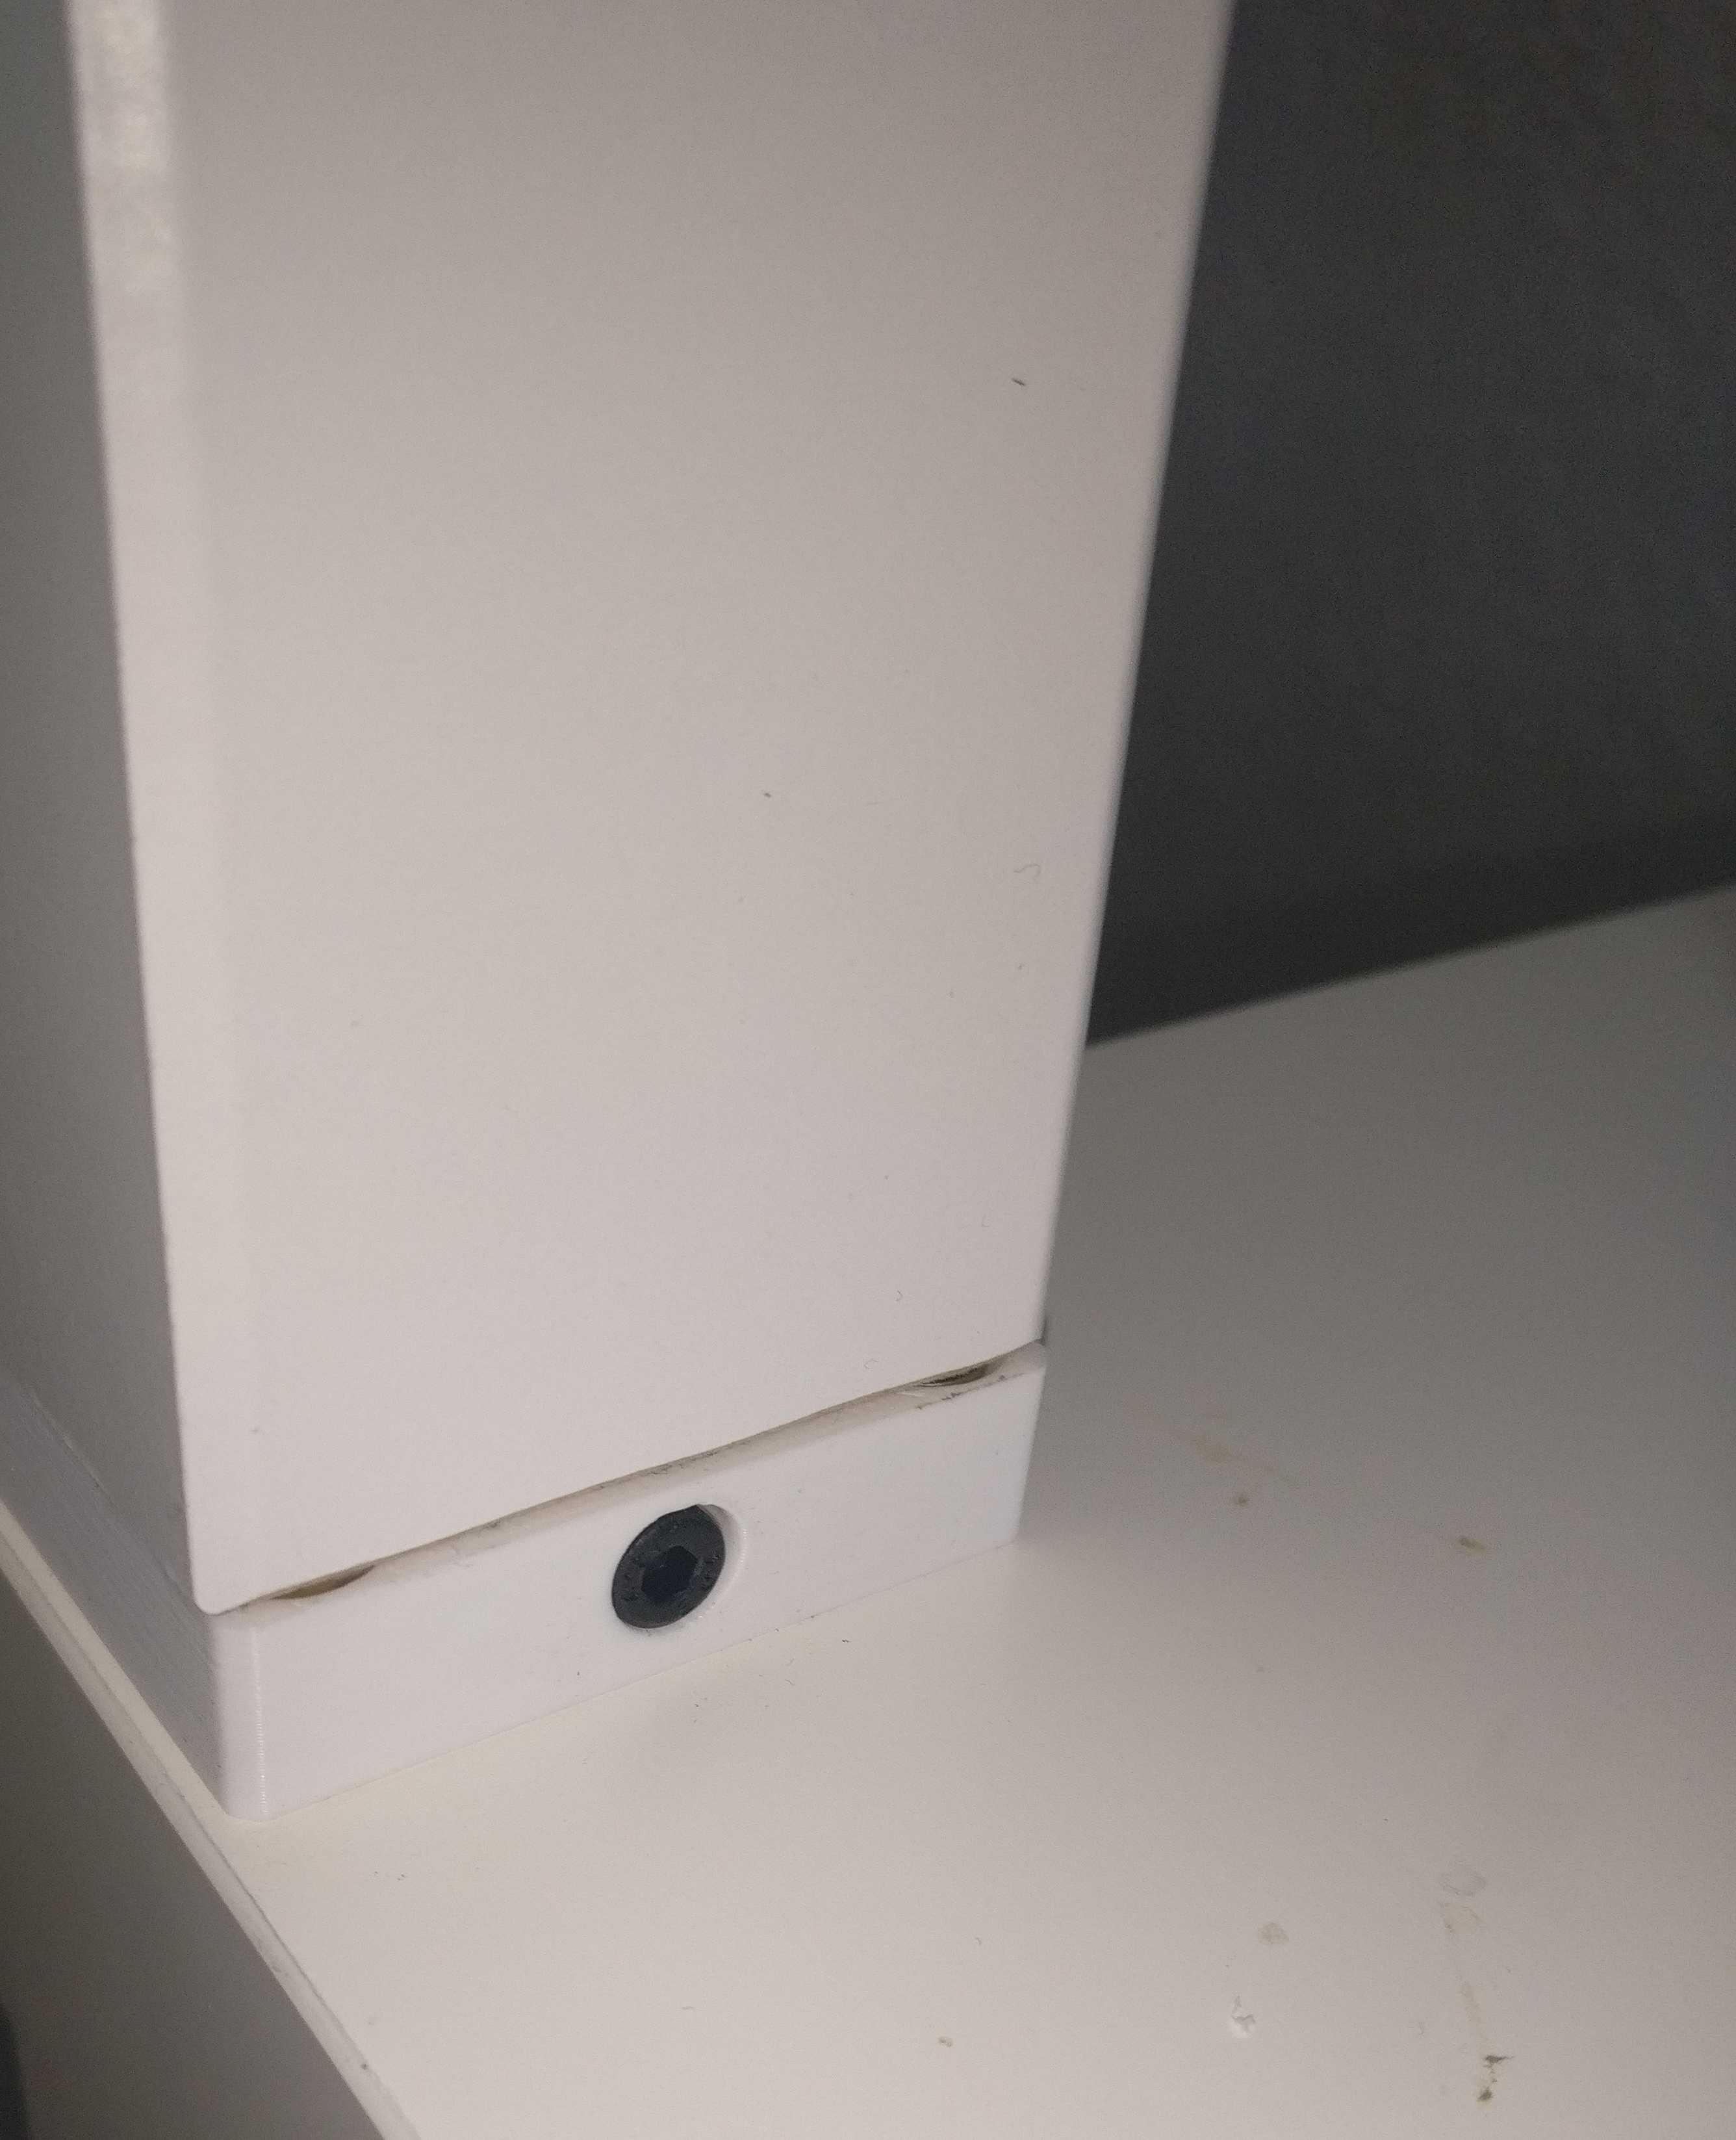
<ul><li>stable stacking prevents X, Y and Z movement</li><li>stack can be unscrewed easily by undoing a single bolt per leg</li><li>adds 12mm of height (which happens to be the additional height required to get a 4U+5U device into the larger Lack coffee table/Enterprise Edition Lack Rack)</li></ul><h4>Required Hardware</h4><ul><li>1 M4*14 bolt per leg (→ 4 for 1 table)</li><li>1 M4 nut per leg (→ 4 for 1 table)</li><li>3 M4 wood screws per leg (→12 for 1 table); The length does not matter within reason, but the thread needs to start within 28mm from the top of the screw-head to still grab into the bottom of the leg.</li></ul><h4>Assembly</h4><p>Be careful not to mix up top and bottom part, as the screw mounting the leg to the tables surface would interfere when mounting the top part to the tables surface.</p><ol><li>Position bottom-part on the bottom-side of a leg as an alignment guide (do this either before assembling the table or turn the table upside down)</li><li>Put the top-part inside the bottom part and mark the screw location</li><li>Pre-drill the center hole in the leg.</li><li>Screw in the top part. The top part is not symmetric - be sure to install it with the countersunk hole facing away from the legs surface. Be careful not to use too much torque, as the particle board is easily stripped away. Make sure that after fastening the screw, the screw head is flush with the couplers surface.</li><li>Position the bottom part at the outer edge of the tables surface (upper-side surface, the non-cardboard one).</li><li>Pre-drill 2 of the 4 holes in the tables surface. Using 2 screws is sufficient, but more screws also work.</li><li>Screw in the bottom part.</li><li>Put the M5 nut into the slot in the top-part. Depending on your printer, you may need to put a piece of tape over the slot to hold the nut in place while screwing it in.</li><li>Stack tables on top of each other. You may need to adjust the rotation of the top-parts to match to bottom parts.</li><li>Screw in the M5 bolt from the side</li></ol><p> </p>
With this file you will be able to print Lack Rack Stacking Mount with your 3D printer. Click on the button and save the file on your computer to work, edit or customize your design. You can also find more 3D designs for printers on Lack Rack Stacking Mount.