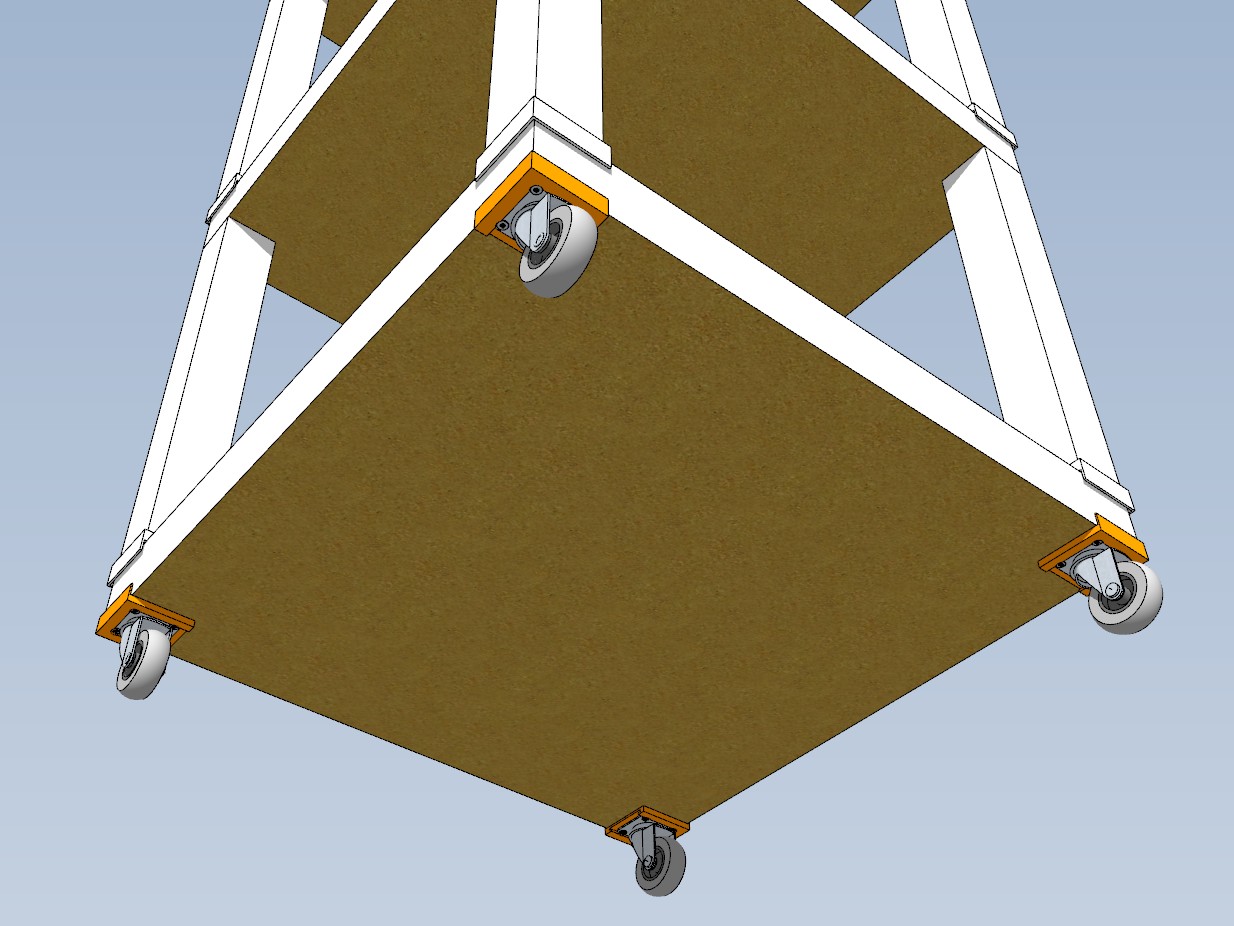
LACK Attack #2: Casterate the Lack (aka Roll The Lack Stack)
prusaprinters
<p>This is a followup to:<br/> Lack Attack#1: Stacking the Lack: <a href="https://www.prusaprinters.org/prints/15917-lack-attack-1-stack-the-lack-aka-the-lack-stack-ad">https://www.prusaprinters.org/prints/15917-lack-attack-1-stack-the-lack-aka-the-lack-stack-ad</a><br/> without further adieu....</p> <p>Attack 2: STACK THE LACK</p> <p>NOTE: SAVE THE SPARE LEGS! If your following this build, you need them for LACK ATTACK #4.</p> <p>Once I had a 4 Lack Stack with one Lack without Legs on the bottom as a base sitting in my living room I wanted a way to move it easily once it was complete. I knew it would need to move to clean/make room when company comes over (I like to print/work in the living room so I can watch the kids as well) so I also picked up a set of RILL casters at ikea (Article Number : 966.713.00) they were in the discount bin as the bag was ripped, $6, can't beat that...</p> <p>I didn't see anything similar, so based on the Lack Stack adapter I knocked out a quick caster adapter for the bottom corners that would also serve as a corner protector for the legs as they tend to collect dings easily.</p> <p>I built these to install 2 ways, I first used them with the posts which will press into the tables screw holes, this was intended to align them, see how they fit, and if they needed modification before I screwed them in place. It worked well for the first couple days and was surprisingly stable, but then one post broke so I screwed them down and into place. I'd skip the posts if I printed these again and go straight to #6x1" screws</p> <p>As always, comments are greatly appreciated, in this case direction and pitfalls to watch for are also appreciated, If you've been here done this and have a better way please let me know.</p> <p>Next:<br/> Attack 3: Power the Lack Stack...<br/> <a href="https://www.prusaprinters.org/prints/15919-lack-attack-3-koppla-the-lack-aka-power-the-lack-s">https://www.prusaprinters.org/prints/15919-lack-attack-3-koppla-the-lack-aka-power-the-lack-s</a></p> <h3>Print instructions</h3><h3>Category: 3D Printer Accessories Print Settings</h3> <p><strong>Printer Brand:</strong> Prusa</p> <p><strong>Printer:</strong> <a href="http://amzn.to/2DxjZlB">i3 MK2S</a></p> <p><strong>Rafts:</strong> No</p> <p><strong>Supports:</strong> No</p> <p><strong>Resolution:</strong> .35mm</p> <p><strong>Infill:</strong> 0%</p> <p><strong>Notes:</strong></p> <p>Printed in white NGEN, 240C nozzle, 85C bed.<br/> I printed these as oriented in the STL on edge.<br/> The walls are fairly thin, and infilling can cause surface bumps.<br/> I increased the wall count to 3 to strethen up the one corner and stop any attempts to infill or void on the walls.</p> <h3> Post-Printing</h3> <p><strong>Build & Assembly Notes:</strong></p> <p>Print it x4, pop it off,<br/> slide the casters into the cutouts,<br/> pop the posts into the holes (if you decide to go that route),<br/> press them into the holes on the bottom of the table used as a base,<br/> and stack....<br/> If your happy with how they look, predrill and add at least 2 screws per caster, 4 optimally.<br/> Not much harder than that....</p> <p><strong>Revisioning:</strong></p> <p>v1.0 - initial release.</p> <h3> How I Designed This</h3>
With this file you will be able to print LACK Attack #2: Casterate the Lack (aka Roll The Lack Stack) with your 3D printer. Click on the button and save the file on your computer to work, edit or customize your design. You can also find more 3D designs for printers on LACK Attack #2: Casterate the Lack (aka Roll The Lack Stack).
