LACK Attack #1: Stack the Lack (aka The Lack Stack Adapter)
prusaprinters
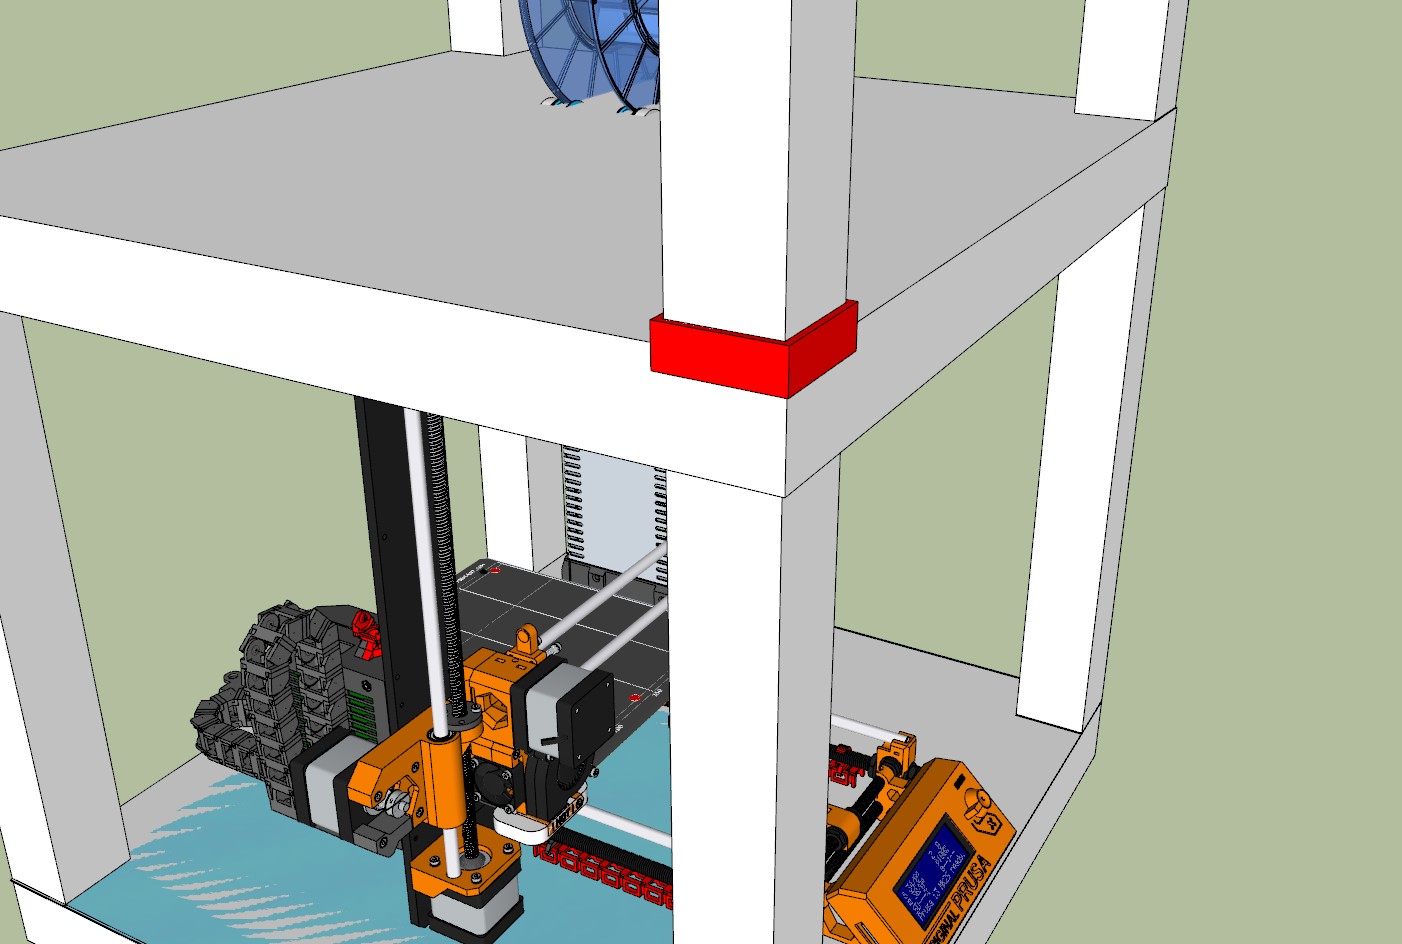
<p>I don't expect many to follow this, but my plan is to post my journey into printer enclosures and expand beyond my current "it sits on the table" model...</p> <p>Wanting to learn and build on what others have done, I decided to start a series of "things" to chronicle my "accidental" (aka the wife doesn't know yet) foyer into printer enclosures in hopes I can help others looking to take the next step, as well to learn from others that have that might see this and provide some help along the way.</p> <p>It all started one night when my wife went to work and I decided to visit IKEA looking for the new TRÅDFRI gateway and bulbs... "Somehow" 4 or 5 (maybe 6) LACK end tables also fell onto my cart...<br/> I thought: "I think I've seen others use these for enclosures, well its too hard to put them back now, I guess they're coming home with me...."<br/> Muahahahaha.... ;)</p> <p>We'll see how long this series of builds lasts, it might not last past the morning when she gets home, we'll have to see...</p> <p>As always, comments are greatly appreciated, in this case direction and pitfalls to watch for are also appreciated, If you've been here done this and have a better way please let me know.</p> <p>without further adieu....</p> <p>Attack 1: STACK THE LACK</p> <p>After assembling 5 LACK tables, stacking them wasn't that much fun, they didn't want to stay in place, so..... I searched Thingyverse and found.... way too many ideas and options....</p> <p>So I built my own...</p> <p>NOTE: SAVE THE SPARE LEGS! If your following this build, you need them for LACK ATTACK #4.</p> <p>Based on a number of other builds (its really a simple part) I put together a quick Lack Stack adapter. It'll likely (definitely) be replaced in the (near) future but its a starting point for this series of builds.</p> <p>A simple corner coupler, it locks the upper LACK into the lower LACK, so you can built a LACK STACK.</p> <p>Next:<br/> Attack #2: Lets Caster the Lack Stack...<br/> <a href="https://www.prusaprinters.org/prints/15918-lack-attack-2-casterate-the-lack-aka-roll-the-lack">https://www.prusaprinters.org/prints/15918-lack-attack-2-casterate-the-lack-aka-roll-the-lack</a></p> <h3>Print instructions</h3><h3>Category: 3D Printer Accessories Print Settings</h3> <p><strong>Printer Brand:</strong> Prusa</p> <p><strong>Printer:</strong> <a href="http://amzn.to/2DxjZlB">i3 MK2S</a></p> <p><strong>Rafts:</strong> No</p> <p><strong>Supports:</strong> No</p> <p><strong>Resolution:</strong> 0.40mm</p> <p><strong>Infill:</strong> 0%</p> <p><strong>Notes:</strong></p> <p>Printed in white NGEN, 240C nozzle, 85C bed, you could try infill but it just slows the print down and causes issues.<br/> The first set I started printing with Slic3r and default 0.35 fast settings with 0% infill, they worked but it took ~1.5hrs to print. I switched over to Cura and its 0.40mm settings with 0% infill, once it got past the first 3 layers I turned the speed on the printer up to 175%, each set afterwards only took ~30 minutes to complete.</p> <h3> Post-Printing</h3> <p><strong>Build & Assembly Notes:</strong></p> <p>Print it, pop it off, slide them onto the legs, and stack....<br/> Not much harder than that....</p> <p><strong>Revisioning:</strong></p> <p>v1.0 - initial release.</p> <h3> How I Designed This</h3>
With this file you will be able to print LACK Attack #1: Stack the Lack (aka The Lack Stack Adapter) with your 3D printer. Click on the button and save the file on your computer to work, edit or customize your design. You can also find more 3D designs for printers on LACK Attack #1: Stack the Lack (aka The Lack Stack Adapter).
