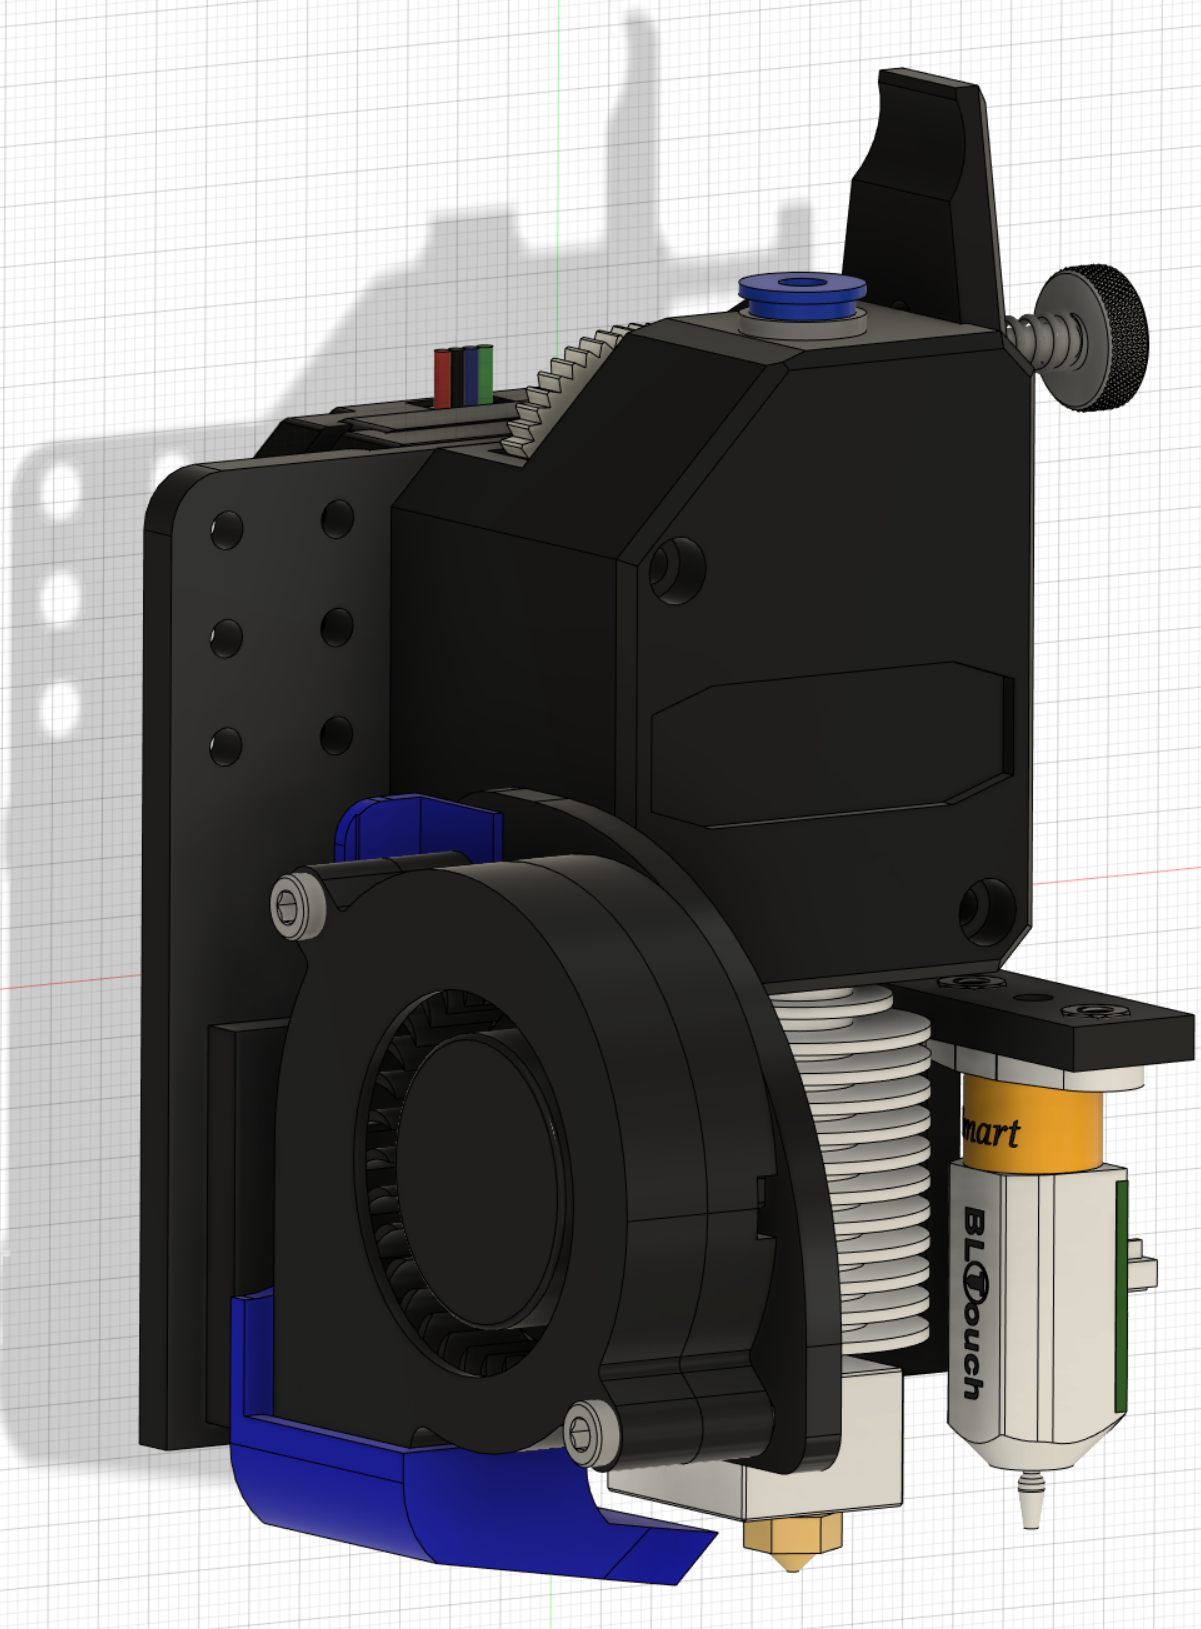
KP3s DD BMG E3d V6 BLTouch Modular (WIP)
prusaprinters
<p>I received my KP3s which came with Direct Drive as standard, as I wanted a second printer but a smaller one compared to my Ender 5, unfortunately build quality isn't great on the hotend unit, but it does have some positives on the rest of the frame.</p><p>The first thing I wanted to replace is the hotend setup with it's DD mash up. So I got myself a BMG/E3d V6 Clones but needed an adapter to fit on the Linear rail on the X Carriage.</p><p>After looking around decided to make my one, and here it is.</p><p>I would say this is currently a Work In Progress as I'm printing the parts and ensuring design is as good for others as it is for me.</p><p>With this design the bracket adapter does not need to be remixed if you want to change the fan type or shroud, also if you do not use a BLTouch this does not needed to be printed.</p><p>The Fan mount for the 5015 blower and the BLTouch mount can be adjusted up and down by 2mm in it is too high or too low for your setup.<br>My current setup uses the existing fan that came with the E3d V6 clone, but plenty of adapters to increase it to a bigger fan.</p><p><strong>Update 02/05/21</strong></p><p>I've noticed that I had lost bed size on X axis and Y axis, so to fix the X axis I've added a new limit mount for a M3x20mm screw so that you can adjust it and gain all the 180mm of the X axis, unfortunately it seems Y axis we lose about 8.5mm. </p><p>Still trying to work out design tweaks to give the full 180mm length, any feedback is welcome.</p><p> </p><p>BLTouch Offset values:</p><h3>define NOZZLE_TO_PROBE_OFFSET { 22, 3, 0}</h3><h3>Print instructions</h3><p>Printed this with 40% infill on PLA, but you should be USING PETG for this as it will be close to the hotend.</p><p>The Fan mount can be printed without supports, however it depends how good your printer is tuned for bridging.</p><p>Make sure you flip the X Carriage adapter as there is 1mm square space for the Nema 17 motor.</p><p>The Fan shroud make sure you lay it flat at the bottom, so it will be at angle, no supports needed.</p><p>35g of filament<br>3:30h Print<br>On Prusa Mini<br>0.20mm quality and 20% infill<br>If printing on PETG make sure you account for shrinkage.</p><p> </p><p><strong>Parts*</strong></p><p>5051 FAN - 2 x M3x20mm hex screw and 2 x M3 Hex nuts</p><p>5015 FAN Mount into X rail adapter mount - 2 x M3x16mm Hex Screw</p><p>X rail adapter mount - 2 x M3x12mm hex screws</p><p>X Axis Limit stop - 2 x M3x8mm hex screws</p><p>BLtouch - 4 x M3x8mm, 4x M3 Hex nuts</p><p> </p><p><strong>Installation</strong></p><ol><li>Screw in BMG extruder and Nema pancake motor with E3d v6</li><li>Screw in the BLtouch mount into the x rail bracket with the 2 M3x8mm hex screws and the 2 hex nuts in the back.</li><li>Screw BLtouch to mount using the 2xM3x8mm hex screws and the 2 hex nuts into the holes made for them in the mount.</li><li>Attach all hotend and screw 2 x M3x12mm hex screws on the right side, the left side if for the fan mount.</li><li>Attach to hex nuts to the holes in the fan mount and then screw 2 x M3x12mm hex screws into the left side holes in the adapter to secure the whole hotend setup on the x rail carriage.</li><li>Attach fan shroud to fan and then attach it to the fan mount, then screw in the 2 x M3x20mm hex screw into the 2 holes on the Fan they should then screw into the 2 M3 nuts you previously attached. This is meant to be a tight fit.</li><li>Get printing!</li></ol><p> </p>
With this file you will be able to print KP3s DD BMG E3d V6 BLTouch Modular (WIP) with your 3D printer. Click on the button and save the file on your computer to work, edit or customize your design. You can also find more 3D designs for printers on KP3s DD BMG E3d V6 BLTouch Modular (WIP).
