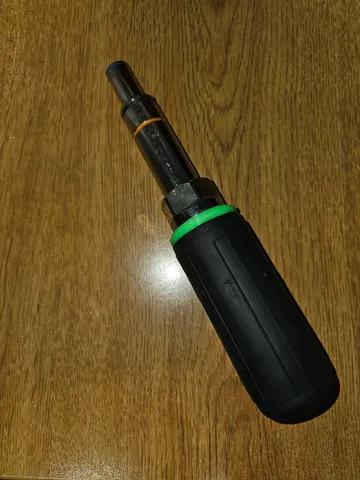
Klein Multi-Nut Driver Replacement Handle
prusaprinters
This is a replacement grip for the Klein Magnetic Multi-Nut-Driver https://www.kleintools.com/catalog/multi-bit-nut-drivers/7-1-multi-bit-screwdriver-nut-driver-magneticGreat tool, but the plastic shaft between the steel and rubber handle ALWAYS breaks.Sometimes Klein/parts houses will replace it, sometimes they just sell you a new one. I got tired of buying new ones.This is also significantly shorter than the original model.There are a few slight changes to the model that I made after the pictures.Removed the word HEX on the bottom cap.Made the bottom cap taller so it would stick out of the rubber grip better.Made the cap plug slightly longer on the flange side, for strength. This is a 3 piece model.Replacement handle guts.Handle hex shape bottom capBottom cap plug.All pieces are printed in PETG at 100% infill. You are welcome to use whatever infill and material you want though. Installation should be in the parts order: 3, 2, 1.Put the plug into the rubber handle grip and press it all the way down to the bottom, with the ring facing down.You can use glue if you want, or just press fit the bottom cap from the bottom of the rubber grip up into the cap plug.Slide the existing metal hex collar into the replacement handle guts, press it down until it fully seats. It will be tight. Make sure to line up the notches inside the printed handle with the notches on the steel collar, or it wont seat all the way.Slide the rubber grip up over the replacement handle, no keys here to line up, just the ribs. Press it until it fully seats.And you're done!
With this file you will be able to print Klein Multi-Nut Driver Replacement Handle with your 3D printer. Click on the button and save the file on your computer to work, edit or customize your design. You can also find more 3D designs for printers on Klein Multi-Nut Driver Replacement Handle.
