Kitchen Sink Strainer
prusaprinters
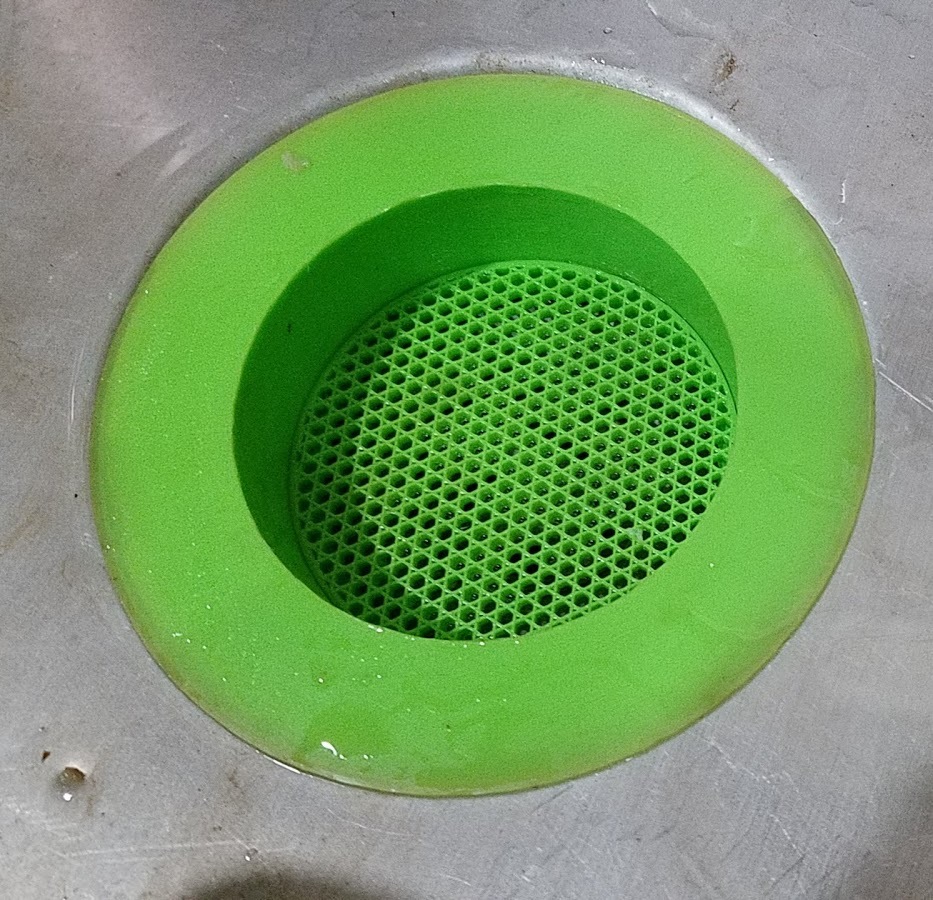
<p>A strainer to keep all the sludge out of the pipes</p> <h3>Print Settings</h3> <p><strong>Printer Brand:</strong></p> <p>Prusa</p> <p class="detail-setting printer"><strong>Printer: </strong> <div><p>i3 MK3</p></div> <p><strong>Rafts:</strong></p> <p>Doesn't Matter</p> <p class="detail-setting supports"><strong>Supports: </strong> <div><p>No</p></div> <p><strong>Resolution:</strong></p> <p>0.2</p> <p class="detail-setting infill"><strong>Infill: </strong> <div><p>20-50%</p></div> <p><strong>Filament:</strong> Any PLA Any</p> <p><br/> <p class="detail-setting notes"><strong>Notes: </strong></p> </p><div><p>Included are the new PrusaSlicer 3mf files for the pieces.</p> The main part contains a bridge cap for the overhangs to avoid rafts. One of the images shows it being cut away with an exacto knife. <p>The strainer insert uses a trick in the slicer. Adjust your slicer for this piece to have zero top and bottom layers. Set the infill to 40% or better. Choose an infill patter that's attractive and will let water flow through easily. On my slicer I chose "star" pattern. When it prints without a top or bottom you're left with a nice looking screen. See the picture</p> <h3>Post-Printing</h3> <p>I had a slight amount of elephant foot and the screen did not insert. I used the exacto knife around the inside edge to cut a small chamfer. The screen then fit nicely</p> </div></p></p></p> Category: Kitchen & Dining
With this file you will be able to print Kitchen Sink Strainer with your 3D printer. Click on the button and save the file on your computer to work, edit or customize your design. You can also find more 3D designs for printers on Kitchen Sink Strainer.