Kinetic wave for your Benchy
prusaprinters
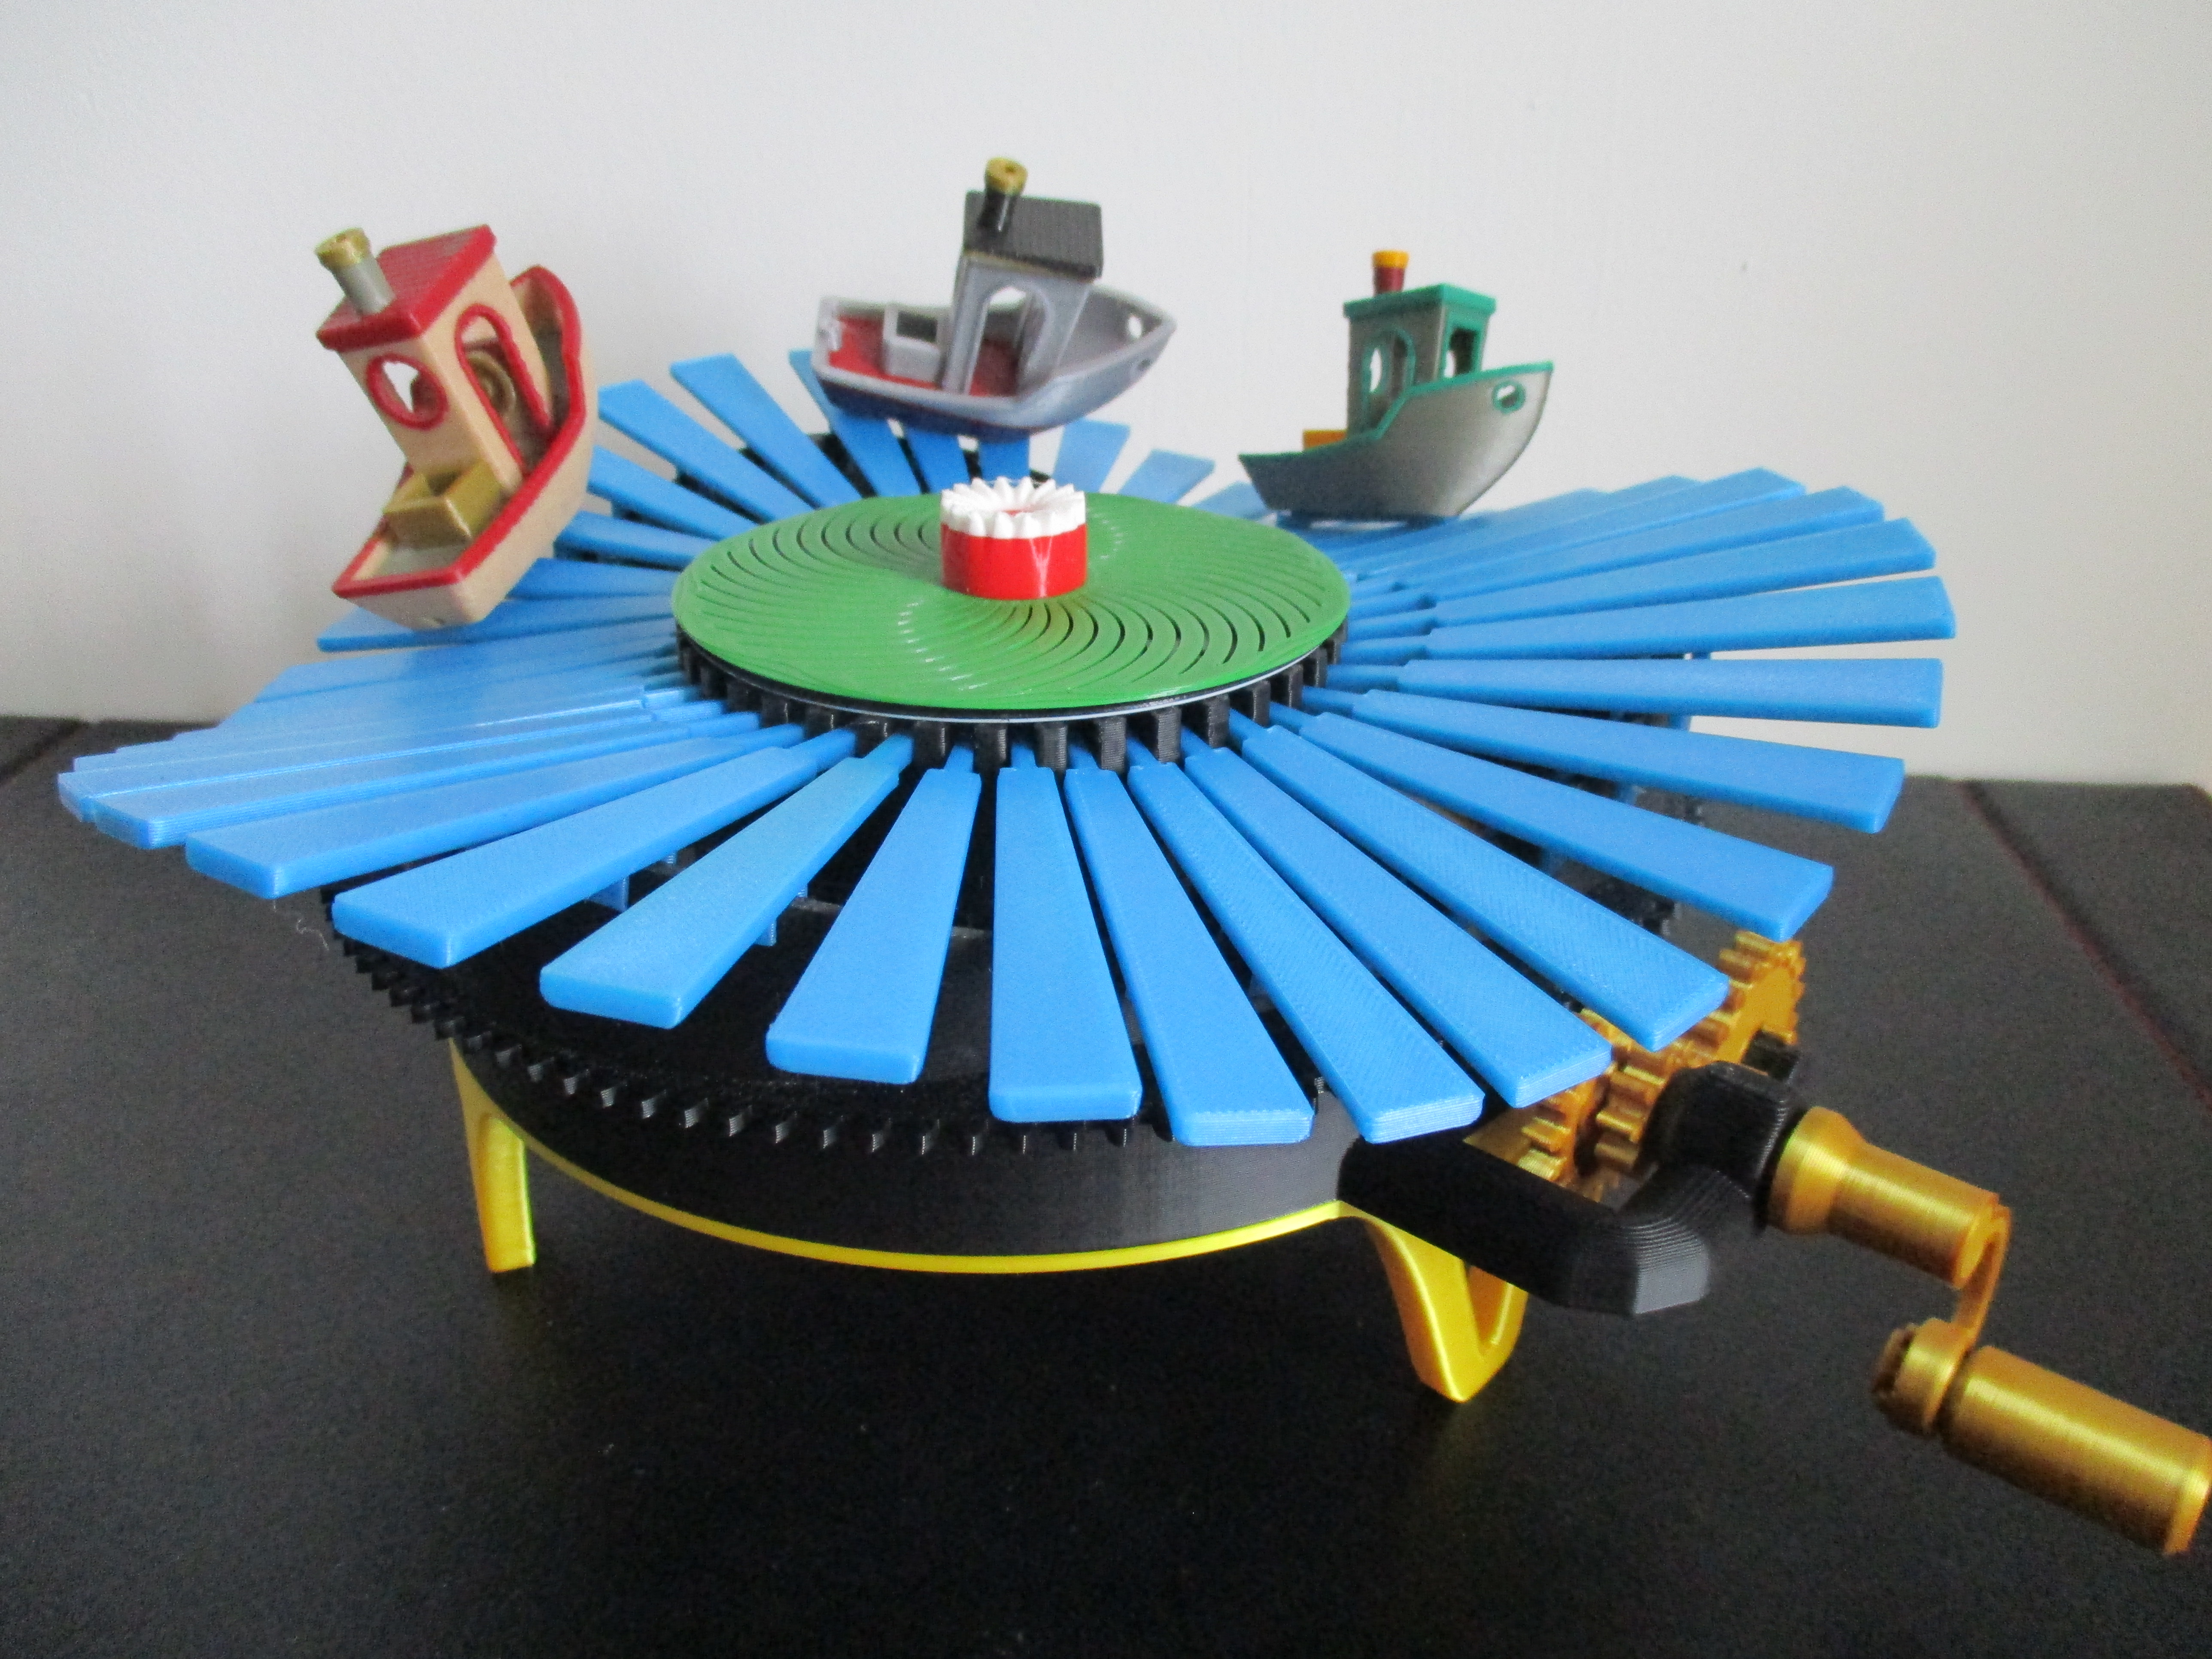
<p>This fully printed mechanical wave will allow you to sail your favorite Benchy.</p><p>Most automata of kinetic wave are linear. I inspired from these to create this circular version.</p><p>The mechanism is pretty simple : the first wheel hold the wave and turn anti-clockwive while the second wheel hold the pales and the boat and turn clockwise.</p><figure class="image"><img src="https://media.printables.com/media/prints/293684/rich_content/049fe748-f783-4931-b542-ba64e8c0debd/6x3eyw.gif#%7B%22uuid%22%3A%22fd9e925b-6768-4c36-a9cf-e066c96e8244%22%2C%22w%22%3A360%2C%22h%22%3A202%7D"></figure><p>I added a reduction gears system on the crank so it is easier to have a smooth rotation.</p><p>If you look under the central water lily you will notice the three little fishes swimming.</p><figure class="image image_resized" style="width:50%;"><img src="https://media.printables.com/media/prints/293684/rich_content/ef77b997-72fa-413f-a9d8-ba5a1ab9fd16/water-lily-gif.gif#%7B%22uuid%22%3A%2221722cab-9e4b-4a31-ba01-095516acafa9%22%2C%22w%22%3A500%2C%22h%22%3A375%7D"></figure><p><strong>You will need to use sandpaper to smooth the wave otherwise there will be too much friction and the all thing will be blocked (see “instructions”).</strong></p><p>You can use a Benchy scaled from 90% to 110%.</p><p>(I used a 110% scaled Benchy for the pictures).</p><p> </p><p><strong>Print Settings :</strong></p><ul><li>Printed on MK3S - PrusaSlicer 2.5</li><li>Nozzle : 0.4mm</li><li>Filament : PLA</li></ul><p><strong>- Plate 1 </strong>(Support) : 0.3mm z-height</p><p><strong>- Plate 2 </strong>(Wheels) : 0.3mm z-height</p><p><strong>- Plate 3 </strong>(Crank and feet) : 0.3mm z-height</p><p><strong>- Plate 4 </strong>(Pales and boat clip) : 0.3mm z-height</p><p>You should start by printing 1 pale and check if the tolerance is ok. It must move freely in a slot of the "central Wheel". If it's too tight you can try to reduce the width at 98% (or lower) but you must not reduce the lenght.</p><p><i>The “Boat clip” has a very small first layer. Maybe you should print it alone not to fail the all plate of pales if it unsticks.</i></p><p><strong>- Plate 5 </strong>(Fishes) : 0.2mm z-height - Color change at 0.80mm</p><p>This part must be printed in 2 colors</p><p>I use <i>External perimeters first</i> for more precise engravings</p><p><strong>- Plate 6 </strong>(Water lily) : 0.2mm z-height - Color change at 0.80mm and 9.20mm</p><p> </p><p>Colors used : Jet Black (Prusament) - Viva la Bronze (Prusament) - Azure Blue (Prusament) - Green Grass (Filamentum) - Lipstick Red (Prusament) - Traffic White (Filamentum)</p><p><i>I added Gcodes for the time estimation. You should generate your own.</i></p><p> </p><p><strong>Instructions :</strong></p><ul><li>1- Use sandpaper or a file to clean every steps you have on the wave (left picture). You will need a perfectly cleaned wave to enjoy a smooth rotation (right picture).</li></ul><p> </p><figure class="image image-style-align-left image_resized" style="width:47.15%;"><img src="https://media.printables.com/media/prints/293684/rich_content/aa00b3cd-4b4c-4b6d-b88b-655ded804341/img_2829.jpg#%7B%22uuid%22%3A%22a4c79097-5d50-441a-abdd-9fb106d66fd3%22%2C%22w%22%3A5152%2C%22h%22%3A3864%7D"></figure><p><img class="image_resized" style="width:47.24%;" src="https://media.printables.com/media/prints/293684/rich_content/e048e412-d851-4caf-af7d-79ea6b3b2c9e/img_2915.jpg#%7B%22uuid%22%3A%22656ac6e2-1fcb-48a3-8f42-286a4c531ad0%22%2C%22w%22%3A5152%2C%22h%22%3A3864%7D"></p><p> </p><ul><li>2- Clip the 3 studs in the support, then clip the feet.</li></ul><p> </p><figure class="image image_resized image-style-align-left" style="width:45.91%;"><img src="https://media.printables.com/media/prints/293684/rich_content/3e886442-87f8-4e70-98d0-f907e205264a/img_2913.jpg#%7B%22uuid%22%3A%223058f370-4a9f-4c5e-aa60-61ac4316e6e8%22%2C%22w%22%3A5152%2C%22h%22%3A3864%7D"></figure><p><img class="image_resized" style="width:47.13%;" src="https://media.printables.com/media/prints/293684/rich_content/2db1ed5b-d6e6-4353-8daa-8830ef53798c/img_2914.jpg#%7B%22uuid%22%3A%2237ef0240-b735-45c9-bd42-7a513fe02bae%22%2C%22w%22%3A5152%2C%22h%22%3A3864%7D"></p><p> </p><ul><li>3- Clip the “Crank Handle” to the “Crank” (use the “Crank clip 1”). Insert it in the support going through the “Crank Wheel” and the “Crank Wheel 2”. Put the “Crank Wheel 3” and add the “Crank clip 2” to the end.</li></ul><p> </p><figure class="image image-style-align-left image_resized" style="width:47%;"><img src="https://media.printables.com/media/prints/293684/rich_content/bea5b2c9-15a6-48d4-8e17-3d6c9021ba5b/img_2922.jpg#%7B%22uuid%22%3A%228a36251e-ed20-49be-b148-2a37a0d1cef6%22%2C%22w%22%3A5152%2C%22h%22%3A3864%7D"></figure><p><img class="image_resized" style="width:47.69%;" src="https://media.printables.com/media/prints/293684/rich_content/37d1737b-0efa-449d-a1dd-03550b81bc5d/img_2908.jpg#%7B%22uuid%22%3A%22f5078e0b-e4fc-43a8-a00e-fb412a5d3268%22%2C%22w%22%3A5152%2C%22h%22%3A3864%7D"></p><p> </p><ul><li>4- Put the “Wave wheel”, the “Central wheel” and the “Satellite wheel” on the support.</li></ul><p> </p><figure class="image image_resized" style="width:50%;"><img src="https://media.printables.com/media/prints/293684/rich_content/ef754320-0afc-4331-8264-16ccb78fd326/img_2907.jpg#%7B%22uuid%22%3A%2282cb6327-a993-443d-9a4b-a2cff5c620bc%22%2C%22w%22%3A5152%2C%22h%22%3A3864%7D"></figure><p> </p><ul><li>5- Put the pales. Make sure every pale is correctly inserted in the wave.</li></ul><p> </p><figure class="image image-style-align-left image_resized" style="width:47.17%;"><img src="https://media.printables.com/media/prints/293684/rich_content/478c2da4-d963-41a9-88eb-5b8047b6e1af/img_2906.jpg#%7B%22uuid%22%3A%2286e28a03-eae7-45b8-b7e3-f8f22d3c9d5d%22%2C%22w%22%3A5152%2C%22h%22%3A3864%7D"></figure><p><img class="image_resized" style="width:46.88%;" src="https://media.printables.com/media/prints/293684/rich_content/d5b219d7-3675-44dc-b648-8b6a78d4cb30/img_2903.jpg#%7B%22uuid%22%3A%227f10275a-1ac8-474b-8e9c-c4c9cd84929f%22%2C%22w%22%3A5152%2C%22h%22%3A3864%7D"></p><p> </p><ul><li>6- Add the “Fishes” (there are 4 little studs to put it well). Add the “Water lily”.</li></ul><p> </p><figure class="image image-style-align-left image_resized" style="width:47.28%;"><img src="https://media.printables.com/media/prints/293684/rich_content/6392ec51-a77b-4bc8-b6b1-0c504157a041/img_2917.jpg#%7B%22uuid%22%3A%22665b3eeb-bb06-4958-9d1e-202f1a81dbca%22%2C%22w%22%3A5152%2C%22h%22%3A3864%7D"></figure><p><img class="image_resized" style="width:47.05%;" src="https://media.printables.com/media/prints/293684/rich_content/02273914-4511-4bc2-b371-cef5e196f7ee/img_2918.jpg#%7B%22uuid%22%3A%227e3e98fb-0d38-4167-aaf8-6c6fa81d6bbf%22%2C%22w%22%3A5152%2C%22h%22%3A3864%7D"></p><p> </p><ul><li>7- Choose your favorite Benchy and glue the “Boat clip”. Clip the Boat on the pales.</li></ul><p> </p><figure class="image image-style-align-left image_resized" style="width:47.15%;"><img src="https://media.printables.com/media/prints/293684/rich_content/081aef16-75ba-49e0-a154-b7a790af2c06/img_2919.jpg#%7B%22uuid%22%3A%22bb343c0e-8f78-4d82-bd0e-62e1077c2f6e%22%2C%22w%22%3A5152%2C%22h%22%3A3864%7D"></figure><p><img class="image_resized" style="width:47.15%;" src="https://media.printables.com/media/prints/293684/rich_content/016b78f2-54ba-45cf-8daa-22da977155af/img_2920.jpg#%7B%22uuid%22%3A%22de0ec2d7-7683-40e1-8df0-acf320cc44a3%22%2C%22w%22%3A5152%2C%22h%22%3A3864%7D"></p><p> </p><p>If you need a Benchy, the original one is there :</p><p><a href="https://www.printables.com/model/3161-3d-benchy">https://www.printables.com/model/3161-3d-benchy</a></p><p> </p>
With this file you will be able to print Kinetic wave for your Benchy with your 3D printer. Click on the button and save the file on your computer to work, edit or customize your design. You can also find more 3D designs for printers on Kinetic wave for your Benchy.