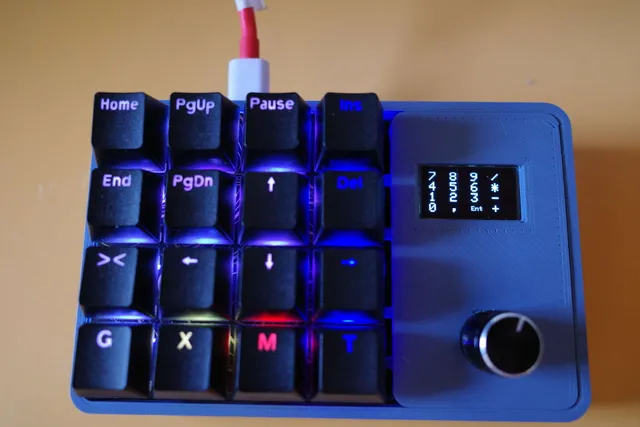
Keybow2040 MacroPad with display and encoder
prusaprinters
MacroPad with the Pimoroni keybow2040 and an OLED display and rotary encoder. Printed in PLA with 0.8mm nozzle for faster work.There are two sizes of foot: one is half a centimeter and the other is one centimeter. The latter is more comfortable for me. Print the one you prefer.The code as well as the necessary libraries can be found at https://github.com/manelto/MacroPad-keybow2040-To carry out the project a few components are needed:- Pimoroni Keybow2040 (https://shop.pimoroni.com/products/keybow-2040)- 0.96" OLED display with QT Stemma connector (https://www.adafruit.com/product/326)- Rotary encoder and Adafruit QT Stemma encoder board (https://www.adafruit.com/product/4991)- M2.5 inserts- 2 M2.5 10mm-12mm screws (for foot-to-base pieces)- 7-10 M2.5 7mm-10mm screws (for the screen, joining parts and the encoder) (only 6 if you use two screws for the screen and another two for the encoder; 10 if you use 4 screws for each component)- 4 x 10mm M2 screws (to attach the printed base to the Keybo2040)- rubber bands for the feet (the ones that come with the Keybow2040 are worth) You will also need two Stemma QT cables minimum 50mm and one 100mm or longer. The longer one will have the QT connector cut off and soldered to the connectors on the Keybow2040 board. Be very careful with this operation, IT MAY DAMAGE THE DEVICE! At the base there is a hole that allows you to connect new devices with the QT Stemma connectors. And on the side of the box you can add two new inserts in case you want to join new pieces with other electronics.___________________________________________________________________________________________________________ Teclado de macros con el keybow2040 de Pimoroni y una pantalla OLED y un codificador rotatorio. Impreso en PLA con boquilla de 0,8 mm para un trabajo más rápido.Hay dos tamaños de pie: uno de medio centímetro y el otro de un centímetro. Para mí es más comodo este último. Imprime el que prefieras.El código así como las librerías necesarias se pueden encontrar en https://github.com/manelto/MacroPad-keybow2040-Para llevar a cabo el proyecto se necesitan unos pocos componentes:- Keybow2040 de Pimoroni (https://shop.pimoroni.com/products/keybow-2040)- pantalla OLED de 0,96" con conector QT Stemma (https://www.adafruit.com/product/326)- Codificador rotatorio y placa Adafruit QT Stemma para codificador (https://www.adafruit.com/product/4991) - insertos M2,5 - 2 tornillos M2,5 de 10mm-12mm (para piezas el pie a la base)- 7-10 tornillos M2,5 de 7mm-10mm (para la pantalla, unir piezas y el encoder) (sólo 6 si utiliza dos tornillos para la pantalla y otros dos para el codificador; 10 si utiliza 4 tornillos para cada componente)- 4 tornillos M2 de 10mm (para unir la base impresa al Keybo2040)- gomas para los pies (valen los que vienen con el Keybow2040)También necesitará dos cables Stemma QT mínimo de 50mm y otro de 100mm o más largo.Al más largo se le cortará el conector QT y se soldará a los conectores de la placa Keybow2040. Tenga mucho cuidado con esta operación, ¡PUEDE ESTROPEAR EL DISPOSITIVO! En la base hay un hueco que permite conectar nuevos dispositivos con los conectores QT Stemma. Y en el lateral de la caja se pueden añadir dos nuevos insertos por si se desea unir nuevas piezas con otra electrónica.
With this file you will be able to print Keybow2040 MacroPad with display and encoder with your 3D printer. Click on the button and save the file on your computer to work, edit or customize your design. You can also find more 3D designs for printers on Keybow2040 MacroPad with display and encoder.
