Kerf Compensation for Lasercutters
thingiverse
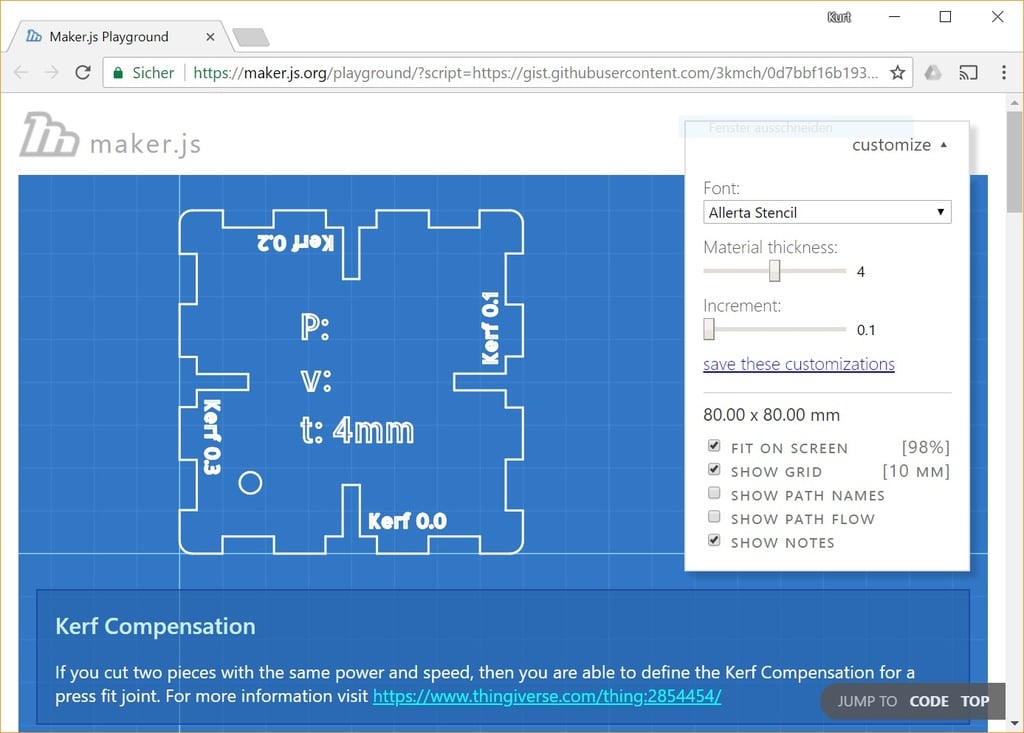
If you want to cut wooden boxes with a lasercutter, the assembly will be easier if you generate interlocking pieces with press fit beforehand. To do this, use the generator at the link below and get a reference cut that allows you to define the appropriate compensation. Visit the Kerf Compensation Site at maker.js.org/playground/?script=https://gist.githubusercontent.com/3kmch/0d7bbf16b193e010f20fee8230c8dd4c/raw/6421331633f911a834600829d68c2112e8c6d97e/kerf.js and hit run. Enter the thickness of your material in millimeters, then skip the increment for now. Download the file and cut two pieces. Look for the connection where the pieces fit together without play or with press fit. This is explained in a video at https://youtu.be/Q_kA19hMXbM. Note the result of the formula (0.3 + 0.3)/2 = Kerf 0.3, or (0.3 + 0.45)/2 = Kerf 0.375. Offset the outline of your shape on your computer accordingly by expanding outer shapes and shrinking inner ones. For example, if you want to cut a square with a side length of 50mm, the drawing on your computer will show it measuring exactly 50 by 50mm. However, due to the laser burning off some material, you need to add Kerf Compensation (see image #1). So expand the square by, for example, 0.3mm (2 times X). It's a good idea to note the applied Power and Speed on one or both pieces and bind them together. If you don't get a press fit even with maximum Kerf, increase the increment by 0.05 or 0.1mm.
With this file you will be able to print Kerf Compensation for Lasercutters with your 3D printer. Click on the button and save the file on your computer to work, edit or customize your design. You can also find more 3D designs for printers on Kerf Compensation for Lasercutters.
