Kawasaki Z750 Indicator Blinker Mount
thingiverse
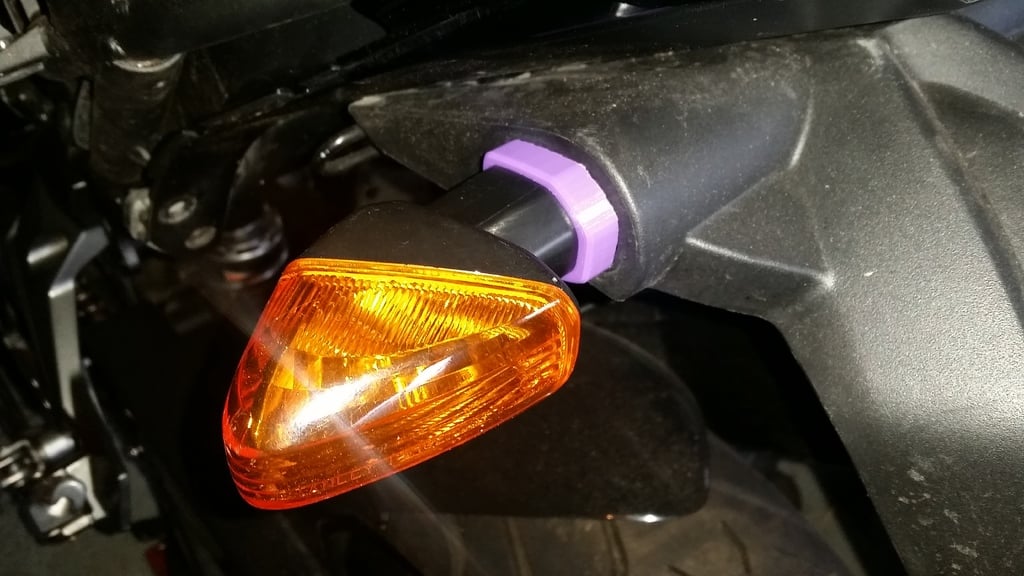
If you own a Kawasaki Z750, your indicator's rubber mount may perish and break. I've been there too, and I didn't want to pay for new indicators since the originals worked perfectly - except for that pesky rubber. So, I designed this replacement block to fix the issue. This block uses the original screw, but you'll need an extra one to ensure it clamps securely in place. If you don't use a second screw, your newly fixed indicator might fall off, and I won't be responsible for any inconvenience that may cause. To secure the block properly, get a 4mm x 10mm self-tapping screw designed specifically for plastic. Once you have this screw, installing the block is a breeze. Simply remove the old rubber mount, insert the large block into the indicator housing, and then reinstall it on your motorcycle. Next, pass the wire through the plate and secure it with the original screw. Don't forget to add that extra screw I mentioned earlier for added stability. You can find instructions and images in the yellow files. Keep in mind that this modified position may affect airflow around your bike's bodywork. Before committing to fixing them in place, make sure the new position works for you. I printed my parts in purple just to show how they fit on my bike. This replacement block is suitable for both front and rear indicators, so feel free to use it as needed.
With this file you will be able to print Kawasaki Z750 Indicator Blinker Mount with your 3D printer. Click on the button and save the file on your computer to work, edit or customize your design. You can also find more 3D designs for printers on Kawasaki Z750 Indicator Blinker Mount.