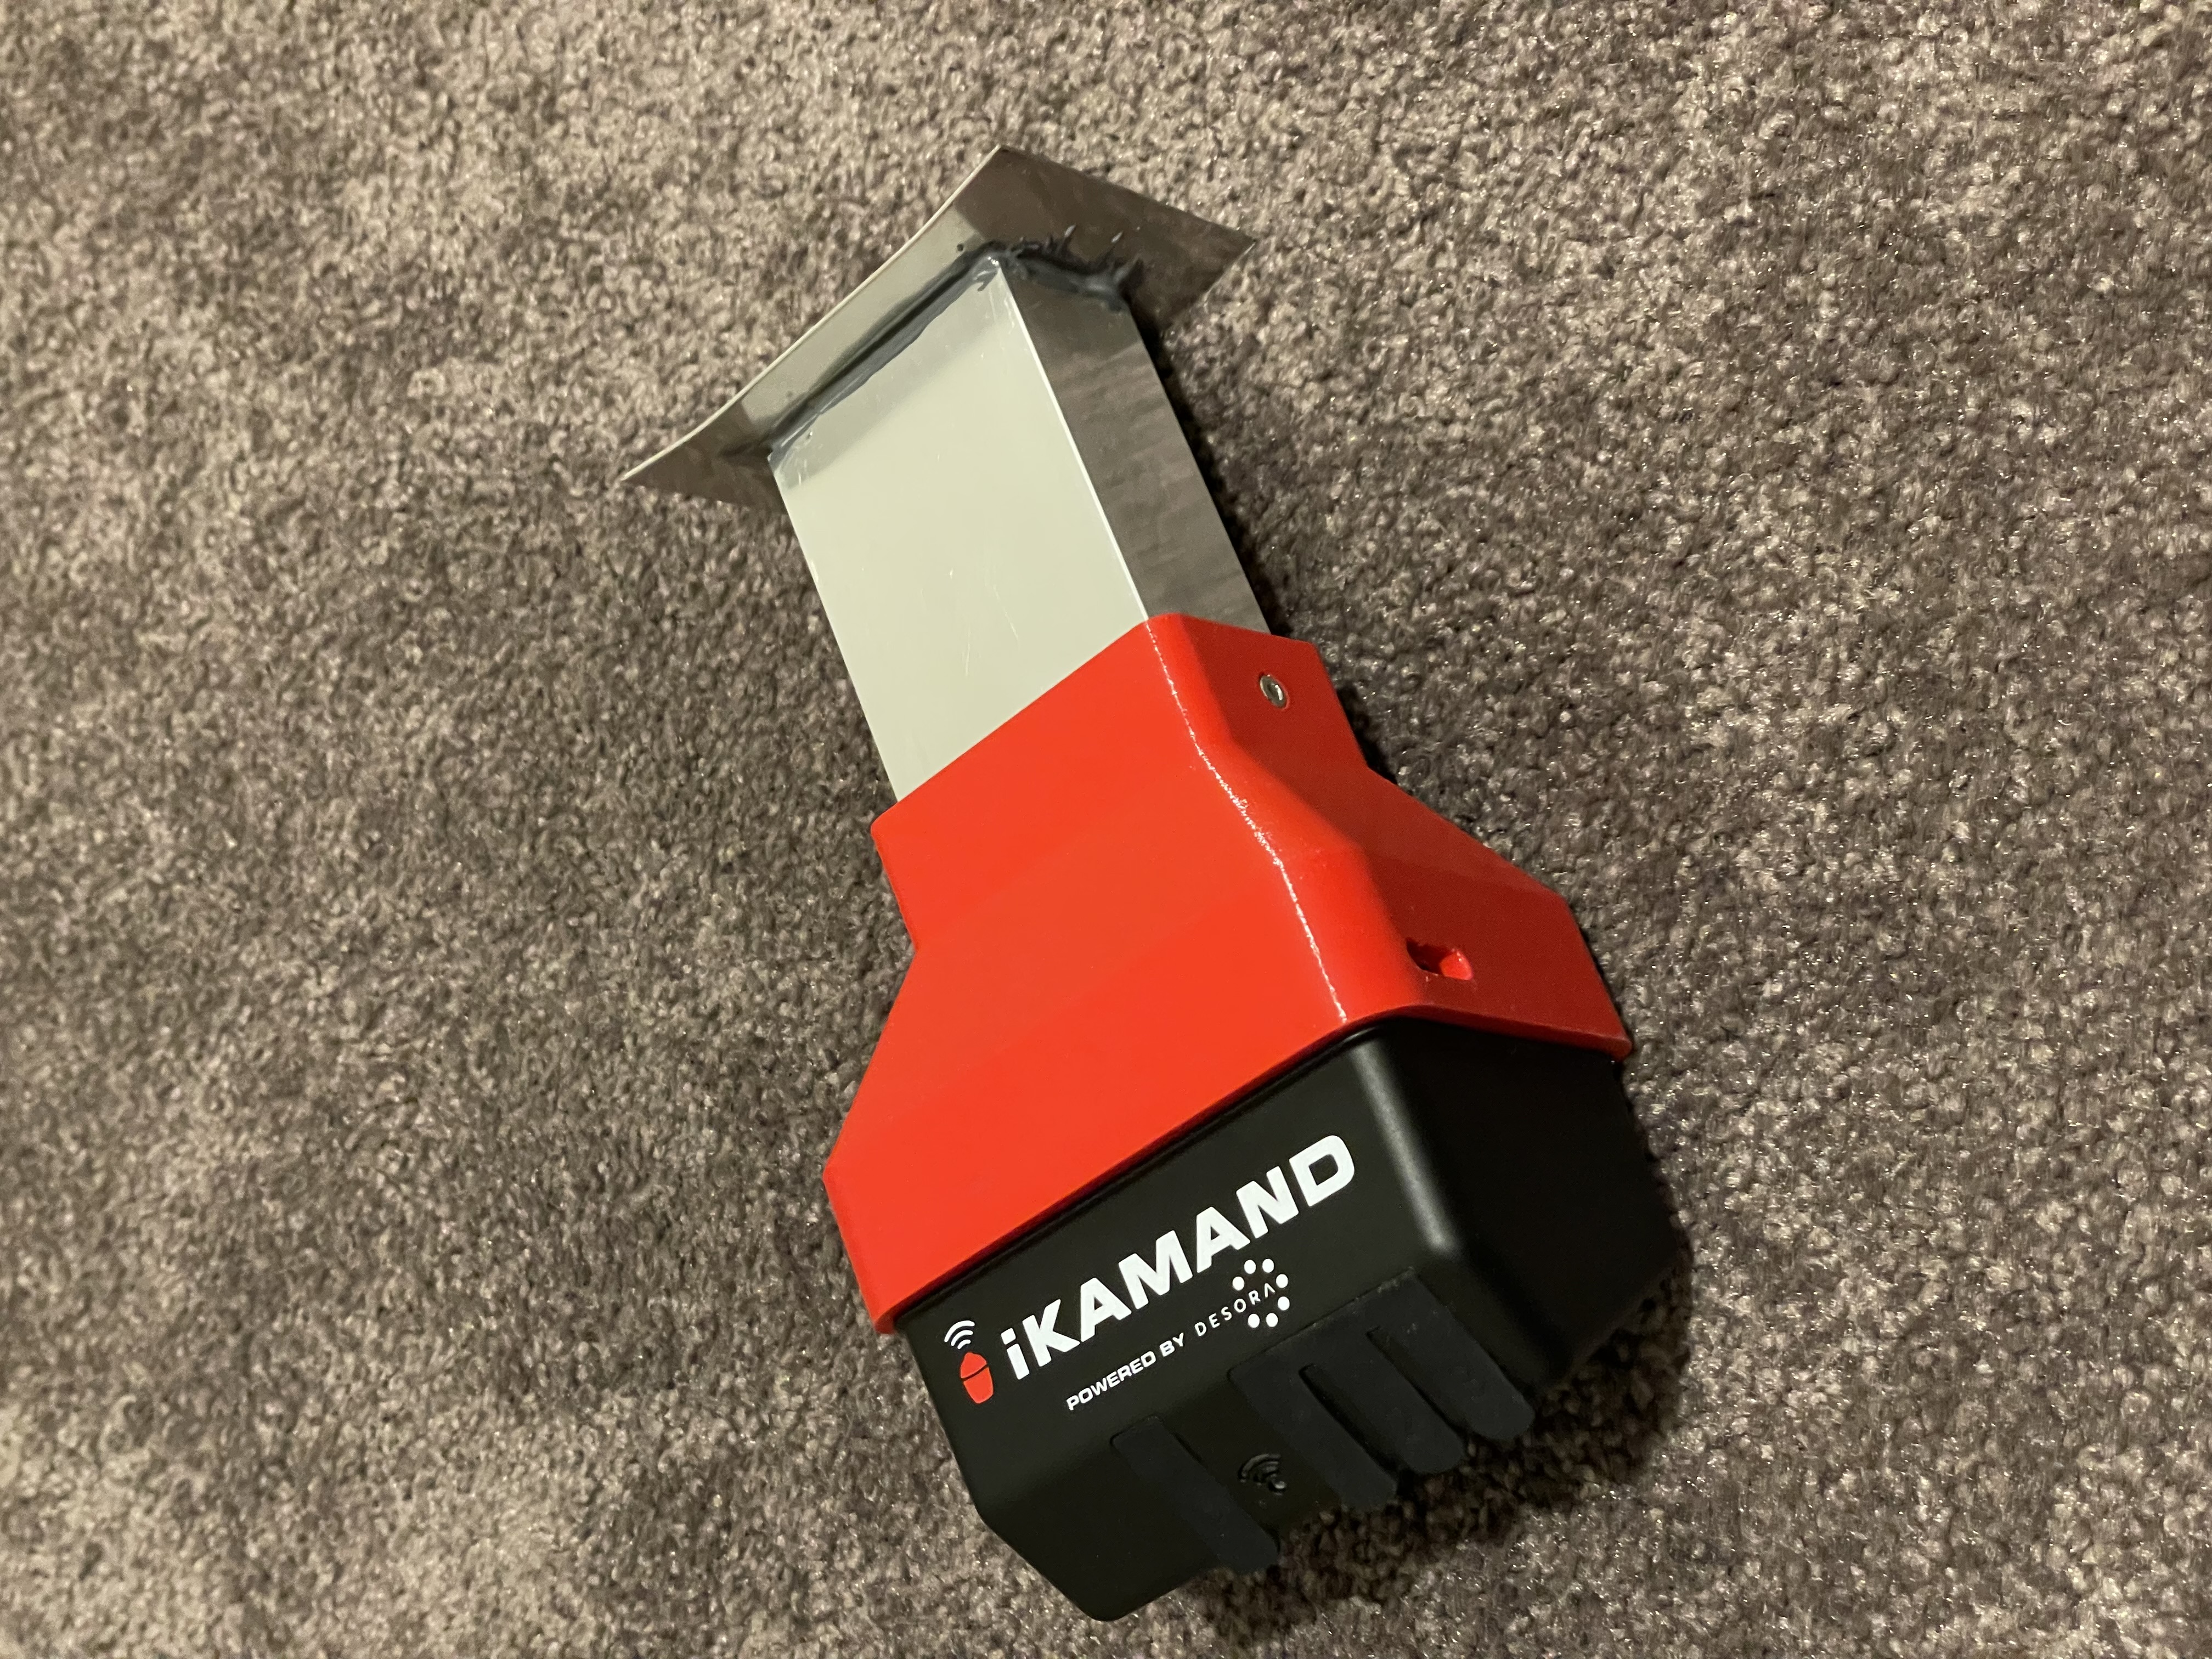
Kamado Joe Junior iKamand Adapter
prusaprinters
<p>I wanted to use an iKamand to control the temperature of my Kamado Joe Junior, but Kamado Joe only sell models to suit the Classic and Big Joe grills. I created this print so that I don't need to babysit the grill on long cooks - just set and forget.</p><p><strong>Additional materials required (available at hardware stores or online):</strong></p><ul><li>1mm thick aluminium or stainless steel sheet</li><li>30mm x 50mm aluminium rectangle tube</li><li>JB Weld or high-temperature silicone</li><li>2 x 8mm M3 bolts and nuts (optional)</li><li>iKamand V2 temperature controller*</li></ul><p>*I have an iKamand for the Big Joe - I've been told that the iKamand for the Classic Joe is identical except for the stainless steel grill mounting bracket which comes with the kit, so the Classic Joe model should also work - but I don't have a Classic Joe model to test. I also don't know if this will work with the first generation of the iKamand. </p><p><strong>3D model print settings:</strong></p><ul><li>Material: PETG</li><li>Layer Height: 0.2mm</li><li>Infill: 40%</li><li>Supports: Optional for iKamand latch slots (see photo), not required if your printer handles bridging well</li><li>Perimeters: 3</li></ul><p><strong>Instructions:</strong></p><ol><li>Print out the part iKamand_Joe_Jr_Adapter</li><li>Print out the part Template_Cut</li><li>Cut the aluminium tubing to length. Note that anything from 30mm to 80mm length will work (but see note at bottom of the page). I've used 30mm in this example.<br><br><img src="https://media.printables.com/media/prints/205716/rich_content/6220913d-8932-4aa4-a28c-439f6f728462/img_0315.jpg#%7B%22uuid%22%3A%2223660c32-ea03-4aaf-95f0-dfc065f233b7%22%2C%22w%22%3A3024%2C%22h%22%3A4032%7D"><br> </li><li>Insert the aluminum tube into the iKamand_Joe_Jr_Adapter until it touches the internal stop (20mm depth). It should be a firm fit, so make sure the tube is deburred before insertion. Optionally, you can drill a 3mm hole in each side of the tubing, using the guides on the side of the iKamand_Joe_Jr_Adapter, and secure in place with an M3 x 8mm nut and bolt on each side.<br><br><img src="https://media.printables.com/media/prints/205716/rich_content/efaf71a3-6eb6-4172-abc6-bc1d623c955e/img_0353.jpg#%7B%22uuid%22%3A%228c78691f-02b2-427e-9a32-557cbcfd8b8b%22%2C%22w%22%3A3024%2C%22h%22%3A4032%7D"><br> </li><li>Use the Template_Cut part to trace out the shape of the replacement grill vent door on the aluminium or stainless steel plate, including the internal “H” shape. Use a fine-point sharpie or a metal scribe to make the marks.<br><br><img src="https://media.printables.com/media/prints/205716/rich_content/232ee9ea-61a0-4887-829e-e2697deb0db9/img_0325.jpg#%7B%22uuid%22%3A%22293e399a-c2e7-4869-a221-7c855e17fa92%22%2C%22w%22%3A3024%2C%22h%22%3A4032%7D"><br><br><img src="https://media.printables.com/media/prints/205716/rich_content/41871928-0208-49f7-96b6-02dad27acc91/img_0326.jpg#%7B%22uuid%22%3A%22941e3d0a-be84-4745-ab0b-6664ad91ed21%22%2C%22w%22%3A3024%2C%22h%22%3A4032%7D"><br> </li><li>Cut out the grill vent door and cut along the “H” shape. I used a junior hacksaw to cut the grill door and a Dremel with a cutting wheel to cut out the “H” shape.<br><br><img><img src="https://media.printables.com/media/prints/205716/rich_content/a56000b6-eb91-4a54-a265-dfa49be633ba/img_0345.jpg#%7B%22uuid%22%3A%22d9c3697b-90be-41e5-b0df-471a5172bfba%22%2C%22w%22%3A3024%2C%22h%22%3A4032%7D"><br> </li><li>Bend the four tabs created by the “H” shape inward - these will slot into the aluminium tube.<br><br><img src="https://media.printables.com/media/prints/205716/rich_content/1870807e-ceb9-40b3-92bd-f014697c27fd/img_0347.jpg#%7B%22uuid%22%3A%22aeb14e64-6a60-41ce-afe4-03517153c5ef%22%2C%22w%22%3A3024%2C%22h%22%3A4032%7D"><br> </li><li>Remove the lower vent door from your Kamado Joe Junior by removing the two right-hand screws and sliding the door out. <br><br><img src="https://media.printables.com/media/prints/205716/rich_content/436db693-00d1-4771-a603-689be04c2d29/img_0310-1.jpg#%7B%22uuid%22%3A%22ca93e720-d8fd-4b39-acab-7c724f135693%22%2C%22w%22%3A2109%2C%22h%22%3A2077%7D"><br><br>You may need to use a spanner to hold the two right hand internal nuts while removing the screws from the front.<br><br><img src="https://media.printables.com/media/prints/205716/rich_content/f2a49e05-a24b-4b23-ad7e-f95d2e62c771/img_0356.jpg#%7B%22uuid%22%3A%227cabc807-a7e2-404f-909a-073bbe7f0fb3%22%2C%22w%22%3A3024%2C%22h%22%3A4032%7D"><br> </li><li>Gently bend a curve into your new door, using the stock door as a template for the curvature. It doesn't need to match exactly, but will need to have some curvature to be able to fit onto the grill. See below photo below of the cut part resting on top of the stock door.<br><br><img src="https://media.printables.com/media/prints/205716/rich_content/31868b63-297f-40c3-a67a-1475333331cb/img_0350.jpg#%7B%22uuid%22%3A%22e68e1041-5875-48c8-9316-2cedb76b1606%22%2C%22w%22%3A3024%2C%22h%22%3A4032%7D"><br> </li><li>Apply JB Weld or high-temperature silicone to the tabs of the grill door, and insert into the aluminum tube to join the two parts. Make sure you apply enough internally/externally that an airtight seal is made between the tube and the plate. (Note that the photo below was from a model I made with an 80mm aluminium tube, I forgot to take photos for the 30mm model.)<br><br><img src="https://media.printables.com/media/prints/205716/rich_content/be4ba7d1-2013-4684-bafe-7bef7f340990/img_0289.jpg#%7B%22uuid%22%3A%22dd4b93e0-8dc7-4bec-a298-14a21f1ef7d1%22%2C%22w%22%3A3024%2C%22h%22%3A4032%7D"><br> </li><li>Once the sealant is cured, the adapter can be slotted into the Kamado Joe Junior and the screws re-installed on the grill.<br><br><img src="https://media.printables.com/media/prints/205716/rich_content/8f38dd61-ad4b-464c-b2cf-07b1f109f17a/img_0357.jpg#%7B%22uuid%22%3A%2252f1f622-952f-4e0a-b3a7-b14dd4de57ee%22%2C%22w%22%3A3024%2C%22h%22%3A4032%7D"><br> </li><li>Clip in the iKamand unit and you're ready to grill.</li></ol><figure class="image"><img src="https://media.printables.com/media/prints/205716/rich_content/216253e6-1456-42f5-b4c0-9d74f68da3b5/img_0359.jpg#%7B%22uuid%22%3A%22f207c17d-6f3a-4baf-8a72-b4868410b74f%22%2C%22w%22%3A3024%2C%22h%22%3A4032%7D"></figure><p> </p><p><strong>Grilling</strong></p><p>Follow the iKamand instructions for firing up the grill and controlling the temperature. I use 3 all-wood firestarters equally spaced out to get a large portion of the charcoal heated up, as this seems to give better temperature control than just lighting the centre.</p><p>Set the top daisy wheel to almost fully closed, see photo below. There should be just enough space to fit a toothpick into a vent hole. If you have the daisy wheel open too far, the temperature tends to overshoot the set point and take a long time to come down.</p><figure class="image"><img src="https://media.printables.com/media/prints/205716/rich_content/6b334e22-e467-434d-9c5d-fde563d99e1d/img_0307.jpg#%7B%22uuid%22%3A%224d865380-78d9-4273-893e-489d2e4df00b%22%2C%22w%22%3A3024%2C%22h%22%3A4032%7D"></figure><p>To end the cook, just close the daisy wheel, remove the iKamand and insert the grill door plug that came with the iKamand kit.</p><p>Using the iKamand on the Joe Jr I've been able to hold +/- 2 degrees C during 120C low and slow cooking without any manual intervention - see below:</p><figure class="image"><img src="https://media.printables.com/media/prints/205716/rich_content/29abe479-6462-4938-b38e-0cf1dabb9861/img_0312.png#%7B%22uuid%22%3A%223543d980-740a-4f90-ad56-e7ceb5b59882%22%2C%22w%22%3A1170%2C%22h%22%3A2532%7D"></figure><p> </p><p><strong>Note regarding tube length</strong> - I use my grill almost solely for smoking and low and slow cooking. I haven't tested this with sustained, high temperatures (eg. 300+ degrees C), so if you do a lot of this type of cooking, make sure to check that the printed parts aren't getting too warm. I originally cut the aluminium tubing to 80mm to offset the 3D printed part from the smoker to prevent it from getting too hot - see photo below:</p><figure class="image"><img src="https://media.printables.com/media/prints/205716/rich_content/832db1b3-e02d-42ef-986a-50faba93547b/img_0308.jpg#%7B%22uuid%22%3A%2207a1146b-5463-440b-affe-f6b1fa6fd6ac%22%2C%22w%22%3A3024%2C%22h%22%3A4032%7D"></figure><p>However, after testing, the parts stayed completely cool to touch. I took temperature readings using an IR thermometer and the parts didn't get warmer than 35 degrees C. I remade the part with a 30mm aluminium tube to make it more compact, and haven't had any temperature issues. I've kept the short version on the grill:</p><figure class="image"><img src="https://media.printables.com/media/prints/205716/rich_content/94b528f2-21aa-4880-ae90-cd195c24225d/img_0359.jpg#%7B%22uuid%22%3A%22e076aa04-5f50-44d3-8b1d-8ac764f8616e%22%2C%22w%22%3A3024%2C%22h%22%3A4032%7D"></figure>
With this file you will be able to print Kamado Joe Junior iKamand Adapter with your 3D printer. Click on the button and save the file on your computer to work, edit or customize your design. You can also find more 3D designs for printers on Kamado Joe Junior iKamand Adapter.
