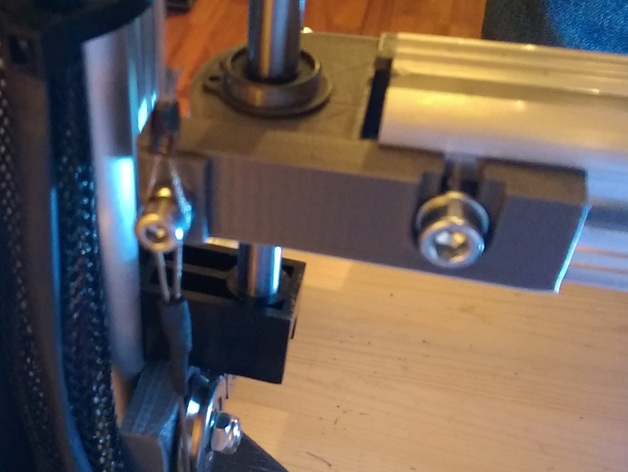
K8200 Z-Axis cable driven stabilizer / parallel drive
thingiverse
I'm very impressed with this upgrade. The Z-axis holder is a bit unstable due to its single drive system. However, this modification has made the Z-axis incredibly stable. For more information and clarity, check out the instructions and pictures below (enlarge for best view). **Instructions** What You'll Need: * 3 meters of stainless steel wire (I used 7x7 1mm wire) * 2 cable locks * 8 metal V-pulleys with ball bearings (5x22x5mm each) * Some screws and nuts * And all the necessary plastic parts, of course! Assembly: 1. Assemble and attach all four upper pulley supports. You'll need 4 M5 bolts, 4 pulleys, 4 supports, 4 spacers, and 4 M5 square nuts. 2. Assemble and mount both lower pulley supports. You'll need 6 M5 bolts, 4 pulleys, 2 holders, 4 spacers, 4 M5 lock nuts, and 2 M5 square nuts. Mount the left one as low as possible and the right one as high as possible. 3. Assemble and attach the right cable holder. You'll need 1 M4 bolt, 1 M4 nut, and 1 M4 lock nut. 4. Assemble and attach the left cable holder. You'll need 2 M5 bolts, 2 M3 bolts, and 2 M3 nuts. Cable and Adjustment: 1. Make a cable loop and secure it to the low right cable holder. Then, lay the cable as shown in the pictures and create another loop at the right cable holder. 2. Tighten the cable by lowering the right pulley support until it's as taut as a guitar string. 3. Finally, clamp down the wire on the left cable holder. Important Note: This modification reduces the X-axis print area to 195mm. Be sure to adjust your software accordingly if you're using this design. Thanks! If you have any questions or need further clarification, please don't hesitate to ask!
With this file you will be able to print K8200 Z-Axis cable driven stabilizer / parallel drive with your 3D printer. Click on the button and save the file on your computer to work, edit or customize your design. You can also find more 3D designs for printers on K8200 Z-Axis cable driven stabilizer / parallel drive.
