K40 y-axis belt tensioner and pulley replacement
thingiverse
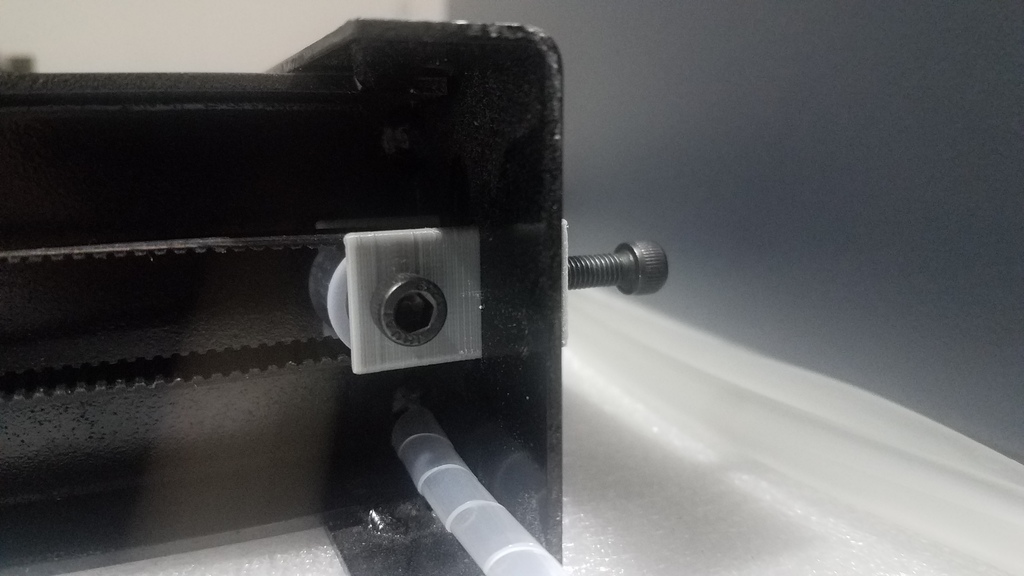
Replacement y-axis belt tensioners for the k40 lasers are a must-have upgrade. The stock RH side, as shown in the picture, is poorly designed and needs to be replaced. Fortunately, the pulleys can be printed using FDM and require some cleaning up before they work properly. A 5mm nut drops into the tensioner and it's recommended to add a couple of drops of super glue to keep it in place. The bearings press-fit into the pulley and should sit about 1mm under the lip. To assemble, start by placing the tensioner through the frame. Next, put the belt around the pulley, insert the pulley with belt into the tensioner, and then place the 5mm bolt through. Use a pair of needle-nose or open-end wrenches to hold the nut in place while making sure not to tighten it too much. If the pulley doesn't easily spin, the bolt is too tight. On the other hand, if there's some movement in the bolt, that's good. Finally, add a nut and washer to the remaining bolt thread, thread it into the tensioner where the nut is superglued, adjust the belt, and tighten up the jam nut. You're all set. Hardware: * 2 - 5mm nuts (for jam nut to adjust pulley) * 2 - 5mm washers (for jam nut to adjust pulley) * 2 - 5mm lock nuts (for holding the bolt that goes through the pulley) * 2 - 5mm washers (for jam nut to adjust pulley) * 4 - 5mm bolts (about 20mm) (sorry, I forgot the exact sizes) * 4 - 5x11x4mm bearings. (used in Traxxas RC cars)
With this file you will be able to print K40 y-axis belt tensioner and pulley replacement with your 3D printer. Click on the button and save the file on your computer to work, edit or customize your design. You can also find more 3D designs for printers on K40 y-axis belt tensioner and pulley replacement.