K40 laser cutter 4 inch exhaust port
thingiverse
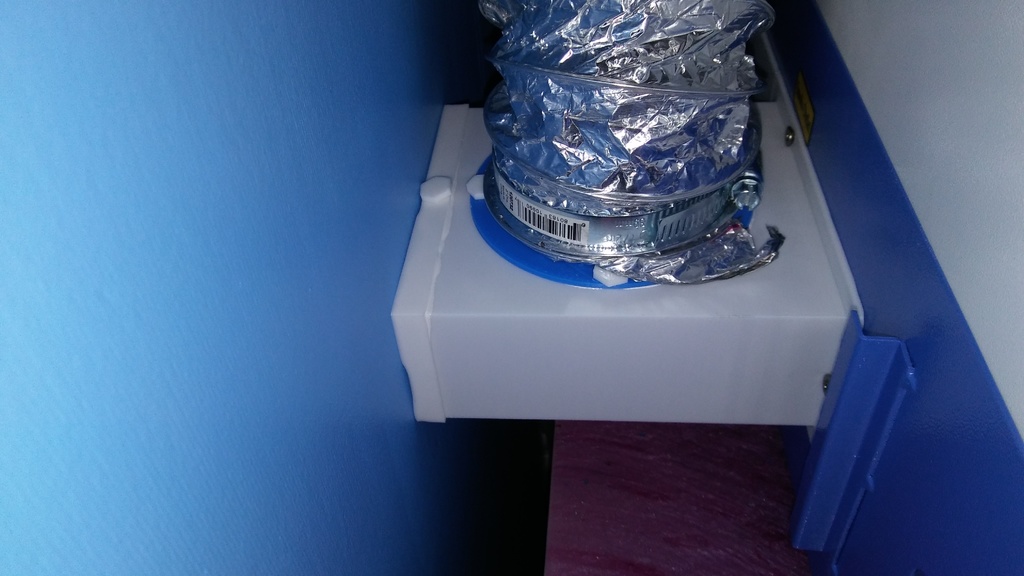
I print at maximum strength by using 100 percent infill. No supports are needed for this design. Many holes for plastic nuts are tapped 1/4-20, but they may be slightly too small due to manufacturing tolerances. I drill them out or tap them to ensure a secure fit. The 4-inch silver vent hose I purchased doesn't fit the fan, so I created an adapter that comes in two sizes. To connect the ducting, I use duct tape - it's exactly what this product is designed for. Assembly: 1. Install the inner metal air duct using original screws and nuts. However, I place the nuts on the outside of the machine and gently finger-tighten them. 2. Facing the machine from the rear, I remove the leftmost nut and install the flat plate (cover.stl). 3. Removing the top nut, I slide the main square vent piece (tower.stl) onto it and lightly tighten the nut with my fingers. To do this, I put one hand through the end of the vent and use my other hand to hold the screw in place. 4. Repeating the process for the right and lower sides can be challenging if you have large hands. As an adult male with small hands, I found it manageable but not easy. 5. Installing the square end piece (top.stl) requires glue or sealant and a printed nut/bolt (quarter20nuttest3.stl). 6. The round vent adapter (ring.stl) is installed using glue or sealant and printed nuts/bolts. This design was created to minimize plastic usage, so if you need thicker or stronger parts, open the .rsdoc file in DesignSpark Mechanical and make adjustments as needed.
With this file you will be able to print K40 laser cutter 4 inch exhaust port with your 3D printer. Click on the button and save the file on your computer to work, edit or customize your design. You can also find more 3D designs for printers on K40 laser cutter 4 inch exhaust port.