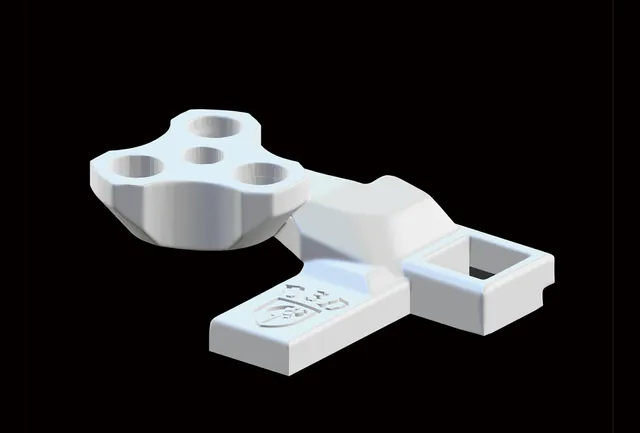
K1 Max Magnetic PTFE/Bowden coupler
prusaprinters
If You find this design useful, Please consider sharing a Make or leaving a comment. It's always good to see my efforts in use by others out there and it often inspires me to make improvements where I can. Without feedback I just draw a line under a design and move on to new projects.-------------------------------------------------------------------------------------------------------------During It's design it was constantly reminding me of a moon Base, so that's what I now call it. The MoonBase magnetic coupler.Note:- If you do not use a riser for the top cover, Do Not print this. It was designed to straighten the filament path and remove the nasty bend that often occurs at the point where the PTFE tube meets the extruder. Without a riser it will cause the PTFE tube to push against the glass.TLDR:- This print acts as both a filament alignment guide for the extruder while adding a quick release component to the PTFE tube connection at the extruder. With the PTFE connection being magnetically attached at the extruder, this print enables you to just pull the PTFE connector off from the extruder when required without causing wear and tear to either the tube or the coupler. The print shape at the 2 magnetic connection points gives the feed into the extruder a more vertical route while also removing the tight bend you often see on the K1 series at the point the PTFE normally enters the extruder.My preferred way of using it now when feeding the printer is:- pull the coupler and hook it over the printer frame on my side of the printer then feed filament as you normally do at the roll end. When it pops out of the mag coupler I pull about 4 inches through. I feed that 4 inches into the extruder before pushing the couplers together. I was genuinely surprised how much further you can push the filament by this method.For removing filament from the extruder? Do the usual retraction, then pull the coupler free. The filament usually comes with it, but if it doesn't? pulling the actual filament itself at the hotend is a way better feel than trying to pull it from the end nearest the roll. It is an instant and direct pull rather than the vague feel you get when pulling from the roll end. Once free of the coupler you just remove the roll as you would normally.------------------------------------------------------------------------------------------------------------The stock filament feed can work against you at times. The length of the tube can make flexible filaments especially hard to get into the extruder. This design effectively removes that issue altogether. Without this print your last option when struggling would be to remove the PTFE tube from the extruder and feed the filament directly into the extruder before replacing the tube. A minor annoyance at best, but constant disconnects chew up the end of the PTFE tube and also add wear and tear to the pneumatic coupler, neither of which are good for either in the longer term.This print allows for your normal filament feeding method meaning you can feed the filament the same way you've always done and ignore the coupler until it's need. But it brings the ability to quickly detach the PTFE tube at the extruder for those times where you are having difficulty. I have also found that by using this detachment option when feeding the printer, I can feed all my filaments far deeper into the extruder than I used to previously, and am also finding removal of filament from the extruder easier as well with the filament pull feeling more solid than when trying to pull it free from the rear of the printer. I had a dodgy roll of filament that blocked my hotend a couple of times before I worked out it was a temperature issue. I only mention it because despite having to use the long clearing prong that comes with the K1 printers, I did not have to remove the print. I fitted it when I made it and it has never been removed since. Simply put? This print fixes an actual problem I was having, but also helps in other aspects too.It's an original design but I drew on inspiration gained from looking at what others were doing with more simple filament guides and stepped it up a notch by adding the quick PTFE magnetic detachment option to the mix. I had previously downloaded a filament alignment guide primarily to help me when feeding TPU but also stop me having to remove the PTFE tube from the extruder when some filaments were being a pain. Unfortunately their design blocked access to the coupler at the extruder, so when I had a particularly soft TPU giving me trouble feeding it into the printer? That filament guide became an added problem rather than a help as I had to remove it to gain access to the coupler. Despite the issues I'd had with that guide, I still liked the basic idea, so after ditching it I set about doing something of my own design to get both a guide and an incorporated quick release coupler in the same print design. This is that design, the Moonbase. A print that makes my life a lot easier and I wouldn't be without now.This print will help straighten the filament path into the extruder, but my main criteria was adding a magnetic coupling as close to the extruder as possible to be able to quickly remove the Bowden tube from the extruder when needed. The head designs worked out pretty much perfect and access to the lock/unlock switch for the extruder gears is still excellent.There are connector versions to cater for both PC4-M6 and ECAS04 couplers. I have printed and tested both types and both work exactly as planned. I personally stayed with the ECAS04 version as the coupler itself takes up less vertical height than the PC4 type and means less chance of the tube pushing against the lid if printing with the lid attached. The design itself needs a 22mm length of PTFE tube (it can be cut off the end of the existing tube as creality make that one too long anyway so no need to buy more, but don't use scissors or anything else that deforms the tube). This small piece of tube is slipped through the main bracket print and directly into the pneumatic coupler of the extruder to secure it in place. Once fitted the top of that small piece of tube needs to sit flush with the magnetic mating surface of the Moonbase lower coupling. For reference, the holes for the PTFE tube are sized to fit regular PTFE Bowden tubes exactly. After printing, a bowden tube should slip through both parts without much resistance. If for any reason your print introduced something making one or both parts not allow the tube through? Run a 2mm HSS drill bit through affected the hole to clear it. Don't go larger (unless your tube is significantly fatter than normal for some reason) as any lateral tube movement will potentially affect alignment and consequently feeding of filament at the tubes meeting point. Simply put:- The print is designed so that when attached together, the long tube (from the filament sensor) will meet the small bit of tube (that runs through the base into the extruder coupler) with perfect alignment and little to no gap between them when they meet.This design uses 5x2mm magnets (either 9 or 12 depending on which option you go for). I have a stack of 5x2mm magnets so they are obviously my preferred option for things I design myself that require small magnets. I chose the 12 magnet option for the one I printed and it is the setup I use on my printer. Both the ECSA and PC4 prints come in 2 versions. They are named ‘single magnet’ and 'double magnet' respectively. I would highly suggest using the double magnet (12 magnets total) option. The single magnet would need your printer set up in such a way that there was little or no ‘sheer’ force at the coupling to prevent the magnets letting go if your filament tube is pushing against the printer frame. The filament itself would prevent the coupler actually moving sideways, but during these moments of ‘sheer force’ it would likely also add some drag to the filament. I never tried the single magnet variant, choosing to go for the stacked option (two 5x2mm magnets stacked in each of the 6 holes for the magnetic coupling). Whichever you choose though, the connecting points nearest the extruder have holes ONLY for double stacks of 5x2mm or single 5x4mm magnets. It is only the top parts that allow for single magnets as an option. I am tempted to remove the single magnet option altogether as I have my doubts whether they will be strong enough. Printing and fitting.If you only print PLA and TPU then this works fine printed in PLA. If you print at higher temps in the enclosure then consider printing this in PETG or a similar more heat resistant filament. Print the main bracket and one of the mag couplers with supports. After printing make sure the hole through the removable mag coupler is clear and the PTFE tube passes through cleanly. Also make sure you remove any traces of support from the magnet holes as they are sized to get the magnets close to flush with the print face (depths were set at 2.2mm hole depth for the single magnet and 4.2 for the double stack) so any leftover support will have the magnets stand proud. Be careful clearing magnet holes as the bottom of the holes is very close to the outer surface and in the case of the ECAS04 the magnets holes are an extremely close tolerance with the central hole that the coupler fits into. I needed this piece to be as slim as possible but still have good magnetic force available and that necessitated the tolerances be kept tight.All the magnets were glued in place once test fitting confirmed they fit correctly.----------------------------------------------------------------------------------FITTING:-Unload filament and remove the PTFE tube from the coupling at the extruder.Cut a 22mm length of PTFE tubing and test fit it to the printed bracket to make sure that it will pass through the hole. Undo the Allen screw holding the drag chain where it connects to the extruder. Carefully put the mag bracket between the chain and the frame and align it correctly before tightening the screw back down. Be careful with your wires around the area where they enter the chain.Slide the 22mm filament piece into the brackets PTFE hole and push through firmly into the stock extruders pneumatic coupler until the top of the tube fits flush with the brackets coupler face. If for any reason it doesn't sit flush (creality may decide to use different couplers that could change how far down the tube will go), then keep in mind that if the tube is slightly lower than flush with the bracket it will still be fine, but if it stands proud it will interfere with the magnetic connection. Flush is perfect, Lower is acceptable, higher is bad. If it stands proud it will need shortening.Connect a pneumatic coupler to the printed removable coupler portion before finally pushing the PTFE tube that comes from the filament sensor into that coupler.You can now load the filament. It's up to you whether you load the filament until it comes out of the removable coupler while it is unattached then feed the filament into the extruder before sliding the magnet couplers together, or you can attach the magnetic coupler first, then feed the filament normally as you have always done previously. I find the first option infinitely better as you can get the filament deeper in the extruder and far easier than when pushing the filament from the rear of the printer.That's it. Job done. A super fast Bowden tube disconnection option with a filament alignment guide all in one place. By the way, the bracket itself is only a half hour print at high quality. I am still surprised how fast some prints turn out to be on the K1 series printers.
With this file you will be able to print K1 Max Magnetic PTFE/Bowden coupler with your 3D printer. Click on the button and save the file on your computer to work, edit or customize your design. You can also find more 3D designs for printers on K1 Max Magnetic PTFE/Bowden coupler.