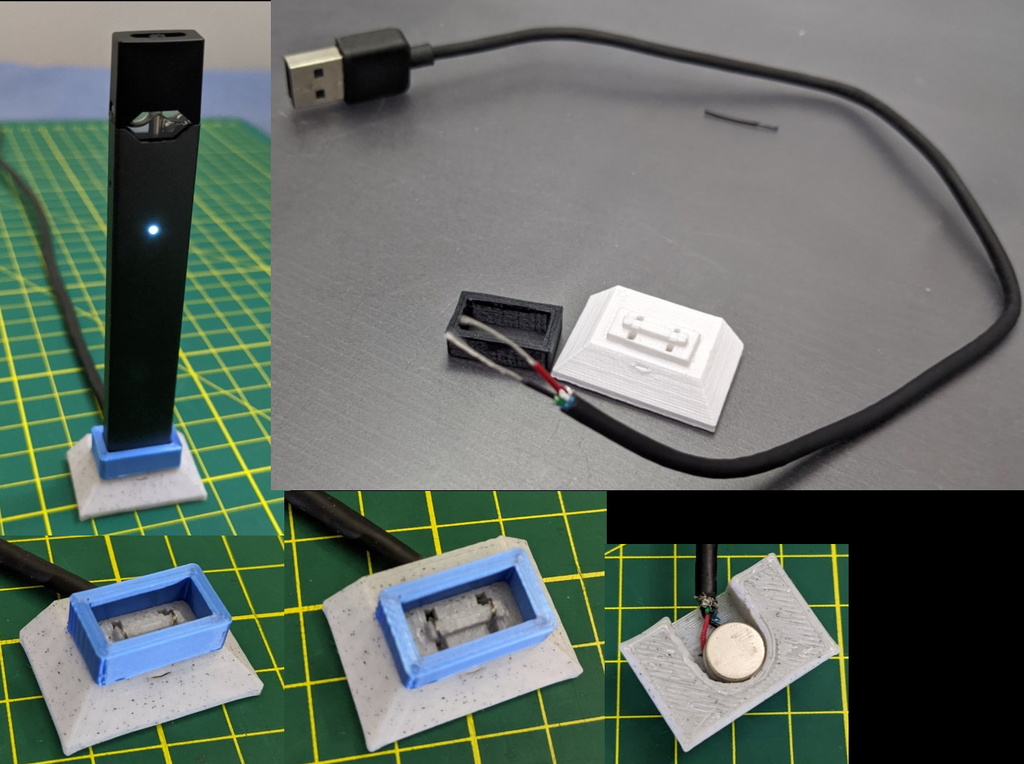
JUUL USB Charger
thingiverse
A Convenient Charging Station for JUUL Users First, print the collar using a raft to ensure a strong foundation. Then, print the base with supports to maintain its stability. The printed components were created at a layer height of 0.2mm and an infill of 20%. The base was constructed from Marble PLA, while the collar showcased a shiny blue finish. I also designed another version for a friend in black and white. Next, prepare the USB cable by cutting off the end and retaining approximately 20mm of red/black wires. Strip the wires back about 15mm and carefully guide them through the back two holes. Use tweezers or fine-tipped pliers to loop the wires over and then down through the front holes. The orientation of the red and black wires is not crucial, as either configuration works. Secure the wires in place using super glue on the underside only. This will prevent any potential damage to the surrounding area. For the magnetic component, a 10mm diameter by 5mm height neodymium magnet was used; however, any suitable magnet can be employed as long as it fits snugly within the designated space. Be sure to orient the magnet correctly before applying glue. Upon completion, the collar should snap into place with ease. To prevent damage to the device or laptop, ensure that the wires are neatly arranged and free from stray strands that could cause electrical shorts. The entire project can be completed in approximately 30 minutes, including printing and construction time.
With this file you will be able to print JUUL USB Charger with your 3D printer. Click on the button and save the file on your computer to work, edit or customize your design. You can also find more 3D designs for printers on JUUL USB Charger.
