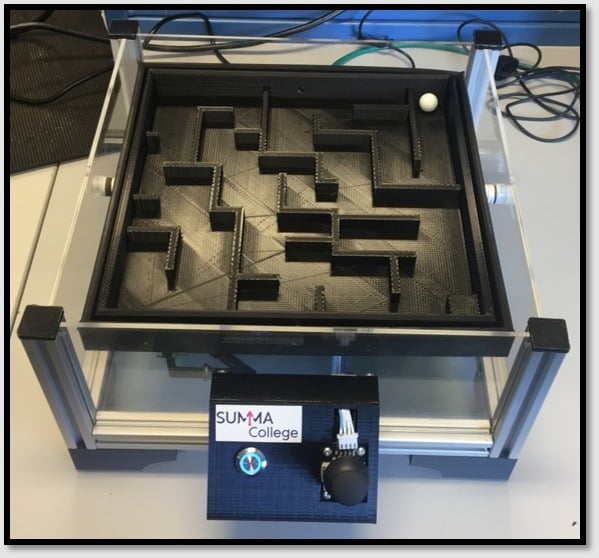
Joystick Maze labyrinth game. Arduino controlled
thingiverse
I created a maze game with some school colleagues. We thought it would be fun to share it with you. This joystick-controlled maze game is sure to challenge your skills. The button with an LED ring serves as a power supply check. Each servo has its own power source (LM7805). If both 5-volt sources are present, the LED ring will light up. The button itself doesn't have any function, but it can be used later. The DXF file for the plexiglass plates and the STP files for the maze itself and frame will be added soon. To build the frame, you'll need: * 20x20 Aluminum profile in sizes: + 4 x 260mm + 4 x 125mm * M4 profile mounts (4 pieces) * M4 bolts * I've included a picture of the frame separately. I recommend having it manufactured at a factory rather than doing it yourself. You'll also need to print: * 4 legs (60% infill, layer height: 0.15mm) * 1 front panel (60% infill, layer height: 0.15mm) For the Lego parts, you'll need: * 3 x Light Grey (new) Technic Universal Coupling 3L * 5 x Black Technic Strain Relief Pin * 2 x Light Grey (new) Technic Beam 3 * 5 x Light Grey (new) Technic Pin 1/2 * 2 x Black Technic Beam 4 * 2 x Dark Grey (new: blue-ish) Technic As-connector * 4 x Black Technic Beam 6 * 4 x Black Technic As- and Pin connector #1 * 2 x Black Technic As- and Pin connector Lateral I've added a picture of the BOM with examples. For the electronic parts: * The PCB fits perfectly on top of the Arduino as a stack, thanks to the holes being copied from the Arduino. * The LM7805 needs to be placed flat on top of some sort of heatsink. We used a piece of bent aluminum. You'll also need: * 3 x 0.33uF caps * 3 x 0.1uF caps * 3 x 220R resistors * 2 x 10kR resistors * 2 x LM7805 voltage regulators * A 12V-24V, 1.5A adapter for input * An optional switch * An optional fuse holder * An optional USB-to-USB panel mount connector * 2 x 180-degree servos (I recommend using high-quality, fast-reacting servos; cheaper ones from AliExpress will work too, but they won't be as great.) You'll also need a joystick. Here are the component links: * 20x20 Alu profile: https://www.123-3d.nl/123-3D-Aluminium-profiel-2020-extrusion-lengte-123-3D-huismerk-i1557-t14575.html * Profile mounts: https://www.123-3d.nl/123-3D-Glijmoer-M4-t-b-v-aluminium-2020-profiel-20-stuks-123-3D-huismerk-i1557-t14575.html * LED button ring: https://nl.aliexpress.com/item/5V-12V-24V-220V-Metal-push-button-switch-with-light-16mm-flat-head-self-reset-Momentary/32802027073.html?spm=a2g0s.9042311.0.0.27424c4d29DZpT * Servo recommendation: https://hobbyking.com/en_us/hobbykingtm-coreless-digital-hv-mg-bb-servo-20kg-0-16sec-66g.html * Joystick: https://www.aliexpress.com/item/Higher-Quality-KY-023-Dual-axis-XY-Joystick-Module-PS2-Joystick-Control-Lever-Sensor-for-arduino/32280675550.html?spm=a2g0s.9042311.0.0.27424c4d0vTh7W * Most important Lego part: https://www.toypro.com/nl/product/1856/technic-universele-koppeling-3l/licht-grijs-nieuw The average cost of this project is around 140€. If you have any questions, feel free to ask!
With this file you will be able to print Joystick Maze labyrinth game. Arduino controlled with your 3D printer. Click on the button and save the file on your computer to work, edit or customize your design. You can also find more 3D designs for printers on Joystick Maze labyrinth game. Arduino controlled.
