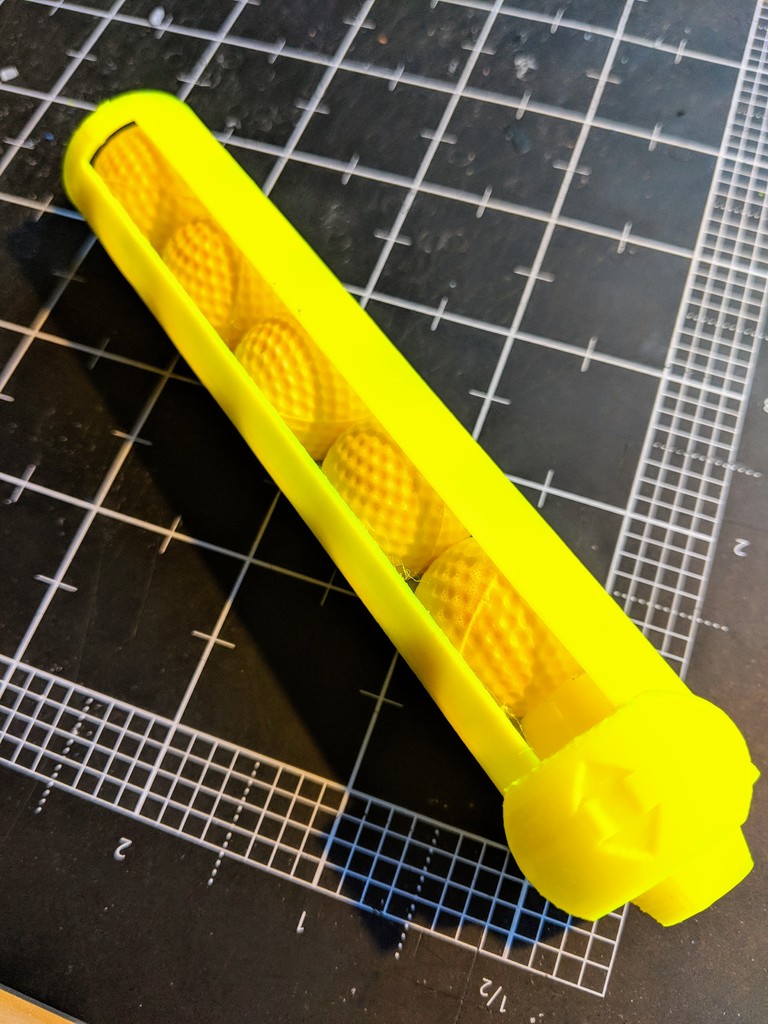
Joe's Kronos Speedloader 5 balls
prusaprinters
<p>This is a speed loader for the Nerf Rival Kronos. Similar to other speed loaders it holds 5 balls and allows quick loading of them all at once. This model has a sliding pusher to grab onto instead of having to use your fingers to touch the rounds directly. This design gives two major advantages:</p> <ol> <li><p>It's double sided, load the speed loader itself from either end. Easy load by just pressing the speed loader directly onto rounds sitting on any surface.</p> </li> <li><p>The sliding pusher extends past the end of the load chamber, thus forcing the balls far enough down into the Kronos to line up properly. Most other speed loaders you have to load the blaster, remove the speed loader, then use your finger to push the rounds a bit further in, then close up the blaster.</p> </li> </ol> <p>I'll probably refine this a bit more by making the sliding pusher tighter to the chamber shaft, and probably curve the rail slots at the top and bottom for slight nicer printing, but this model works great as is.</p> <p>No need for supports, it has the only ones you need built right into the model, just snap them off when it's don't printing. Highly recommend you use a decently wide brim when slicing.</p> <h3>Print Settings</h3> <p><strong>Printer Brand:</strong></p> <p>Creality</p> <p class="detail-setting printer"><strong>Printer: </strong> <div><p>Ender 3</p></div> <p><strong>Rafts:</strong></p> <p>No</p> <p class="detail-setting supports"><strong>Supports: </strong> <div><p>No</p></div> <p><strong>Resolution:</strong></p> <p>.2mm</p> <p class="detail-setting infill"><strong>Infill: </strong> <div><p>not really needed, but doesn't hurt to add in</p></div> <p><strong>Notes:</strong></p> <p>Print with a brim! Very important as there's little surface area touching the build plate. Supports are NOT needed, as long as you have semi decent bridging settings you should be fine, even without them it should work out.</p> <p>You can print at a better resolution if you like, 0.2mm worked fine for me. I used and tested with PLA, your may get different results with different materials, shrinkage may be a factor not accounted for with other materials.</p> <h3>Post-Printing</h3> <p>Just snap off the supports under the finger tabs on the pusher. Sand them down if you like. Remove the brim you should have added in your slicer, and you are good to go!</p> <h3>How I Designed This</h3> <p>This was mostly just an excuse for me to learn Tinkercad for the first time. I'll probably redo it entirely in Fusion 360 as a learning experience there.</p> <p>When i looked at other speed loaders out there i found that they suffered from various, small, issues that I thought I could correct.</p> <p>Most loaders require a bit of additional shoving to get the rounds to seat properly, it seemed to me the loader could do that for me. Others that use your fingers to directly touch and push the rounds seemed sometimes flimsy, though they are usually sleek which i liked. Ones that used push bars were often only one sides, or came in multiple pieces when printing which was less than ideal.</p> <p>I took these small issues and adjusted my design to address them. There's still room to improve. Tolerances could be tighter, some more curves in a couple areas may help printing, and the pusher could probably be altered to rattle a bit less and use less material. Future versions will examine this for sure.</p> </p></p></p> Category: Toy & Game Accessories
With this file you will be able to print Joe's Kronos Speedloader 5 balls with your 3D printer. Click on the button and save the file on your computer to work, edit or customize your design. You can also find more 3D designs for printers on Joe's Kronos Speedloader 5 balls.
