JGAurora A5 3D-Touch sidemount
prusaprinters
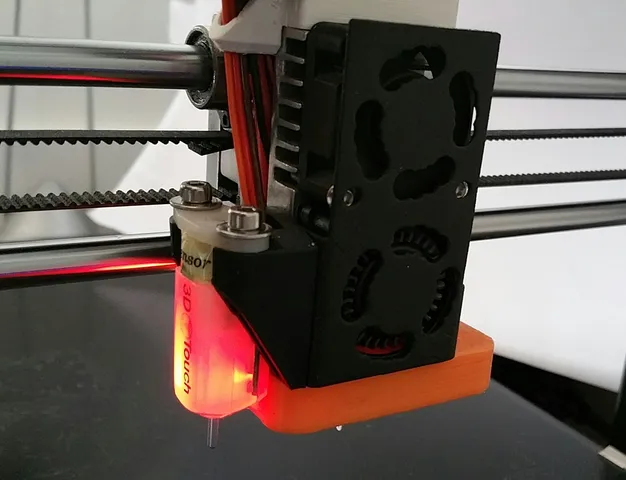
This thing allows to mount a 3D-Touch bed leveling sensor to the side of the printhead. It fixes two major issues I had with other mounts: It does not collide with the frame when moving the Z-gantry all the way up. It avoids long levers and thus better constrains the Z-position of the probe. There is a version that puts the sensor as close to the nozzle as possible and one that is compatible with the famous BlowHard 3000. Prints without supports, best at 0.1mm layer height. Use 3-4 wall lines and 5 top/bottom layers for more stability. The mount places the sensor some 36mm in the X-direction and 8mm in the Y-direction from the nozzle, depending on your exact printer geometry. These values need to be entered in your firmware configuration. For Marlin this would beby changing the following lines in Configuration.h: #define X_PROBE_OFFSET_FROM_EXTRUDER 35 #define Y_PROBE_OFFSET_FROM_EXTRUDER 8 #define Z_PROBE_OFFSET_FROM_EXTRUDER -1.5 Or, for the BlowHard3000 compatible mount: #define X_PROBE_OFFSET_FROM_EXTRUDER 37 #define Y_PROBE_OFFSET_FROM_EXTRUDER 12 #define Z_PROBE_OFFSET_FROM_EXTRUDER -1.5 Please check one of the excellent HOWTOs out there on how to install the sensor and update your firmware. The Z-offset denotes how far the sensor trigger point is from the nozzle - thus it is always a negative value. Typically this should be around 1.5mm, again depending on your printhead and sensor geometry. After installing the sensor, home your X-axis and carefully drive the printhead to the right side. Check if the sensor collides with the X-axis holder before reaching the maximum of 305mm. If so, consider reducing the X-size of the printbed in your firmware settings, just to be on the safe side. Post-Printing After printing, check if M3 screws fit into the sensor mounting holes. Screw them in carefully - if they require too much torque, carefully drill out the holes with 2.5mm and repeat. Use a M3 tap if necessary. Fix the mount to the printhead by first removing the existing M2 hex screws with a matching allan key. Replace them with 2x M2x6 countersunk flathead screws. Take care not to overtighten the screws, the printhead only provides ~1mm worth of thread. Fit the sensor in the mount and fix it with 2xM3x6 screws. Again, tighten the screws very carefully to not damage the threads of the mount. Category: 3D Printer Parts
With this file you will be able to print JGAurora A5 3D-Touch sidemount with your 3D printer. Click on the button and save the file on your computer to work, edit or customize your design. You can also find more 3D designs for printers on JGAurora A5 3D-Touch sidemount.
