Jezrien's Honorblade.
prusaprinters
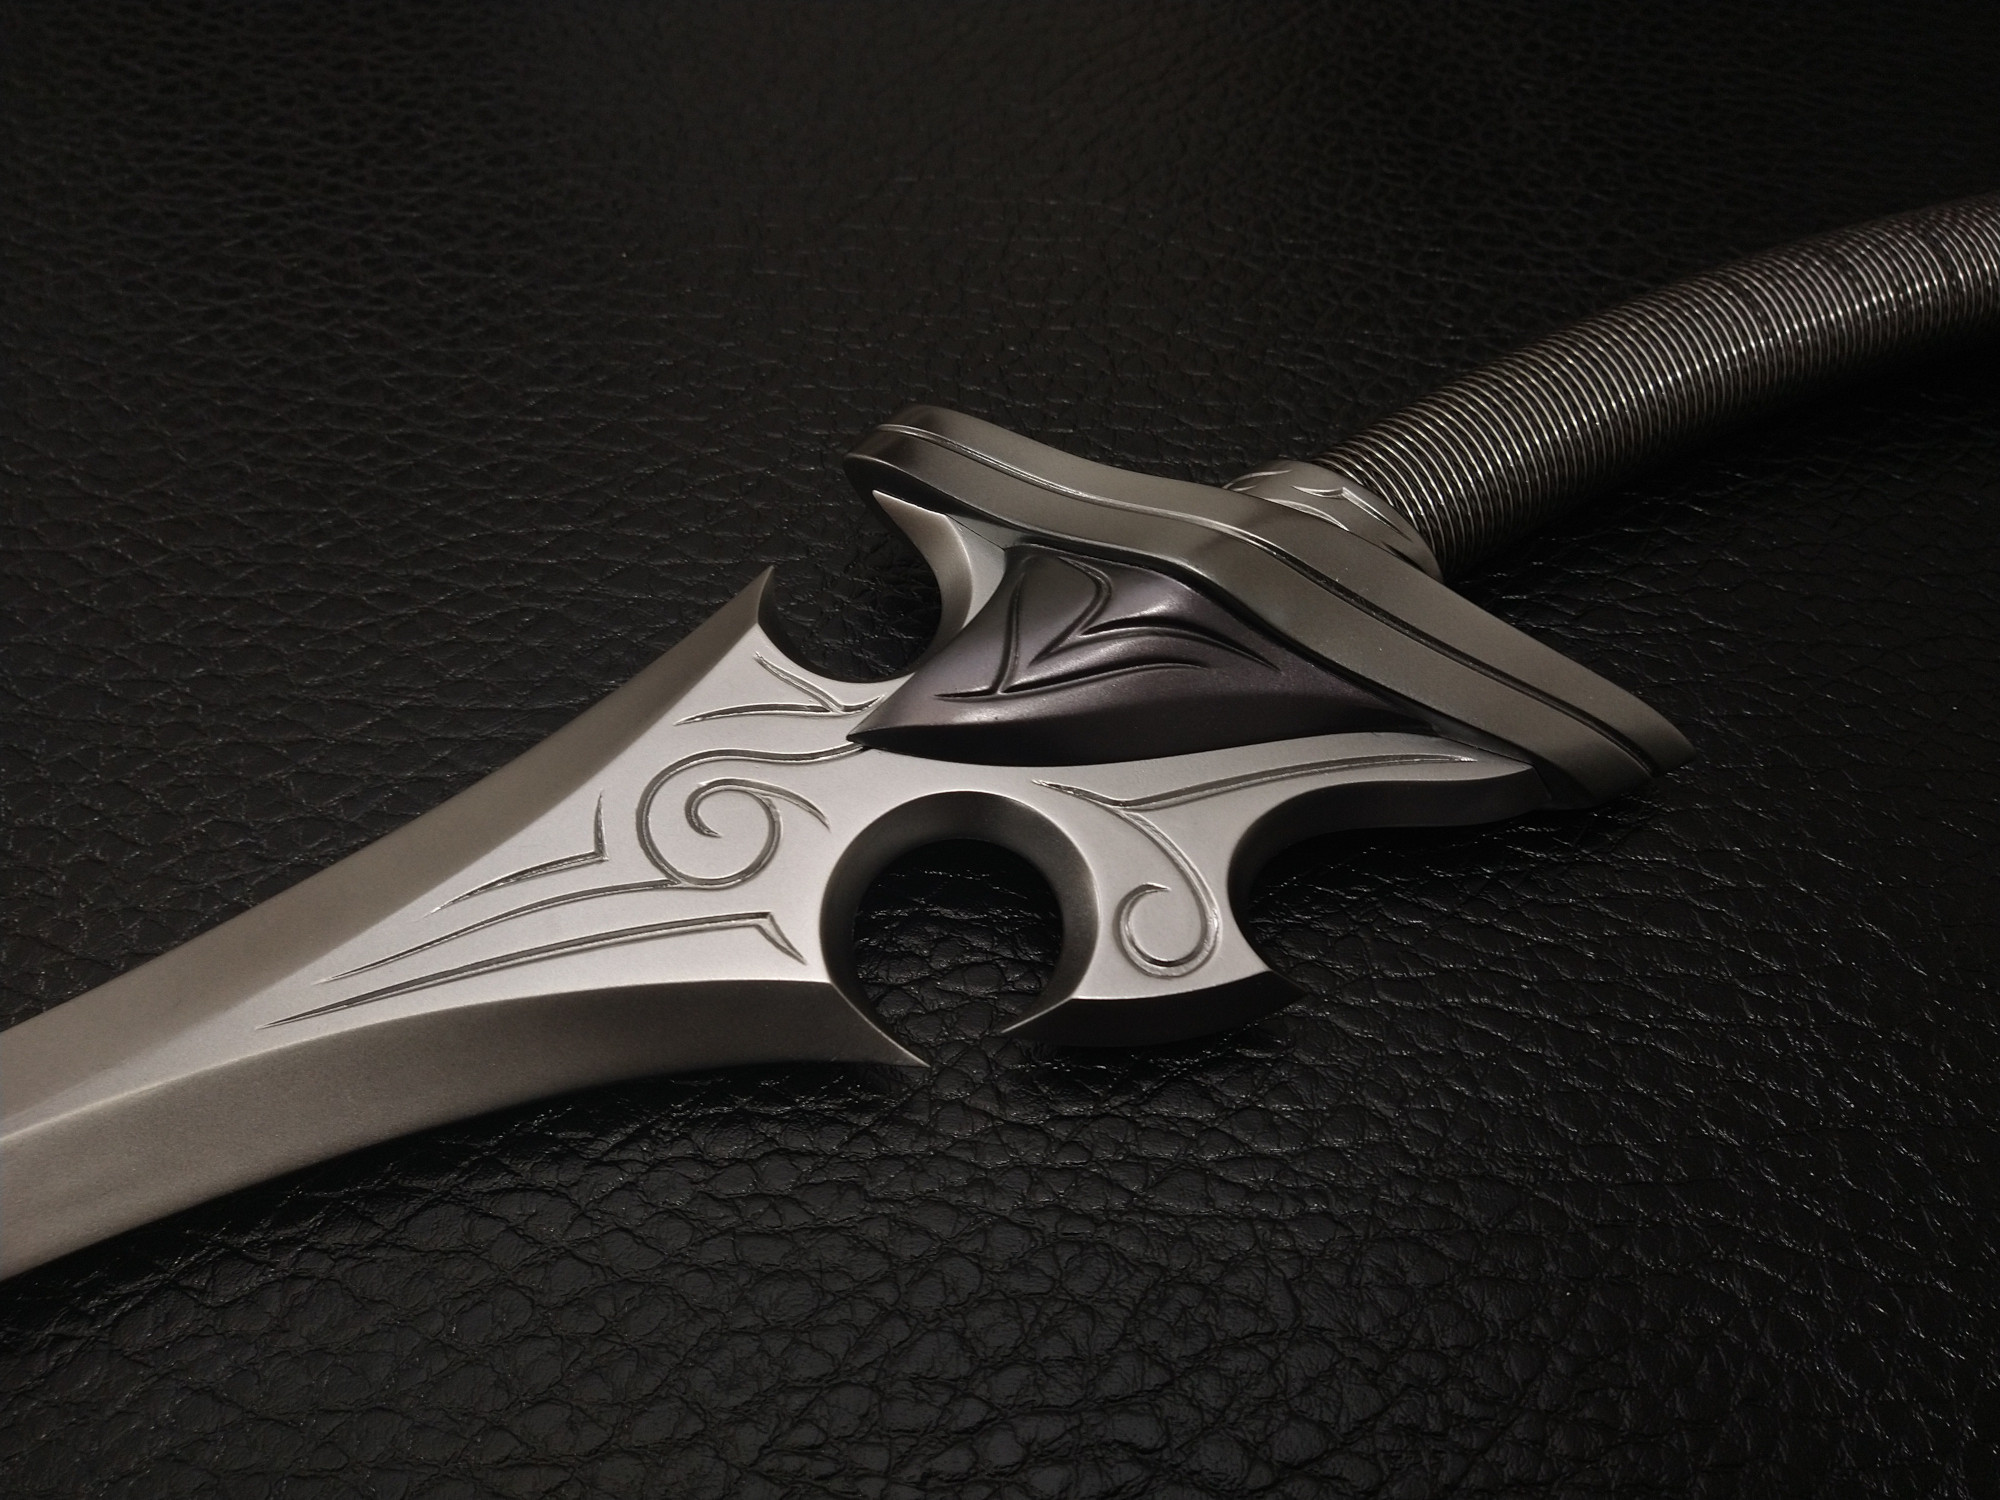
<p>These models are for creating a prop Jezrien's honorblade from The Stormlight Archive series, written by Brandon Sanderson. Printing these parts requires an X/Y space of 200 x 200 mm, and a Z height of 220mm. Along with the STL files, this zip contains both step and parasolid files for all parts. Remix or modify however you want.</p><h3>Print Notes</h3><p><strong>Blade</strong><br>Print the base of the blade with a high infill % and thick walls. The thin part of the base is under a lot of stress from carrying the rest of the blade.<br><br><strong>•Hilt</strong><br>There are two options for printing this part. I hope you have good support settings.</p><p>One is to print it with the entire bottom surface supported. This will make for a stronger part with the ugly supported side on the bottom where it's less visible. If going this route, use enough bottom layers to give 2-3mm of bottom thickness to allow yourself plenty of room for sanding down the supported surface without getting through to the infill.</p><p>The other option is to print in two pieces, which allows for much simpler supports. The downside is that this will give a weaker part, and the seam between the two halves will be in a highly visible area.</p><p><strong>•Handle</strong><br>Printing the handle in one piece requires 257mm of Z travel. If your printer can't fit this, there are parts to print the handle in two pieces.<br><br><strong>•Handle ornament and pommel</strong><br>I printed these parts with resin, but they should still work with FDM if you're willing to spend more time sanding. The pommel has two version, one is pre hollowed for printing with resin, the other is solid. If printing the pommel with FDM, the solid version may use slightly less material depending on your infill and perimeter settings.</p><h3><strong>Assembly notes</strong></h3><p><strong>Required hardware</strong><br>•#10 threaded rod cut to 37 inches. This can potentially be substituted for an m5 threaded rod, but it will be a tight fit in the printed parts.<br>•#10 nuts and washers. (m5 if using that for the threaded rod)<br>•2mm pins for aligning parts during assembly. https://www.amazon.com/gp/product/B07MR2J61Q/<br>•Wire for wrapping the handle. I used 0.018 in plain steel wire for the twisted pairs, and 22 gauge stainless steel wire for the accent.<br>https://www.mcmaster.com/8870K17/<br>https://www.amazon.com/gp/product/B07CJS4C2S/<br>•Epoxy glue, rubber cement, a lot of sandpaper, body filler / glazing putty.<br>•Paint. Entirely up to you, but I used Createx Charcoal-Viola W368 for the upper part and bottom surfaces of the hilt, and Createx Quicksilver W357 for everything else. The quicksilver should be sprayed over a layer of gloss black. The glossiness of the black undercoat will determine how reflective the silver is, and applying more or less coats of silver will make a brighter or darker looking metal. Everything but the handle was coated with Createx 4053 clear coat.</p><p>General assembly process is to build the blade with the threaded rod glued into it. After the blade is fully cured, glue the handle, handle ornament, hilt, and blade together at the same time with a washer and nut on the portion of the threaded rod that sticks out of the handle to hold everything together. After the nut in the handle is tightened, the pommel is glued in place using the peg for alignment.</p><p><strong>Blade</strong><br>Assemble and glue the two halves of the blade base first, being careful not to let any glue block the large hole running through the middle. Pins that align the two halves of the blade base will need to be trimmed down to about 10mm using a rotary tool or small bolt cutters. After the blade base is fully cured, clean up the holes on the end that align with the rest of the blade using a 2mm drill. Clean up all remaining alignment holes with a 2mm drill, and glue together all parts together with pins and the threaded rod.</p><p><strong>Hilt</strong><br>Do not glue the hilt onto the blade without the handle. The handle will not fit into the recess on the bottom of the hilt if the threaded rod from the blade is already in place.<br><br><strong>Handle</strong><br>If you printed the handle in 2 pieces, clean up the pin holes with a 2mm drill, and glue the two halves together using pins for alignment, make sure not to let glue block the large hole running through the handle. After the handle is in one piece, wire wrap it using this kind of jig and technique (not my video).<br><br>https://www.youtube.com/watch?v=8DavBulY7zQ<br><br>When making the twisted wire pairs, one pair should be twisted clockwise, and the other counterclockwise. If both are twisted the same direction, the two pairs will not appear braided when laid next to each other. Make each set of wire about 9m long; this should leave you with 1-2m extra to work with when wrapping the handle. After making the twisted wire, I would strongly suggest wrapping each pair onto an empty filament spool to make them more manageable. This stuff loves to tangle and kink, and any kinks will be visible after wrapping. Before wrapping the handle, test fit it in the hilt, and mark the portion of the handle that goes inside the hilt. Do not wrap this part of the handle. If you do, it will most likely not fit in the hilt anymore depending on the wire you chose. Start wrapping from the bottom using the three holes built into the model to anchor the wires with toothpicks and glue, and work your way up. When you reach a good stopping point, drill small holes into the side of the handle and secure the wires with toothpicks and glue as in the video. Don't worry if the end near the top of the handle is ugly, you should be able to end the wrapping in a place that will be covered by the handle ornament.</p><p><strong>Handle ornament</strong><br>The inside may require sanding to fit over the wire on the handle depending on the wire you chose and the tuning of your printer.</p><p><strong>Pommel</strong><br>Nothing special. Just use the peg to align the pommel with the end of the handle</p>
With this file you will be able to print Jezrien's Honorblade. with your 3D printer. Click on the button and save the file on your computer to work, edit or customize your design. You can also find more 3D designs for printers on Jezrien's Honorblade..