Japanese Lamp Inspired Standing Desk
thingiverse
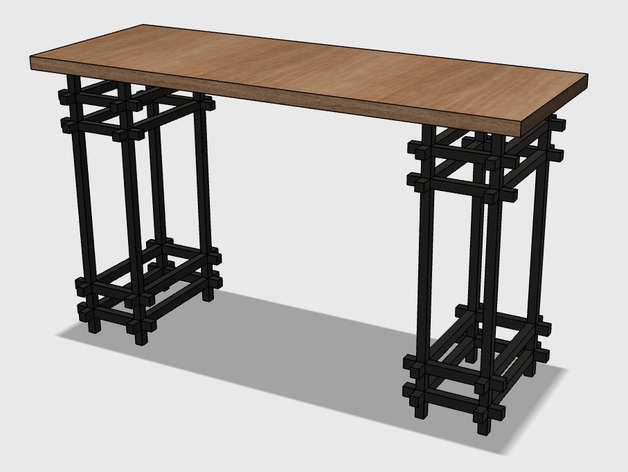
Inspiration to build this standing desk comes directly from the unique shape of traditional Japanese lamps. As the top, I used stained and varnished pine, measuring 70cm x 25cm x 2cm (27" x 10" x 0.75"). You'll also need eight all-threaded M5 rods, sixteen self-locking M5 nuts, and thirty-two 2cm (0.75") wood screws to complete the build. I had to reinforce the structure with metal rods to prevent collapse when leaning on it. There are nine distinct pieces in this design, each requiring a specific number of copies from the provided STL files: 1. z_12x12x24_bottom.stl - 8 copies 2. x_12x12x130.stl - 12 copies 3. y_12x12x220.stl - 16 copies 4. z_12x12x27.stl - 16 copies 5. z_12x12x234.stl - 8 copies 6. x_12x12x130_top.stl - 4 copies 7. z_12x12x30_top.stl - 8 copies 8. mount_42x120x8_left.stl - or mount_42x120x8_right.stl, both requiring 2 copies each Printer Settings: Brand: RepRap Model: K8400 VERTEX Rafts: No Supports: No Resolution: 0.2mm Infill: 100% Notes: Consider the long dimensions of items 220mm x 12mm x 12mm and 234mm x 12mm x 12mm, ensuring your printer can accommodate them diagonally. If not, shorten these pieces without affecting the design. Majority of long parts were printed with a 7mm wide brim. Post-Printing Instructions: First, ensure threaded rods pass through all piece holes easily. Initially, this may require effort, especially for longer pieces. Assemble all pieces and check fit quality. Sand joints as needed depending on print quality. Cut eight threaded rods, each about two millimeters shorter than assembled leg height. Place a locking nut on one end of the rod and screw it in until aligned with the outer edge of the nut. Glue them together in that position using metal glue. Repeat this step for other seven rods. Now assemble the desk legs by inserting locking nuts into z_12x12x30_top.stl (item 7) openings and tightening the assembly by rotating item 7 clockwise until aligned with the rest of the assembly along X and Y axes. If the rod comes out, cut it shorter and try again. Finally, place the desk top upside down and position assembled legs on top of it (also upside down). Find where you want to attach the legs to the top. Place mounts (items 8) over items 7 and mark screw locations. Remove legs and attach items 8 to the desk top with 32 wood screws, ensuring each end has identical mounts facing left or right for successful assembly. You may want to add rubber or silicon pieces to the lower end of the legs to protect surfaces from scratching. After about a week or two of use, detach the legs, tighten pieces #7, and reattach the legs in place.
With this file you will be able to print Japanese Lamp Inspired Standing Desk with your 3D printer. Click on the button and save the file on your computer to work, edit or customize your design. You can also find more 3D designs for printers on Japanese Lamp Inspired Standing Desk.