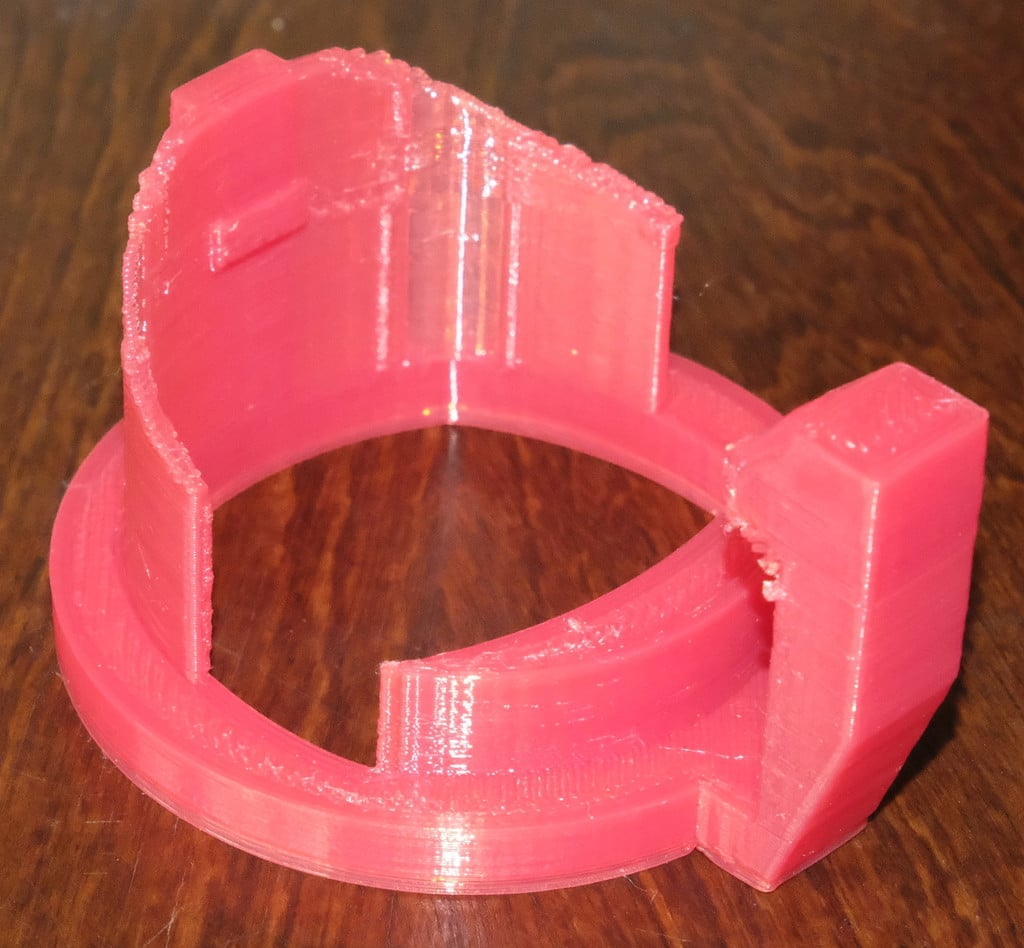
J1772 to Tesla holster adapter
thingiverse
This Thing is designed to be installed in a J1772 mounting holster, converting it for use with a Tesla charging connector or a J1772 cable with a Tesla J1772 charging adapter attached. This simplifies a switch from a non-Tesla EV or PHEV to a Tesla, or the use of a non-Tesla EVSE if you prefer one over Tesla's own Wall Connector. I have tested this design with the Clipper Creek J1772 holster and with a generic one I had on hand. While I cannot guarantee that it will work with anything else, the odds are in its favor. Printing Tips: For this Thing, I provide three `.stl` files: `j1772-tesla-20.stl`, `j1772-tesla-15.stl`, and `j1772-tesla-10.stl`. These correspond to different placements of the tab that engages with the notch in the bottom of the Tesla plug or adapter. The `-20` version allows the adapter to be almost fully inserted into the holster, but requires a holster with a fairly deep well. The `-10` version works with shallower holsters, but leaves the adapter hanging out by about 10mm. The `-15` version places the tab in an intermediate location. To determine which one to use, try sticking a Tesla adapter into your J1772 holster and measuring the gap between the ridge in the Tesla adapter and the edge of the J1772 holster. If this gap is 5mm or less, you can use the `-20` version; but if it's over 5mm, use a version with progressively shallower placement of the tab (or tweak the `teslaTabHeight` variable and generate a new `.stl` file). Be sure to print with a suitable material for your environment. I used PETG since my EVSE is mounted outdoors. PETG is also softer than many plastics, and therefore less likely to cause serious wear on the Tesla plug or adapter. When printing prototypes, the latch generally broke after two or three attachment/detachment procedures. I didn't strengthen the weak point because that would make it harder to flex. There's a notable overhang on the J1772 latch. When printed without supports, the resulting latch had a lot of drooping strands of filament, which needed to be clipped off; but the latch worked fine. When printed with supports enabled (slicing with Slic3r), the resulting mass of plastic was very difficult to remove and left a less clean overhang. Modifying This Thing: You can modify this Thing using the Thingiverse Customizer feature or by editing the .scad file in OpenSCAD and rebuilding it. Several variables appear near the top of the file, and you can adjust them to tweak the design of the adapter. The variable you're most likely to want or need to modify is `teslaTabHeight`, which sets the position of the tab that engages with the Tesla plug or adapter to keep it from falling out of the holster. The default setting of `20` enables a J1772 plug with an adapter to be inserted almost fully into the adapter; however, if your J1772 holster is particularly shallow, you may need to adjust this value. Most of the remaining variables should not be adjusted, although it's conceivable you'll need to adjust `ringHeight`, `baseHeight`, or `baseWidth` for some holsters. Also, reducing `$fn` will speed up the rendering of the design, at the cost of some smoothness in the curves.
With this file you will be able to print J1772 to Tesla holster adapter with your 3D printer. Click on the button and save the file on your computer to work, edit or customize your design. You can also find more 3D designs for printers on J1772 to Tesla holster adapter.
