J-Max_Bowden Belt Extruder (feeder) V1.0
thingiverse
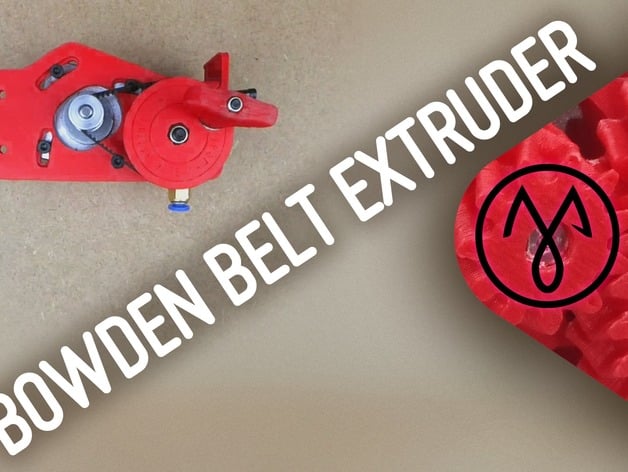
French version : http://www.j-max.fr/?p=632 English : Fade up about plastic gears noise, let me introduce you to my Bowden Belt Extruder v1.0. It's quiet and effective with a 4:1 reduction ratio. This is a compact feeder compared to RichRap's. The belt tensioning is assumed by a radial insert of the motor. The unibody feeder is very stiff for enhanced extrusion precision. We added a crank to the secondary pulley to allow to feed/unfeed the filament quick and easy. The lock inspired from the lulzbot Taz5 one allows a quick release in no time to access to the hobbed gear easily for maintenance, through, because the tight fit of the filament guidance you don't really need to open the idler to insert a new filament. See video for further presentation : https://youtu.be/mSWpEaICI2o Or for assembly instructions : https://youtu.be/LU_pFnTfH9M The extruder was in beta mode during 6 months and had 4 beta testers (thanks to my friends at the KB group ;) ) Several versions of the parts leaded to that V1.0 extruder that we don't have actually nothing to complain about. Actually, I don't think it's necessary to develop any 3mm extruder, as it will soon RIP (here in Europe, the shops are doing sales on that diameter). Add-ons There is different body versions. Big thanks to Rexipus for creating the OpenBuilds version of my feeder body. You can find it here : https://www.thingiverse.com/thing:2934417/ Another big thank you to my friend Sven for creating the CoreXY version of the feeder body. You can find it here : https://www.thingiverse.com/thing:2881133/ The feeder bodies are very similar, but they have some slight differences. To choose which one to print, you need to know a bit more about your printer configuration : 1) If you are using a Prusa i3 or a CoreXY setup with the idler on the right side of the extruder, you should use the "right" version. 2) If you are using a Prusa i3 or a CoreXY setup with the idler on the left side of the extruder, you should use the "left" version. Please note that the idlers for both configurations are identical and can be used without any modifications. Locks The lock is another part that I have created to make it easier to change the filament. The design is based on the lulzbot Taz5's lock but with some slight changes to make it more suitable for my extruder. Please note that you will need a bit of expertise to assemble and modify this part, so if you are not comfortable with modifying parts, please don't try to use this one. The lock has been designed to be printed in two parts. The first part is the main body of the lock, which contains the springs and the mechanism for holding the filament. The second part is a small piece that fits on top of the first part and holds everything together. Please note that you will need a 3mm bit to drill the hole for the spring in the first part. The parts Here are all the parts that you will need to print : 1x Feeder body ( choose between the "right" or "left" version depending on your printer configuration ) 1x GT2 64 tooth secondary pulley 1x Crank for secondary pulley 1x Idler 1x Lock Necessary tools: 1.4mm Allen Hex key (for hobbed gear and GT2 16T pulley) 2.5mm Allen Hex key (for M3 screws) 4mm Allen Hex key (for M5 screw) 5.5mm wrench for M3 nuts 8mm wrench for M5 nuts 9.5mm wrench for pneufit thin plyers (for deburing) utility knife (for deburing) 3mm bit (for deburing) 5mm bit (for deburing) a gas lighter (for deburing stringing) See video for deburing and mounting details. Print Settings Printer Brand: RepRap Printer: Prusa I3, CoreXY Rafts: No Supports: Yes Resolution: at least 0.3mm, 2mm layers Infill: at least 50% Notes: Please set "supports everywhere", and prefer strong filaments : ABS, PETG, Carbon fibre reinforced PETG, POM, PC. Note, this is a compact feeder, a high infill level in relationship with your filament type is necessary to prevent any twist during operation. Post-Printing What to do, just out of the build plate. Deburring operation: You will need to deburr all the parts before assembling them. This can be done by hand or using a utility knife. Please note that you should not use any sandpaper or other abrasive materials for deburring, as they may damage the parts. Mounting: To mount the extruder on your printer, you will need to attach it to the X-axis carriage. Please refer to your printer's manual for specific instructions on how to do this. Once the extruder is mounted, you can connect it to the Y-axis motor using a standard 3mm bowden cable. Please note that you should not use any zip ties or other cables to secure the bowden cable, as they may damage the cable over time. Instead, please use a small piece of tape to hold the cable in place. Calibration: Before printing anything with your new extruder, you will need to calibrate it properly. Please refer to your printer's manual for specific instructions on how to do this. Please note that you should not print any test objects or calibration files until you have properly calibrated your extruder. Printing: Once the extruder is properly calibrated, you can start printing anything you want!
With this file you will be able to print J-Max_Bowden Belt Extruder (feeder) V1.0 with your 3D printer. Click on the button and save the file on your computer to work, edit or customize your design. You can also find more 3D designs for printers on J-Max_Bowden Belt Extruder (feeder) V1.0.
