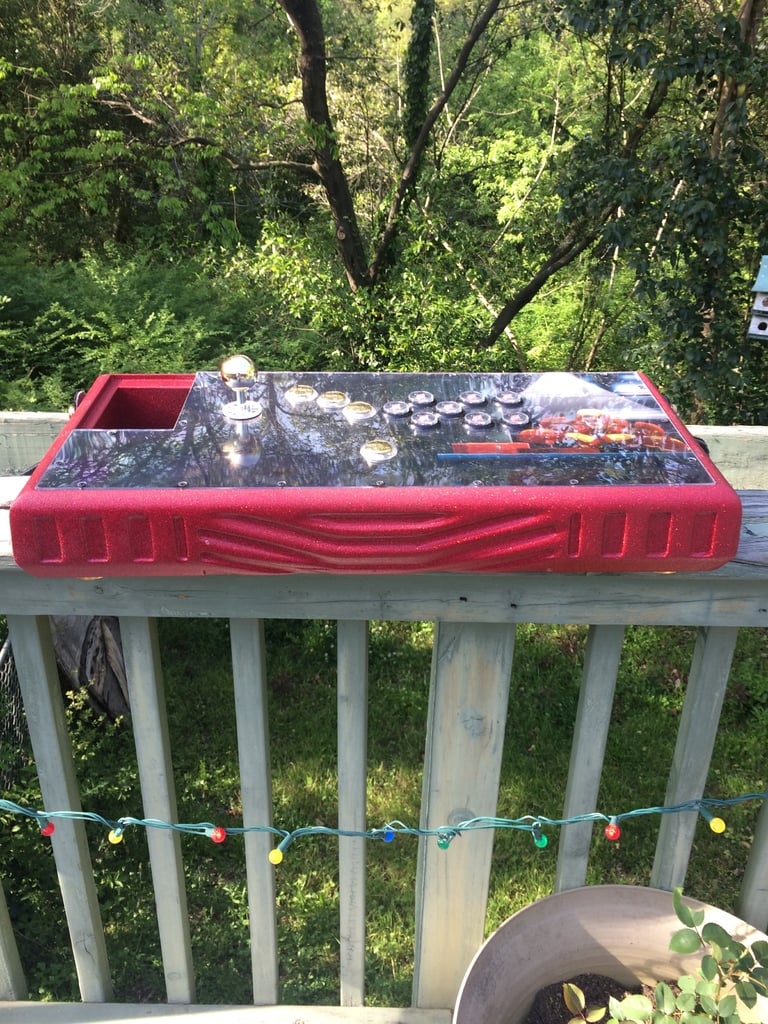
Iron Man Fightstick Case
thingiverse
Here's the latest update: Added top panel images to some random files generated during production. The SolidWorks files will be added once everything is finalized. I've included the theme files as-is. IronMan.zip and warmachine.zip can be unzipped into your emulation station themes folder and then selected in the theme selection dialog within the ES options menu. I may make some changes to the theme soon. The top panel has been updated with ample space between buttons, and everything is now properly proportioned (36.5mm between centers at all times). I've chosen 10-gauge galvanized steel (update: 1008 steel is cheaper and stronger, so we're switching to that), and 1/8-inch lexan. The actual dimensions come within .08 of a mm to flush with the top, which is close enough for me. Sandpaper will easily take care of any remaining difference. The bottom panel will be made from 1/4-inch thick plexiglass. All that remains to complete the panel is adding the mounting screws. Here's an Iron Man (or War Machine) inspired Raspberry Pi, PS4, and PC compatible fightstick, including everything needed to play anywhere at any time. The .stl file is dimensionally accurate when exported with mm as the export unit in SketchUp. The holes for the arcade buttons are 30mm in diameter, which you can measure to verify. I recommend waiting until the final versions are posted before using them, as there have been a few minor changes. I've included various versions and will likely split some off into their own projects. The IronManMK2.41Assembled.skp is the most up-to-date and complete version, featuring an accurate top panel. The entire file reports clean in the solids inspector, and XEOMOTRY.com can read the step files generated from STLs exported from SketchUp. There are currently 4 thin walls where the side pockets meet with the side button cutouts. Leaving the corners rounded will provide enough strength to keep the detail intact, but you can also cut them out if desired. The G-code files provided do not yet cut out the thin walls. The cheapest option I found for printing one was on 3D Hubs for $246. Don't even consider Shapeways, as they want over $1,200 just for the body. 3DSystems was uncooperative when I shared my budget with them. In the end, I found a person in the CNC Zone Forums who offered to help me for $400, including CAM work. I highly recommend this route, especially since the cam files are already complete. The text files included are actually the G-code files used to CNC the model; I'll add more later. The artwork I commissioned is also included, along with the .psd files used in its creation. Credit goes to TOVIO for some amazing work. This artwork was created to resemble me and my friend who's getting a copy. I haven't reviewed the psd files, but you may be able to separate the face out into a separate layer and have your own image placed there instead of mine and my buddy's. I used this artwork to create a custom theme for Emulation Station, which I'll include later (once it's finalized and I can get some screenshots). I'll try to upload it to the official repo for themes. Soon, I'll roll out a custom image of Retropie with some neat additions like Google Assistant integration, touch button motor control, safe shutdown button, and RGB LED integration. When I do, I'll share it here, or at least provide a link if it's not uploaded directly.
With this file you will be able to print Iron Man Fightstick Case with your 3D printer. Click on the button and save the file on your computer to work, edit or customize your design. You can also find more 3D designs for printers on Iron Man Fightstick Case.
