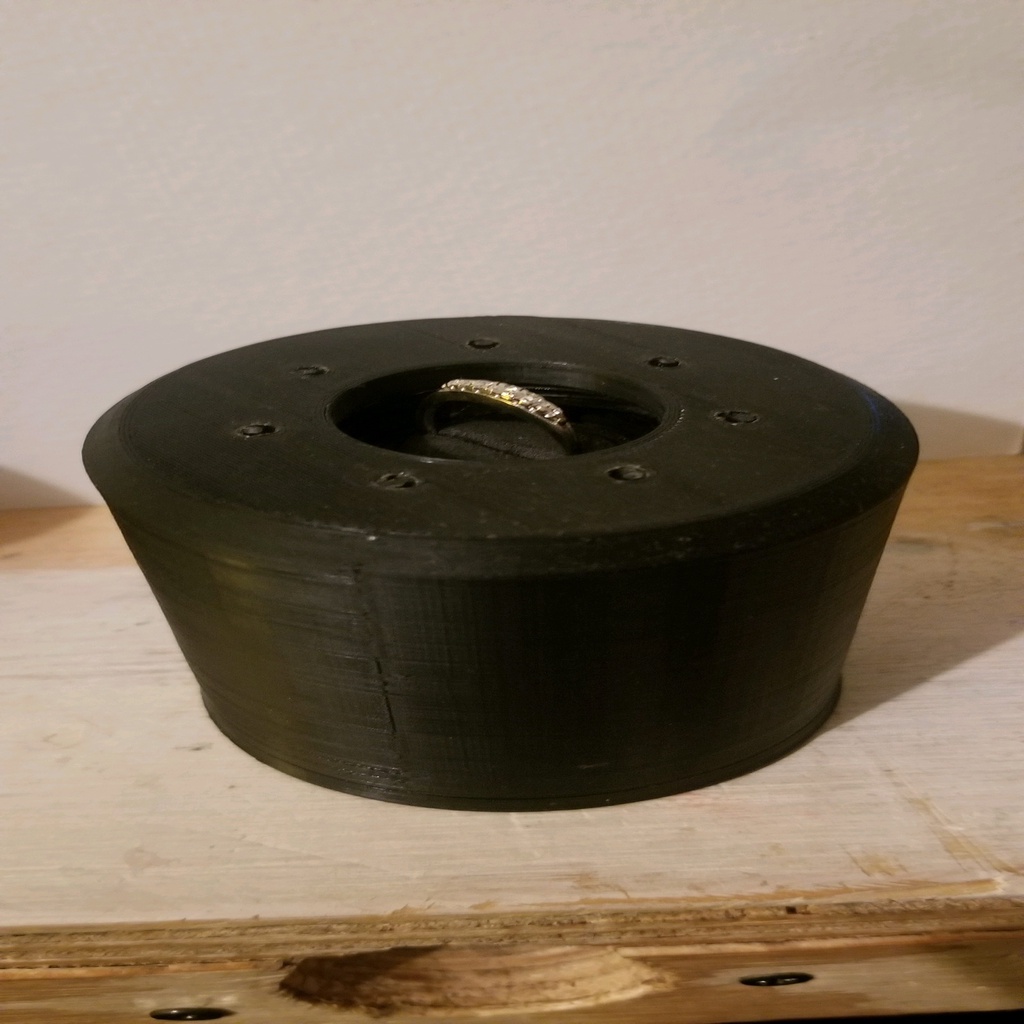
Iris Ring Box
prusaprinters
<p>So, I am going to ask my girlfriend to marry me. Like, next weekend. So, I designed a cool ring-box.</p> <p>This took me around 2 months to design, and I went through an entire roll of PLA designing it. Ended up doing 4 complete redesigns, with a lot of prints between. I have enough pieces to make roughly five of these sitting around in various levels of disassembly.</p> <p>This pushed my design experiance (such as it is) to it's limits, but I love the end result! and I hope it will help other people pop the question as well :)</p> <p>Other itmes needed: Extra Filiment (for blade pegs), Super Glue, Snips, Screws (Designed for m3, but I used screws from an old laptop). optional: EVA foam</p> <h3>Print Settings</h3> <p><strong>Printer Brand:</strong></p> <p>Creality</p> <p class="detail-setting printer"><strong>Printer: </strong> <div><p>Ender 3</p></div> <p><strong>Rafts:</strong></p> <p>No</p> <p class="detail-setting supports"><strong>Supports: </strong> <div><p>Yes</p></div> <p><strong>Resolution:</strong></p> <p>.1</p> <p class="detail-setting infill"><strong>Infill: </strong> <div><p>.2</p></div> <p><strong>Filament:</strong> <a href="https://www.amazon.com?linkCode=ll2&tag=thingiverse09-20&linkId=e4759bff1fa9a55a0f897d801ce2d765&language=en_US&ref_=as_li_ss_tl">Amazon</a> Basics PLA Black</p> <p><br/> <p class="detail-setting notes"><strong>Notes: </strong></p> </p><div><p>I used the cheapest PLA out there when I made this. I have since switch to hatchbox, and I think it would be a lot better. Also, I made this in the summer (it is VERY humid here), and I wish I had kept the filament dry. would have helped with some of the gaps/bubbles on the side. But it was the first thing I ever designed, so not bad overall</p></div> Post-Printing ============= <p><strong>Step 1: Preparing the blades</strong></p> <div><p>For the blades, you need to super glue filament pieces into the holes. I glue over size pieces, and then cut it after. it is a LOT easier than trying to line it up inside that way. One side goes up, one side goes down. Every blade needs to match. (see pictures for examples of assembled blades</p></div> <p class="detail-title"><strong>step 2: preparing the platform</strong></p> <div><p>This step is probably the easiest. Just cut off the little pegs on the innermost piece and glue pieces of metal hanger into the holes (I used gorilla glue due to its space filling property). I played around with the idea of having printed pegs, but I could never get the overhand issue figured out. (like I said above, this is my first moving design...). the platform piece should fit inside the outer most piece, with the metal 'rods' long enough to catch the sides of the track, but short enough to move freely. </p> Around this time, you might want to sand the inside piece track. I also added paste wax to help it move freely on every touching part, but I am not sure if it helped. <p><strong>Step 3: assemble the platform</strong></p> <p>Take the bottom piece (inside bottom), and place the body platform inside. The bottom pieces should be flush. Slide the dovetail inside piece into the dovetail bottom piece. This only fits one way (it won't line up if put on backwards) to make sure the pegs line up later.</p> <p><strong>Step 4: Place the blades into the outside piece</strong></p> <p>This part is HARD. It took me roughly an hour (I have fat fingers). you need to pass the pegs of one side of the blades into the outside piece. turn the outside piece upside down and just set it inside. the first 5 are pretty easy, but the last 2-3 have a trick. you have to pick up the back of the first blade and line up the peg . it is a lot harder than it sounds. if you make the hole bigger there is too much play. you just need to struggle through it. you got this!</p> <p><strong>Step 5: the second hardest part</strong></p> <p>Now, you need to do that again for the inside part. thankfully, geting them into the track is easier then getting them into a hole. gently slide the platform and inside part up and down until you feel the pegs slide true. you will understand when you get it</p> <p><strong>Step 6: screw it together, and finishing up</strong></p> <p>Now, you need to take 2 m3 screws and find 2 holes (opposite from each other) that remain in your view in both the open and closed position. screw the m3 screw in (I took my screws out of an old laptop, so your millage may vary). Add a little CA glue if you are sure you did everything correctly, but be sure to not glue the moving parts together.</p> <p>I added a small piece of EVA foam with a slot added to hold the ring. The ring fit perfectly. Congrats! you built the monstrosity that I designed!</p> <h3>How I Designed This</h3> <p>I desinged this on paper, and this was actually the 3dr design that I came up with. the first used a planatary drive, but taht was WAY too complex for someone who had never even downloaded fusion360 yet! the second design used a simulat design, but itscrewed up in a slightly different way (using a solid rod in the middle, and the platform had a thread instead of the inside ring</p> </div></p></p></p> Category: Interactive Art
With this file you will be able to print Iris Ring Box with your 3D printer. Click on the button and save the file on your computer to work, edit or customize your design. You can also find more 3D designs for printers on Iris Ring Box.
