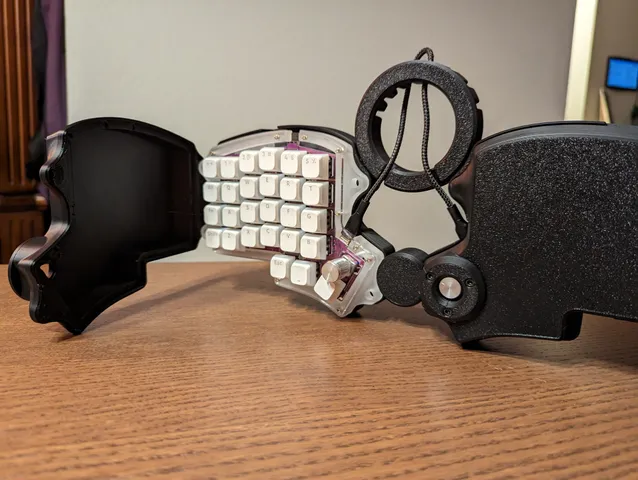
Iris Rev6a Keyboard case
prusaprinters
Protects your delicate keycaps for the keyboard commuter. This case is way over-designed.It's built for the Keebio Iris rev6a phoenix edition case with the holes for tenting. (It looks like they've moved on to v7, so we may never see the 6a again). :shrug:I started with an import of the phoenix edition case design files from the keebio repo - so the fit is perfect.The internal height is for XDA profile keycaps. These pudding caps are what i pulled my measurements from. If you are using a taller profile, you'll need to adjust the variable XDA_cap_profile_clearance in the .step file. (There's a ton of steps in that file - so you may have to do some rework if you tweak the height).Everything is designed to be friction fit - but there are holes for M3 10mm screws if you want to get fancy. You need to be able to print at least .2 clearance so everything fits good. If not, you're probably gonna have a bad time. If you don't want to use screws, a drop of crazy glue will probably cover it. The hinges, connector, and handle are all separate components for easy printing and assembly.The hinges are print-in-place.No supports are needed. The bottom trays have some “sacrificial columns” that you snap off before assembly. Those columns are on the bottom side of the diamond-ish nubs.The handle isn't necessary, but it's a nice place to tuck the cable.The top cover has holes to insert 12mm x 3mm circular magnets. The magnets stick to M3 10mm screws that go in the post holes on the bottom case. You can back those screws in and out to adjust how much the lid sticks. To insert magnets, stop the lid print two layers before completion. I've included gcode files that have the pause in them. Note - after you've glued in the magnets and are ready to resume printing, be sure to turn the print head heat back on. (It shuts off the nozzle heater but not the bed heater on pause). I glue my magnets in with a drop of super glue, do with that information what you will. If you don't want to insert magnets, the doors will open when you pick it up. Maybe try a rubber band? This is designed to be printed at .3 layer height - i based all my wall thickness and layer calculations specifically on .3.I saved all files with the objects oriented correctly for print.The knobs I built/measured for are the ones Keebio sells, so the knob protector rings height is designed for those. You can make adjustments in the step file if you're feeling frisky. Alternately, if you raise the keycap height, the knob protector may not be needed.Some things i'd change if i wasn't absolutely burnt out on this project:Improve the handle balance. When you pick it up by the handle, everything tips forward and the doors fly open if the magnets arent strong enough.I'd add a latch so the doors don't fly open.Improve the joints. There's only 3 barrels now, i think if i doubled that to 6 the joint would open smoother. Please post any makes - or make suggestions for improvements. I might not get to those suggestions - but for the next keyboard . . .
With this file you will be able to print Iris Rev6a Keyboard case with your 3D printer. Click on the button and save the file on your computer to work, edit or customize your design. You can also find more 3D designs for printers on Iris Rev6a Keyboard case.
