Iris Box v2
thingiverse
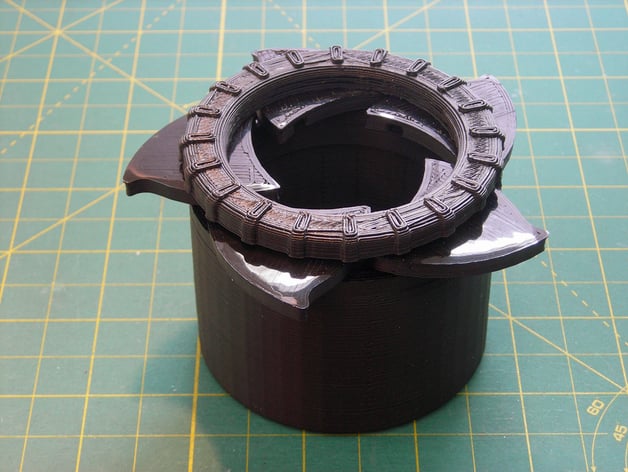
This Iris Box design differs from http://www.thingiverse.com/thing:4458's shorty version, as it overcomes the difficulties in printing parts correctly and allows the ring to turn further for better box opening. The original mechanism was replaced with a new one for smoother operation. NX6 .prt files are available for use. To assemble, print the ring, one peg array, five shutters (available individually or together), and select a base from three options. A 3mm filament or extra pegs (scaled down/cut to 3mm) are needed for assembly. Test shutter clearances with 3mm filament and adjust pegs as required. Insert pegs into the ring's holes, securing them with hot glue if necessary. Check base hole clearance using 3mm filament or extra pegs. Align upper assembly with base pegs and push in, followed by shutter insertion. Trim pegs for proper fit and enjoy flicking it open and closed.
With this file you will be able to print Iris Box v2 with your 3D printer. Click on the button and save the file on your computer to work, edit or customize your design. You can also find more 3D designs for printers on Iris Box v2.