IPi V4 (Legacy Model)
prusaprinters
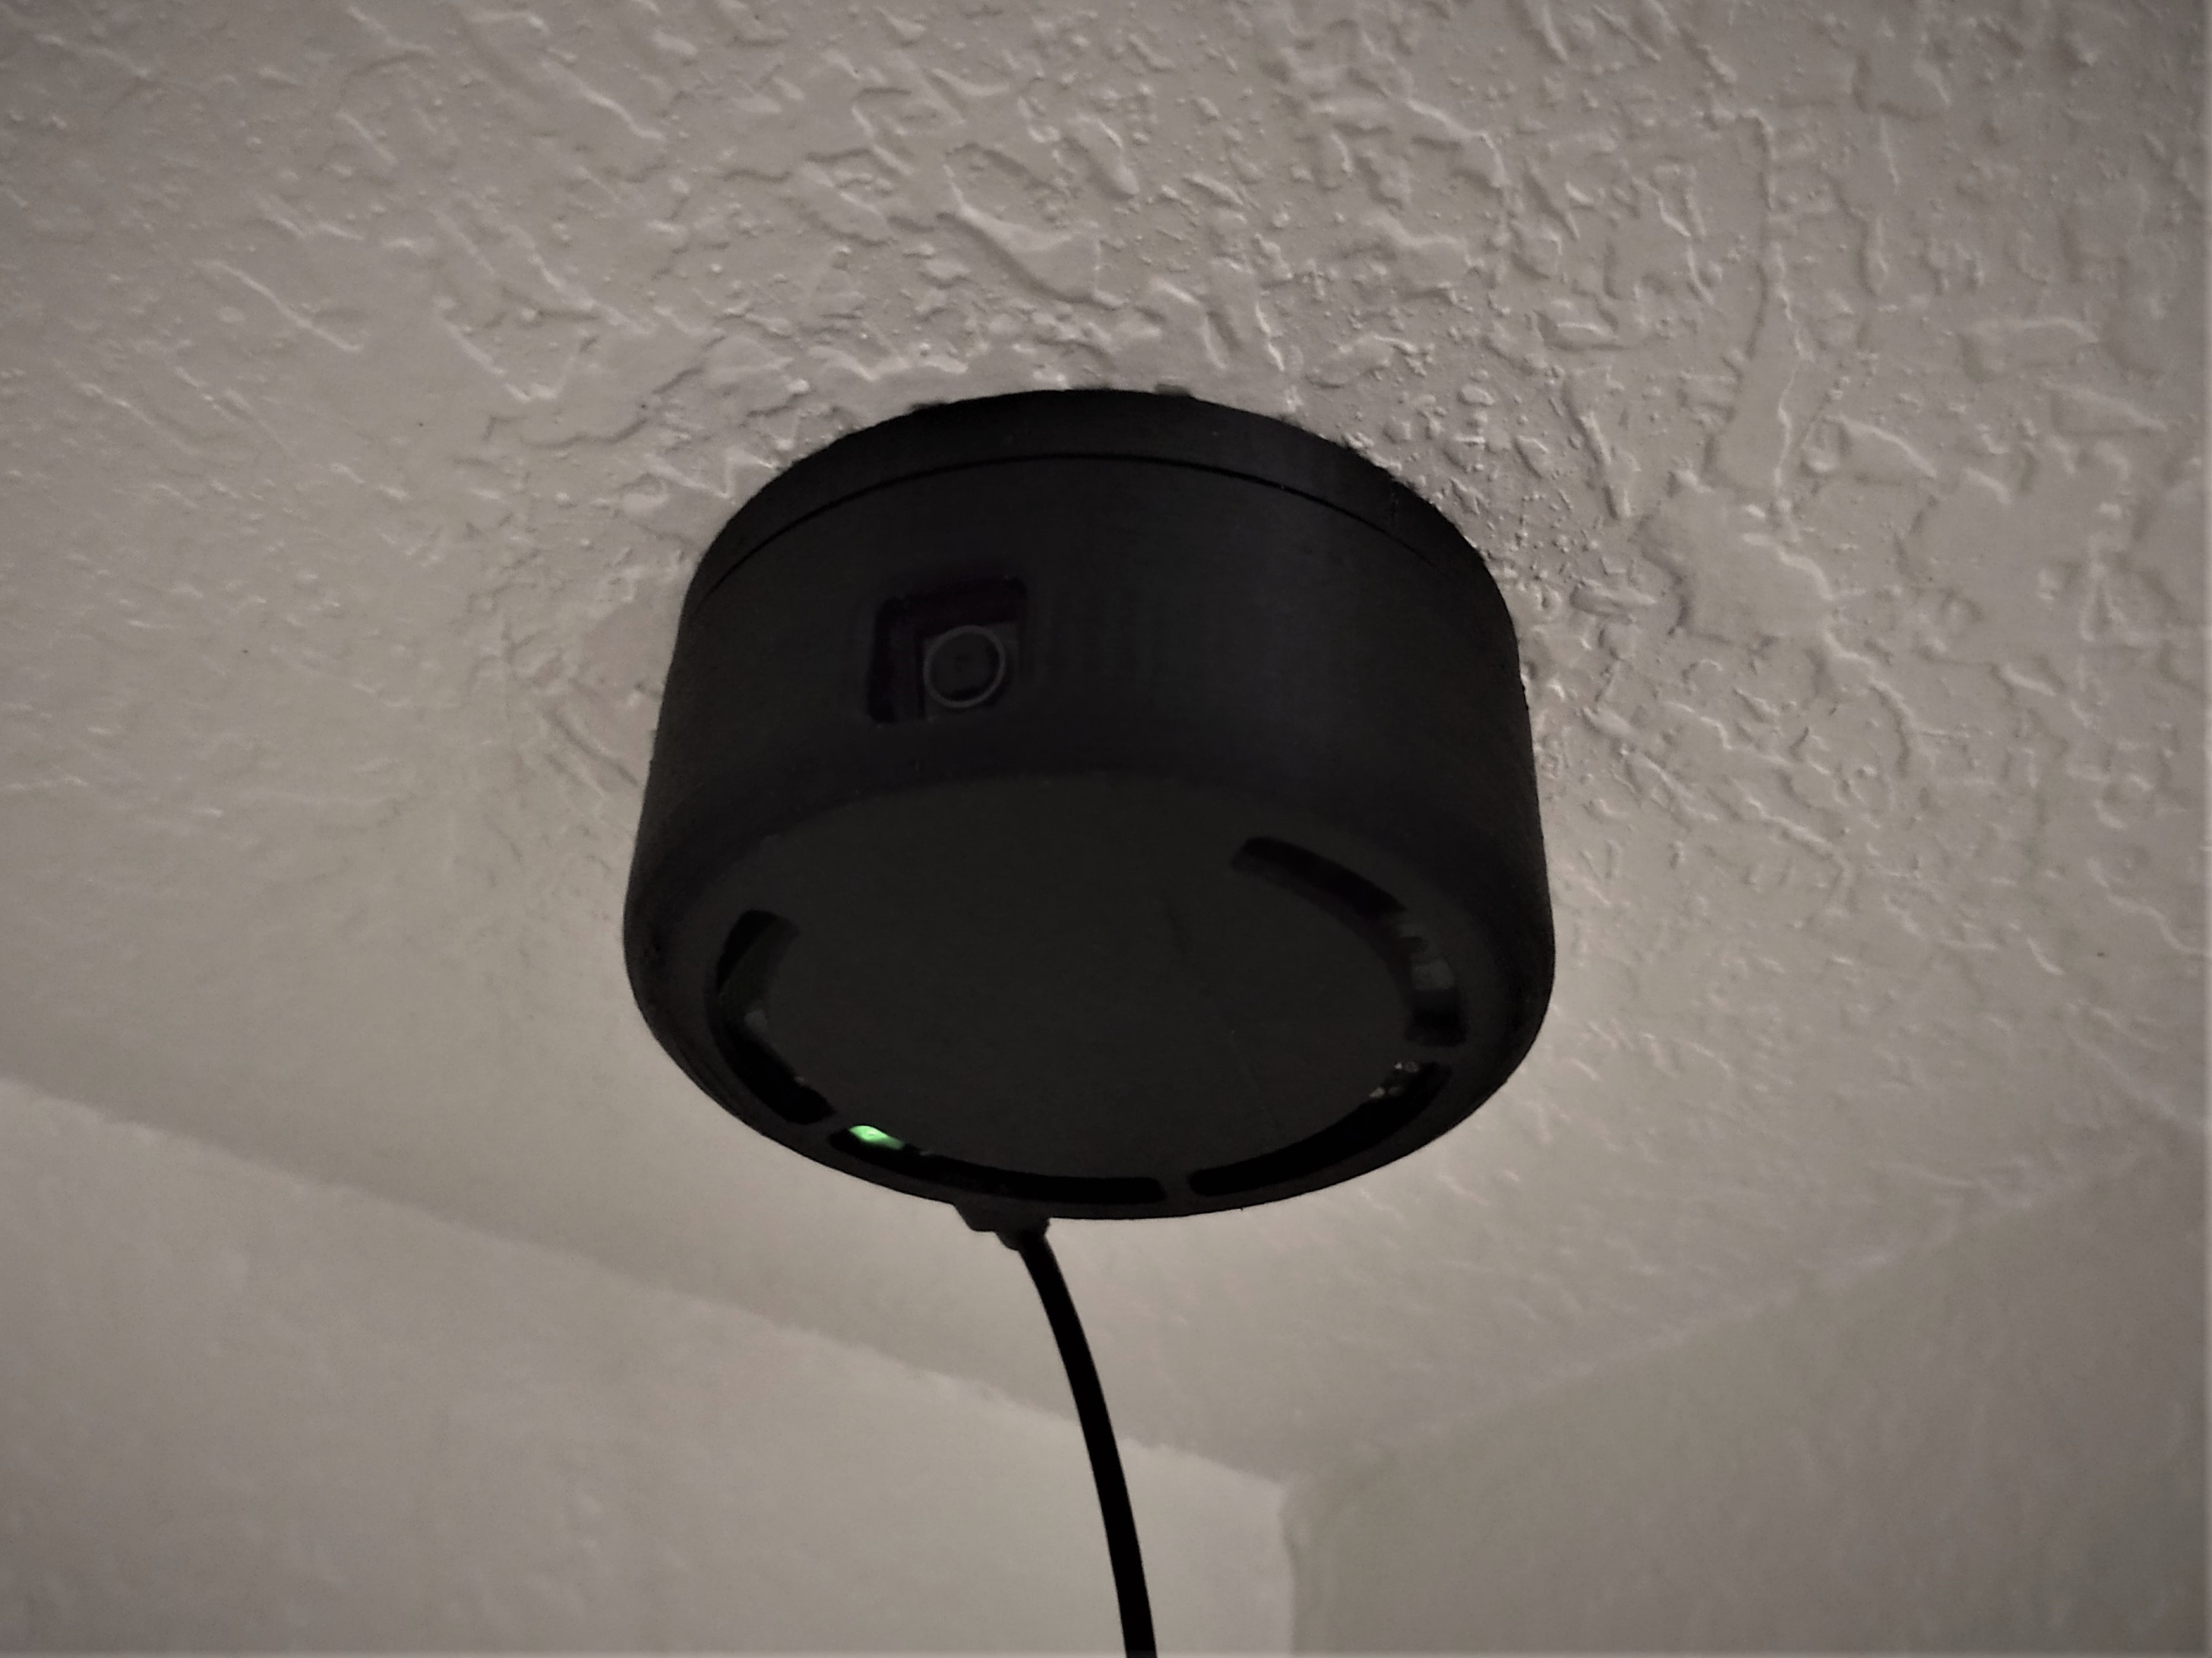
<p>(Originally Uploaded to Thingiverse August 25, 2020)</p> <p>The IPi V4 is a direct design offshoot of the IPi VRT. Whilst keeping the rotational bearing of the VRT, the V4's design is centered around being highly compact, yet easily accessible for modifications.</p> <p>The IPi V4 is a two part design, (three, if counting the internal print in place bearing) with the mounting rotational bearing snapping to the top of the camera body. The only screws needed are for mounting to the ceiling, though two M2x4 screws can be used to secure the camera PCB if you wish.</p> <p>Both versions of the camera body have a single port for insertion of a MicroUSB cable. Mini HDMI and Data MicroUSB ports were not included in the casing design since the IPi series is designed for wireless security monitoring, hence only a power source is really necessary. The PCB is easy to remove, in case you need to access those I/O ports.</p> <p>With the GPIO version of the camera body, there's a channel in the camera casing that allows for GPIO pin's soldered portion to rest in, keeping the PCB flush with the casing. With the more open internal volume, (Compared to previous IPi versions) one can easily install pHats, fans, shims, jumpers, etc. A small heatsink should be used if there's no active cooling installed, since ventilation is limited, as well as sending pictures and video via motioneyeOS causes the CPU to get a bit hot when motion is detected.</p> <p>The IPi V4 fixes an issue with the IPi VRT, in that the camera is angled down 68.1° (Compared to the VRT's straight forward camera position) to allow to be used in rooms with higher ceilings. The VRT's camera positioning caused it to see more ceiling, than floor and doorway is placed higher than 7 1/2 ft. (2.28m)</p> <p>Hardware:</p> <p>Raspberry Pi Zero W: <a href="https://www.adafruit.com/product/3400">https://www.adafruit.com/product/3400</a></p> <p>Raspberry Pi Camera V2.1: <a href="https://www.adafruit.com/product/3099">https://www.adafruit.com/product/3099</a></p> <p>Raspberry Pi Zero Camera Ribbon Cable: <a href="https://www.adafruit.com/product/3157">https://www.adafruit.com/product/3157</a></p> <p>Micro SD Card 8GB: <a href="https://www.amazon.com/Sandisk-MicroSDHC-Memory-Card-Adapter/dp/B000WH6H1M">https://www.amazon.com/Sandisk-MicroSDHC-Memory-Card-Adapter/dp/B000WH6H1M</a></p> <p>2A Wall Power Supply: <a href="https://www.amazon.com/ICV-USB-Wall-Charger-Lightweight/dp/B0119BUJDQ/ref=sr_1_8?dchild=1&keywords=2A+phone+charger&qid=1598379406&sr=8-8">https://www.amazon.com/ICV-USB-Wall-Charger-Lightweight/dp/B0119BUJDQ/ref=sr_1_8?dchild=1&keywords=2A+phone+charger&qid=1598379406&sr=8-8</a></p> <p>MicroUSB Cable: <a href="https://www.amazon.com/AmazonBasics-Male-Micro-Cable-Black/dp/B071S5NTDR/ref=sr_1_16?dchild=1&keywords=micro+usb+cable+10ft&qid=1598379014&s=electronics&sr=1-16">https://www.amazon.com/AmazonBasics-Male-Micro-Cable-Black/dp/B071S5NTDR/ref=sr_1_16?dchild=1&keywords=micro+usb+cable+10ft&qid=1598379014&s=electronics&sr=1-16</a></p> <p>M2 x 4mm Screws: (If you want to secure the camera PCB) <a href="https://www.amazon.com/XunLiu-Grade-Alloy-Socket-Screws/dp/B07Q18NTVJ/ref=sr_1_3?dchild=1&keywords=m2x4+screw&qid=1598379793&s=industrial&sr=1-3">https://www.amazon.com/XunLiu-Grade-Alloy-Socket-Screws/dp/B07Q18NTVJ/ref=sr_1_3?dchild=1&keywords=m2x4+screw&qid=1598379793&s=industrial&sr=1-3</a></p> <p>M4 x 12mm Screw: (For ceiling mounting) <a href="https://www.amazon.com/M4x12mm-Drilling-Hardware-Accessories-Philips/dp/B07QHWKNXC/ref=sr_1_2?dchild=1&keywords=m4+self+tapping+screw&qid=1598379700&s=hi&sr=1-2">https://www.amazon.com/M4x12mm-Drilling-Hardware-Accessories-Philips/dp/B07QHWKNXC/ref=sr_1_2?dchild=1&keywords=m4+self+tapping+screw&qid=1598379700&s=hi&sr=1-2</a></p> <p>Software:</p> <p>motioneyeOS: <a href="https://github.com/ccrisan/motioneyeos/releases">https://github.com/ccrisan/motioneyeos/releases</a></p> <h3>Print instructions</h3><p>Standard Print Settings:</p> <p>Material: PLA<br/> Extruder: 210C<br/> Bed: 56C<br/> First Layer Print Height: .24mm<br/> Standard Layer Height: .18mm<br/> Wall Thickness: .40<br/> Wall Perimeters: 2 (3 for the Rotational Bearing)<br/> Infill: 15%<br/> Infill Pattern: Gyroid<br/> Material Flow: 100%</p> <p>Supports are only needed for the camera's view port and MicroUSB port.</p> <p>Supports Percentage: 15%<br/> Support Pattern: ZigZag</p>
With this file you will be able to print IPi V4 (Legacy Model) with your 3D printer. Click on the button and save the file on your computer to work, edit or customize your design. You can also find more 3D designs for printers on IPi V4 (Legacy Model).