IPi V2i (Legacy Model)
prusaprinters
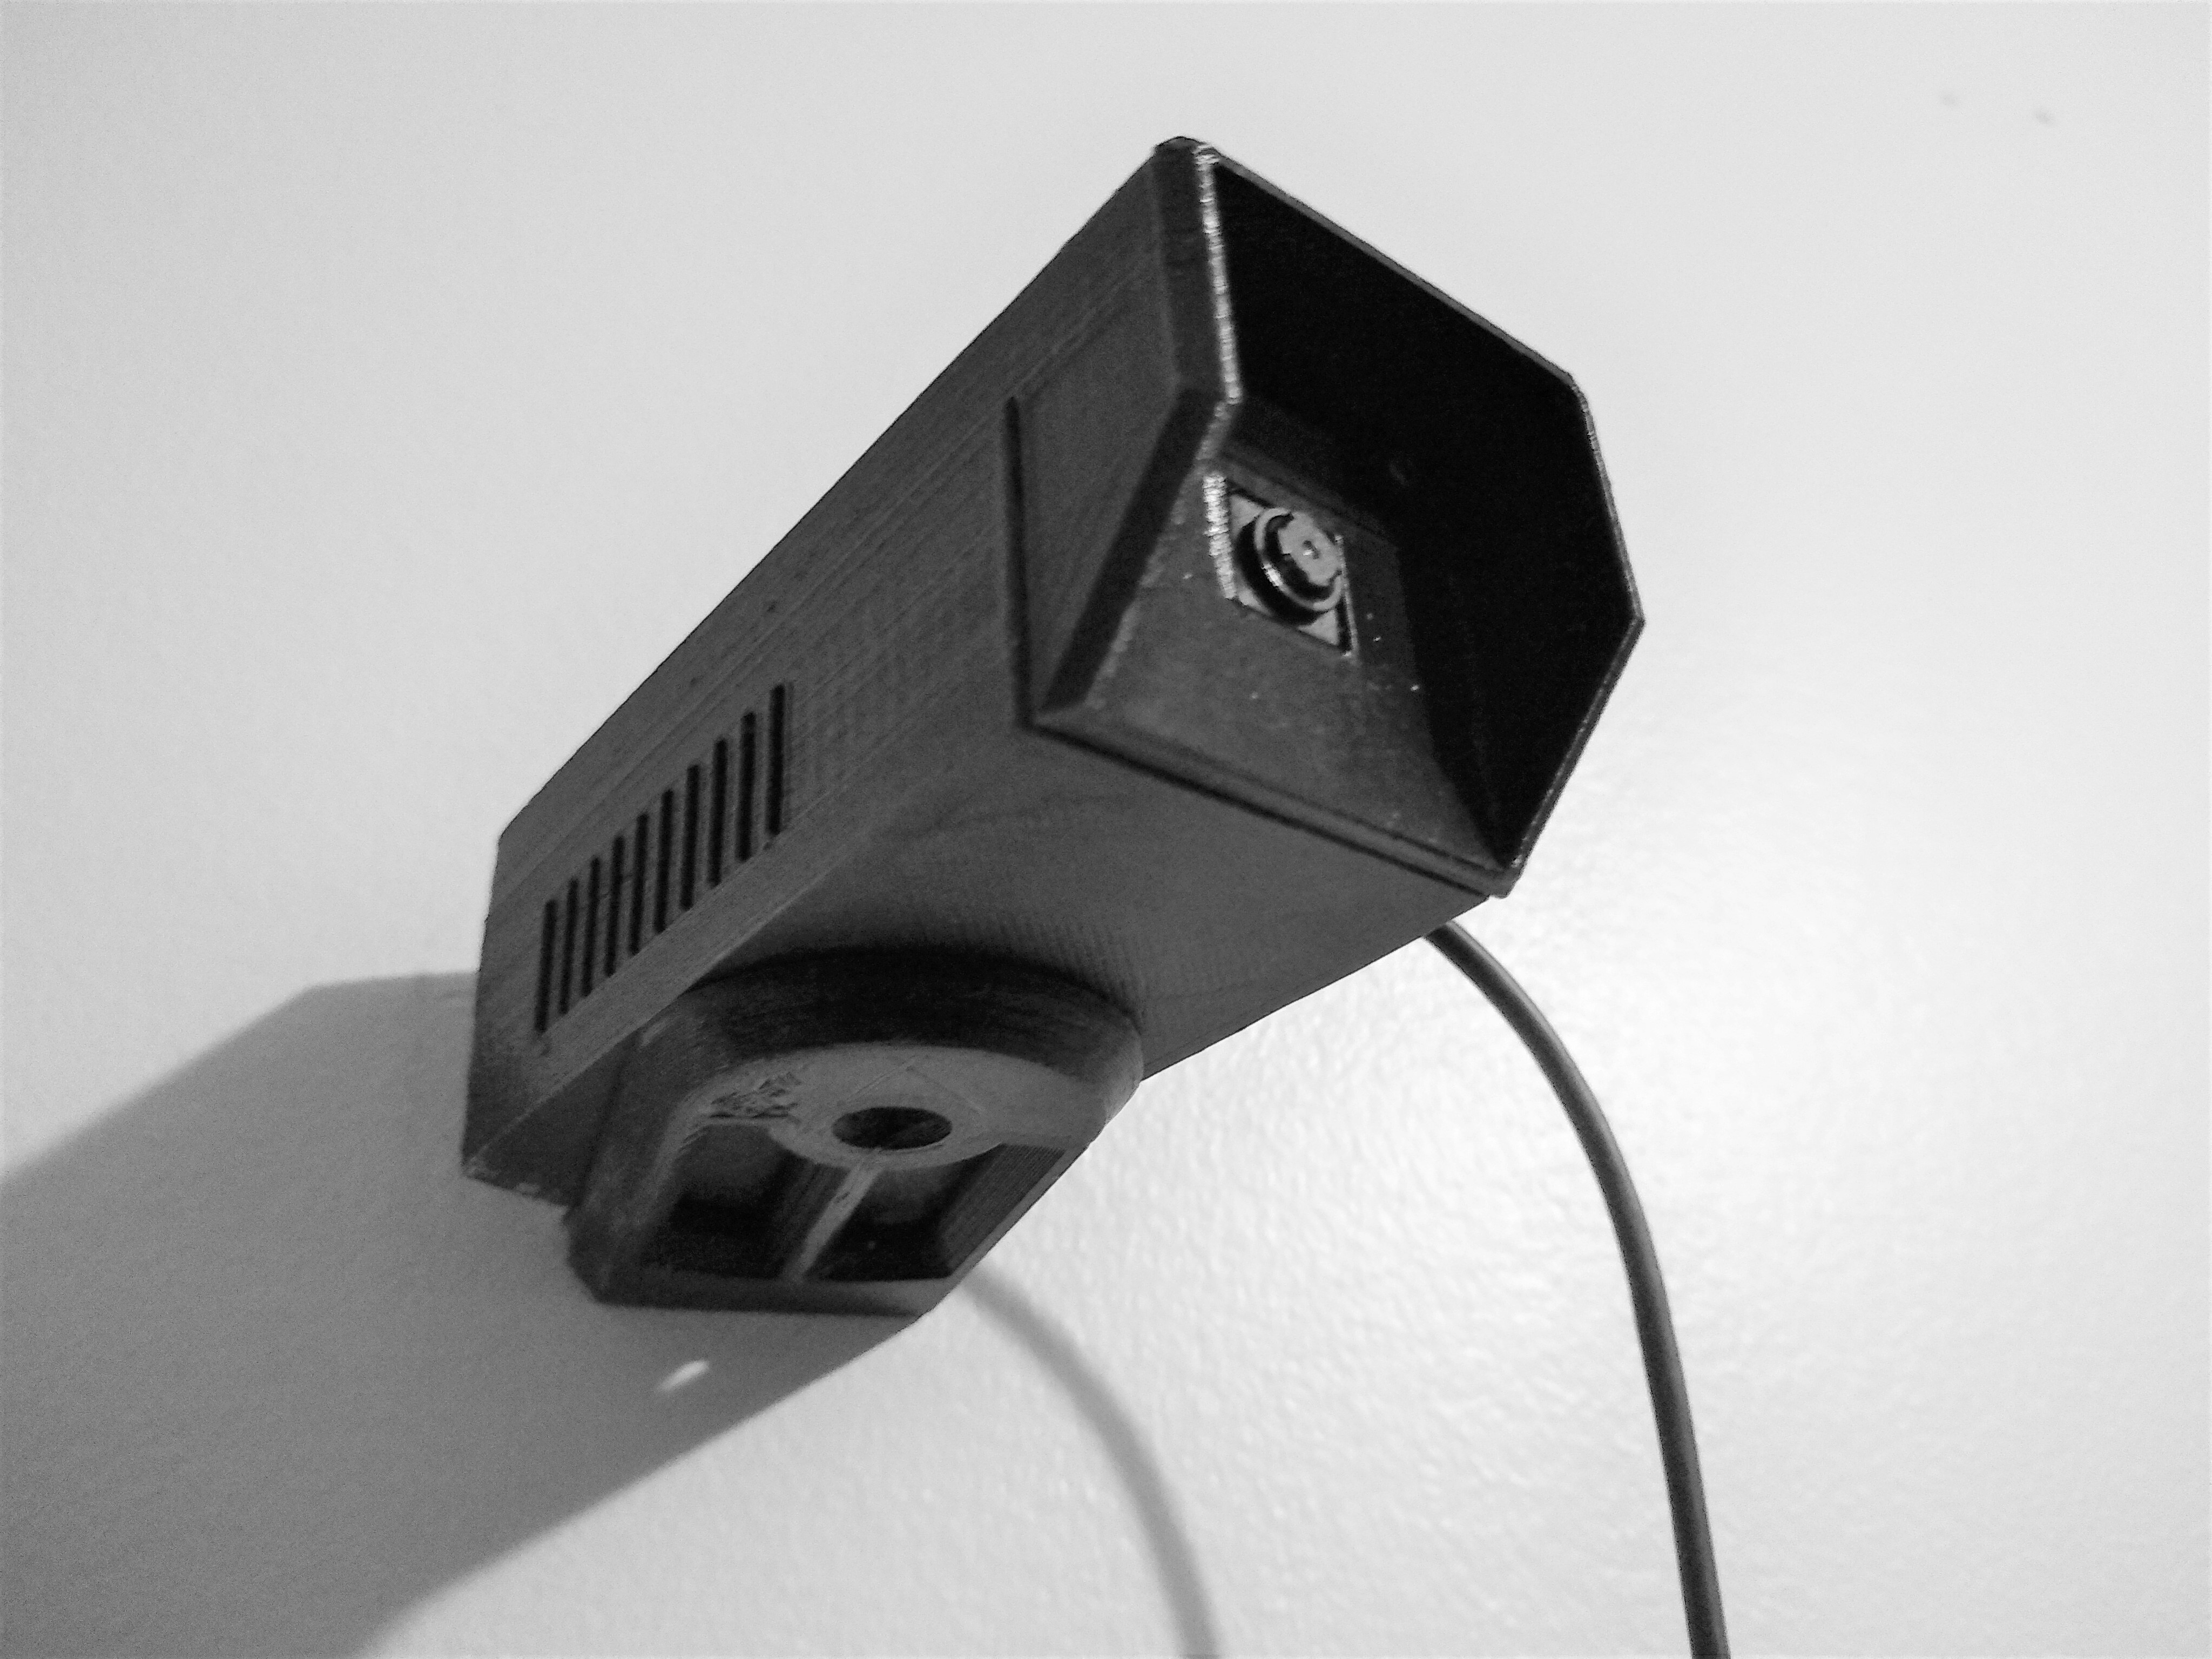
<p>(Originally Uploaded to Thingiverse July 03, 2019)</p> <p>No silly commercial this time ;)</p> <p>So this is a direct iteration of the original IPi V2. Normally this would be considered a version 2.5, but there were so many small changes, along with a hardware change, that this is instead going to be a separate "Improved" version, so to speak.</p> <p>With that being said, this is the list of design changes.</p> <p>Exterior:</p> <p>The camera system is slightly thinner</p> <p>Many edges have been chamfered, removing several sharp corners from the camera system</p> <p>I/O ports slightly enlarged</p> <p>Taller ventilation ports</p> <p>Camera Base is thicker, allowing the camera system to take heavier loads from accidental cord pulls</p> <p>Camera base has been skeletonized, along with 1 extra wall perimeter for extra strength</p> <p>2 less screws are needed to mount the camera PCB</p> <p>Camera view port is enlarged</p> <p>Camera sunshade has been lengthened</p> <p>Camera body assembly screw point have been relocated closer to the center. (See Note 1)</p> <p>Interior:</p> <p>Mounting pegs for the raspberry pi zero w have been swapped out for a pass through screw mount (See Note 1)</p> <p>Screw mount towers have a higher chamfer angle relative to its base, making it more sturdy and less prone to snap off</p> <p>A bracket has been built into the bottom of the camera body to hold the camera in place, replacing the 2 previous mounting screws</p> <p>A socket was designed above the camera view port for the SMD plug to rest against, allowing the camera PCB to sit flush against the mounting surface (SMD socket fits both Camera Module 1.3 and 2.1 SMD Plugs) (See Note 2)</p> <p>Hardware:</p> <p>The original IPi V2 used a Pi Camera V1.3, this version has been upgraded to use camera version 2.1 (Both camera versions and their IR variants can be used due to the socket adapter update seen above)</p> <p>Notes:</p> <p>(Note 1) The original screws to combine the lower and upper camera halves where placed near the edges of the enclosure; this caused the walls around the outside edges to split after a short period of time. The new locations make more sense, and are more stable.</p> <p>(Note 2) Before the socket was built in, the SMD connectors on the front of the camera pcb would cause the pcb to not sit flush with camera mount, and if pushed, would cause the camera to tilt upwards, the socket prevents this.</p> <p>Hardware:</p> <p>Raspberry Pi Zero W<br/> Raspberry Pi Camera V2.1 or V2.1 IR<br/> Raspberry Pi Zero Camera Ribbon Cable<br/> HDMI to Mini HDMI Cable<br/> USB to Micro USB Adapter (for wireless keyboard initial setup before SSH)<br/> Micro SD Card (16GB)<br/> 1A Wall Power Supply<br/> M2 x 15mm Screws<br/> M2 x 8mm Screws</p> <p>Software:</p> <p>motionEyeOS: <a href="https://github.com/ccrisan/motioneyeos/releases">https://github.com/ccrisan/motioneyeos/releases</a><br/> VNC: Automatically with the Raspbian OS Image</p> <h3>Print instructions</h3><p>Standard Print Settings:</p> <p>Material: PLA<br/> Extruder: 208C<br/> Bed: 60C<br/> First Layer Print Height: .26mm<br/> Standard Layer Height: .2mm<br/> Wall Thickness: .40<br/> Wall Perimeters: 2 (3 For the Camera Base)<br/> Infill: 15%<br/> Infill Pattern: Gyroid<br/> Material Flow: 100%</p>
With this file you will be able to print IPi V2i (Legacy Model) with your 3D printer. Click on the button and save the file on your computer to work, edit or customize your design. You can also find more 3D designs for printers on IPi V2i (Legacy Model).