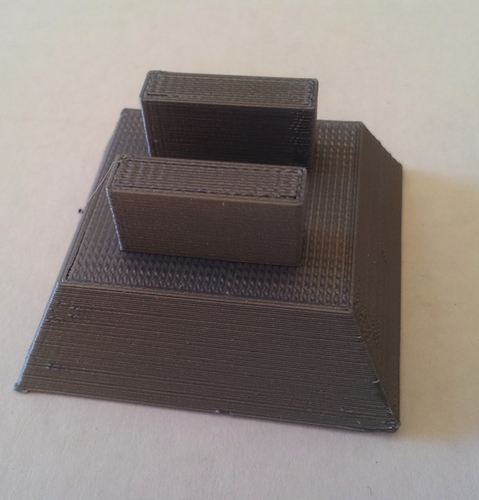
iPhone Quick Release Targus
pinshape
Here's a simplified version of the instructions for creating a quick release mechanism for an iPhone on a Targus tripod. If you're interested in making one for an Arcus tripod, I can provide those instructions as well. First, let's start with the Targus model. This is a basic design that should work for most people. To begin, go to Tinkercad and open up a new project. You'll need to create a new object by clicking on the "create" button at the top of the page. From there, select the "sphere" option from the list of shapes available. Next, draw out a circle for the base of your quick release mechanism using the sphere tool. Make sure it's large enough to fit comfortably over the tripod's socket. Now, let's add some supports to our design. We'll need two small cylindrical objects that will connect the iPhone to the tripod. Click on the "cylinder" tool and draw out a small cylinder for each of these supports. To attach the supports to the sphere, you can use the "hole" feature in Tinkercad. Simply click on the hole button and then select the point where you want to create the hole. Repeat this process for both supports. Now that we have our supports in place, let's add a small ring around the base of each one. This will help secure the iPhone in place. To do this, click on the "ring" tool and draw out a small ring for each support. With our design complete, let's move on to assembling the quick release mechanism. To do this, simply attach the sphere to the tripod using the socket provided. Then, connect the supports to the sphere using the holes we created earlier. That's it! Your Targus iPhone quick release is now complete. If you're interested in making one for an Arcus tripod, here are some additional instructions you can follow: To start, go back to Tinkercad and open up a new project. Create a new object by clicking on the "create" button at the top of the page. From there, select the "sphere" option from the list of shapes available. Draw out a circle for the base of your quick release mechanism using the sphere tool. Make sure it's large enough to fit comfortably over the tripod's socket. Next, let's add some supports to our design. We'll need two small cylindrical objects that will connect the iPhone to the tripod. Click on the "cylinder" tool and draw out a small cylinder for each of these supports. To attach the supports to the sphere, you can use the "hole" feature in Tinkercad. Simply click on the hole button and then select the point where you want to create the hole. Repeat this process for both supports. Now that we have our supports in place, let's add a small ring around the base of each one. This will help secure the iPhone in place. To do this, click on the "ring" tool and draw out a small ring for each support. With our design complete, let's move on to assembling the quick release mechanism. To do this, simply attach the sphere to the tripod using the socket provided. Then, connect the supports to the sphere using the holes we created earlier. That's it! Your Arcus iPhone quick release is now complete.
With this file you will be able to print iPhone Quick Release Targus with your 3D printer. Click on the button and save the file on your computer to work, edit or customize your design. You can also find more 3D designs for printers on iPhone Quick Release Targus.
