Interior for a Märklin H0 coach wagon
thingiverse
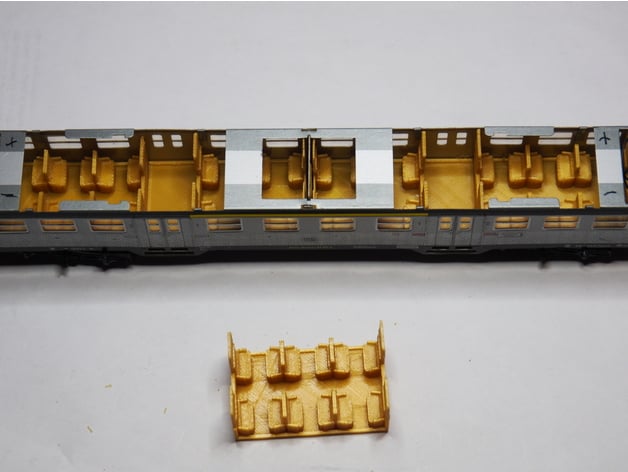
This is an interior design for Märklin coach wagons that were not originally equipped with one, like the "Silberlingen" 4042 and 4043 models. The original interior is no longer sold separately, so I decided to measure it and redesign it in Blender because there are currently no 3D designs available. The original interior was created as a single piece, but since some wagons without an interior have a metal partition in the middle, printing it in two parts is necessary. This can be achieved by splitting it into four separate pieces, allowing for easy mounting through the openings in the roof of certain models. Printer Settings: Ultimaker Original No supports were used. Normal resolution was selected. Notes: I chose to use bronze filament because its color closely matches that of some original interiors. Two end parts and both middle part files are required to fill a long wagon (24cm). Post-Printing Instructions: The middle section comes in two versions, one with small notches at the ends and one without. This distinction is necessary due to metal flaps on the interior metal partition that protrude slightly. Mounting the Interior: Depending on the type of model, there are different methods for installing the interior: For older models with cellophane windows, squeeze the parts through the top by first inserting the middle sections and then the end sections. For newer models with plastic windows, remove the bogie (the part holding the wheels), bend the metal flaps inside at the ends which are part of the metal steps, take out the steps, and gently push the bottom to unhook the side panels. After removing the bottom, place the interior in its designated position.
With this file you will be able to print Interior for a Märklin H0 coach wagon with your 3D printer. Click on the button and save the file on your computer to work, edit or customize your design. You can also find more 3D designs for printers on Interior for a Märklin H0 coach wagon.
