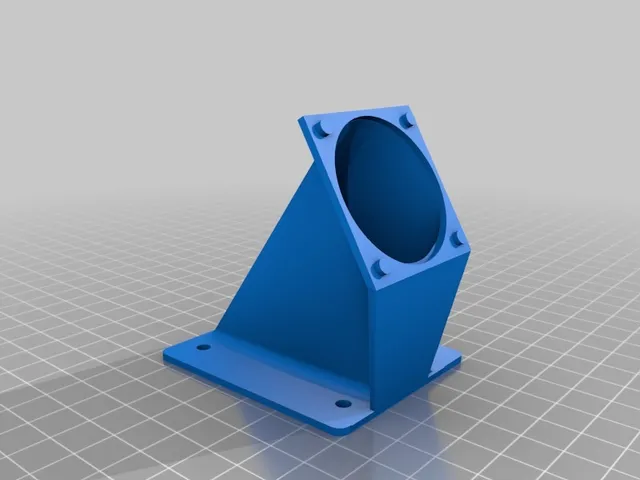
Intake Duct for Controller Cooling Fan
prusaprinters
I installed a controller cooling fan duct by lexaiden but found that the air pulled in under the heated bed caused problems when printing ABS and PETG. The bed would take too long to recover and the thermal protection would shutdown the print. To resolve the issue I created this intake duct to match up to the front of the 40 mm fan. There are two versions of the duct. Version 1: Tabs align to the screw holes of the fan and maintain alignment. The duct is held in place by the attachment to the frame. This is the easiest to install but does not seal completely to the fan. Version 2: Screw holes allow the attachment of the intake duct through the mounting holes of the fan into the stepper cooling duct. Print Settings Printer: Anycubic Kossel Delta Plus Rafts: Doesn't Matter Supports: Doesn't Matter Resolution: .2mm Infill: 20% Notes: The duct can be printed as it is oriented in the STL. The duct is designed so that support should not be necessary. I printed in PLA. Post-Printing Assembly The cable lengths supplied with my printer made several cable connections taut in a straight line from entry to socket. This made installation of a duct impossible. I purchased longer cables that now allow better cable routing. Version 1 Materials: Two (or up to 4) M3 or M4 screws with T-Nuts. Really two is all that is needed. Installation: Loosen the controller board frame mounting screws so that it can move along the rails. Place the intake duct against the rails and move the controller board and intake duct to position that holds the duct against the fan with the intake duct tabs inserted into the fans screw holes. Tighten the controller board and intake duct mounting screws. Version 2 Material: The Version 1 material, plus 4 M3x16 screws for attachment to the fan duct with 10 mm thick fan. Because the fan duct screw holes are close to the duct, insert the screws through the intake duct prior to connecting to the fan duct. Installation: 1.Highly advised to assemble the intake duct to the fan duct outside of the printer. 2. Loosen the controller board frame mounting screws so that it can move along the rails. 3. Attach the duct assembly to the controller board and move the controller board to a position that aligns the intake duct to the rails and screw in place. 4. Tighten the controller board rail screws. Category: 3D Printer Parts
With this file you will be able to print Intake Duct for Controller Cooling Fan with your 3D printer. Click on the button and save the file on your computer to work, edit or customize your design. You can also find more 3D designs for printers on Intake Duct for Controller Cooling Fan.
