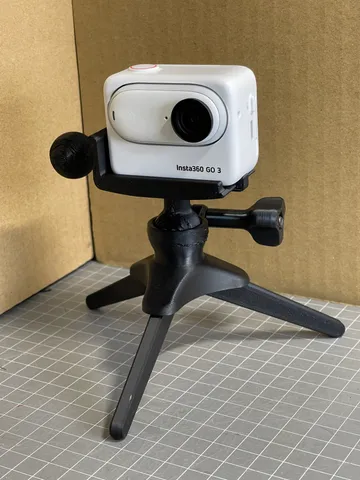
Insta360 Go 3 Tripod
prusaprinters
Permanent Magnets: 10*3mmNote the NS pole of the magnet An M5 x 40mm bolt is needed for assembly (longer works too, but it will stick out and look ugly). Assembly:Fasten the legs first, as this can require a bit of force. Place the tripod base upside down on a flat surface. Be sure to align the notches of each leg witch the small bumps inside of the grooves for the legs. Press straight down, but be careful so you don't hurt yourself if something slips. Using leather gloves might be a good idea.The ball-joint should connect without excessive force, if needed you can use a screwdriver to slightly widen the gap while pushing it into place.Side the M5 bolt through the printed screw. If it's difficult to get the last bit of the bolt head seated, use an M5 nut on the other end to pull the bolt through.The bolt hole is threaded in the design, but depending on your printer settings, it might be a bit tight. You can put a small amount of grease on the very end of the bolt for smoother operation.
With this file you will be able to print Insta360 Go 3 Tripod with your 3D printer. Click on the button and save the file on your computer to work, edit or customize your design. You can also find more 3D designs for printers on Insta360 Go 3 Tripod.
