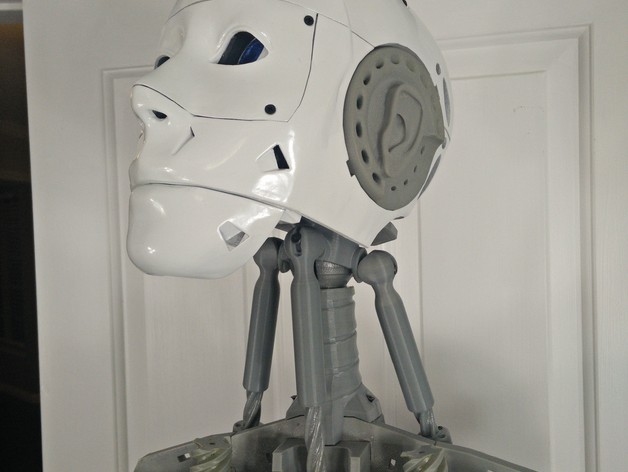
InMoov Articulating Neck Joint ReMix
thingiverse
This is a reworking of Bob Houston's exceptional articulated neck modification. Check out the tutorial at https://www.youtube.com/watch?v=FPV6k8QfDY8. To build this mod, you will need: - 3 three-millimeter by twenty-millimeter socket head cap screws - 3 three-millimeter by twelve-millimeter machine screws - 3 washers (twenty-millimeter diameter) - 7 #6 or #8 flathead screws (three-quarters of an inch long) or equivalent - 8 #4 half-inch flathead screws or equivalent To print every part, use the following settings: * 100-micron layer height * 6 perimeters * 2 millimeter tops and bottoms * 15% infill * 3 to 4 millimeter brim Only these parts require supports: ArtNeck_ServoHolderV2, ArtNeck_ServoJointUpperV2, and the assembly. Drill out the neck upper ball mounts to two-point-five millimeters, then tap three-millimeter threads. Lightly sand the ball joints and attach them to the head using #8 screws. Next, insert the NeckLower into the Neck with the larger slot facing the back. Align, then drill, countersink, and use a short machine screw to join together. Make sure you shorten or snip the screw so it does not extend into the neck. Attach the new neck subassembly to InMoov using #8 screws. Mount Head NeckUpper to NeckLower carefully to avoid jostling. Sand the external surface of the ServoPivot Mount point. Drill a pivot hole to two-point-five millimeters, then threads to three-millimeter. Use the ServoPivot to drill out the mount holes from the shoulder frame. Put the left servopivot into the right facing inward and drill for correct mount hole locations. Countersink the mounts and attach them using #8 screws. You will need to temporarily remove either the arm or the rear shoulder panel to access these mounts. Next, sand the mating surface for ServoHolder. Drill a pivot hole and servo mount holes to three-millimeters. Test fit into ServoPivot. It should be tight but not loose. Attach to ServoPivot using a three-millimeter washer and a twelve-millimeter machine screw. To attach PistonBaseSide, drill it out to three- to four-millimeter diameter. Temporarily mount it to the servos. Mount the servos to ServoHolder using #4 flathead screws. Drill PistonBaseFront to three- to four-millimeter diameter. Remove the neck front piston base and attach PistonBaseFront to the front Neck servo using #4 flathead screws. Enable the neck front servo and set it to 90 degrees position. Grease up PistonBaseFront and balljoint. Test fit PistonFront, attempting to mate with the head at floor level. Make a note of what change in rotation is required to make the head level (15 degrees, 45 degrees etc). Remove PistonBaseFront and reset the horn at desired position. Attach PistonBaseFront again. To affix the ball joint, use a twenty-millimeter socket head cap screw. To access this, turn the head slightly to one side. Repeat these steps for the neck side servo by greasing up PistonBaseSide and balljoint and test fitting PistonSide. Whatever control solution you're using, make sure it sets sane max/min values for the new neck nod and side actions. This modification is very cool and offers a great way to enhance your InMoov build. Enjoy! The following changes were made: - NeckJointUpper was updated to V3 - Wider mounting studs were added - Balljoint backplane was shortened for a few more degrees of freedom NeckJointLower was also updated to V3, with the ball joint feature thickened and both slots matching in size. HK15328 servo horn was also included if using that type of servo.
With this file you will be able to print InMoov Articulating Neck Joint ReMix with your 3D printer. Click on the button and save the file on your computer to work, edit or customize your design. You can also find more 3D designs for printers on InMoov Articulating Neck Joint ReMix.
