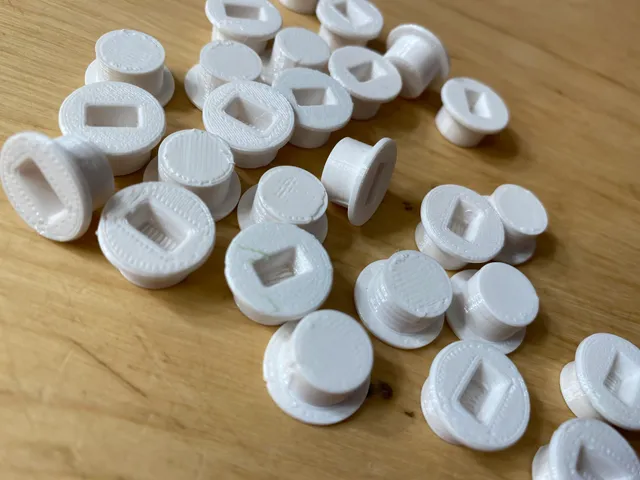
Inflatable Light Cap
prusaprinters
DescriptionI have a ton of holiday inflatables that I setup outside of the house for various holidays. Inflatables need maintenance, and one common task I have is replacing the burned-out low-quality LED lights inside an inflatable, with better quality lights. The lights have a mount that goes through a hole in the skin of the inflatable, and connects to a cap. The two parts snap together and lock the light in place.https://www.thingiverse.com/thing:5159408 This model on Thingiverse is the mount portion of the light. I was never able to find the cap part of the light. I suspect that the cap is only sold to inflatable companies, and that there is no money to be made selling the cap directly to consumers. This creates a problem when you loose a cap, or when you’re trying to replace the LED light, and need a way to connect the new light to the fabric of the inflatable.Eventually I became comfortable enough with Fusion360 to make my own cap. Yay!If you print these, and the corresponding mount model from Thingiverse, the cap requires a bit of force to snap onto the mount. You may hear one, two or three clicks as it settles in place. When properly snapped onto the mount, the mount will sit level. If the cap feels tilted to one side or the other, you haven’t finished snapping it in place. When connected properly, you may need to gently pry the two pieces apart with a spudger. Notes about this modelI designed this cap to work with the Thingiverse model linked above. It should clip onto the existing mounts that come with lights, but I’m not sure how strong the grip connection is between the two parts. There is a form of mount that uses two prongs that snap onto a cap that has a hollow center running through the cap. This mount will not work for that sort of mount.I don’t try connecting these caps to existing mounts. Instead I’ll cut the bad light out of the strand, splice a new high quality LED into the strand, superglue the thingiverse mount onto the light, and then use this cap to hold things in place. Print notesPrint these in the orientation of the model file. Wide part on the print bed. The hole/cavity inside the cap is small enough that you do not need to add supports. Print this with a 0.4mm nozzle. The detail inside the cap is too small to be properly replicated with a 0.6mm nozzle. 0.2mm layer height.A single cap takes 9 minutes to print. I fill the print bed with caps and print them in bulk. A full bed of 80 will take 8-ish hours to print.I print the caps with PETG, and for this job I really like the Prusament Signal White.
With this file you will be able to print Inflatable Light Cap with your 3D printer. Click on the button and save the file on your computer to work, edit or customize your design. You can also find more 3D designs for printers on Inflatable Light Cap.
