infill cheat sheet
prusaprinters
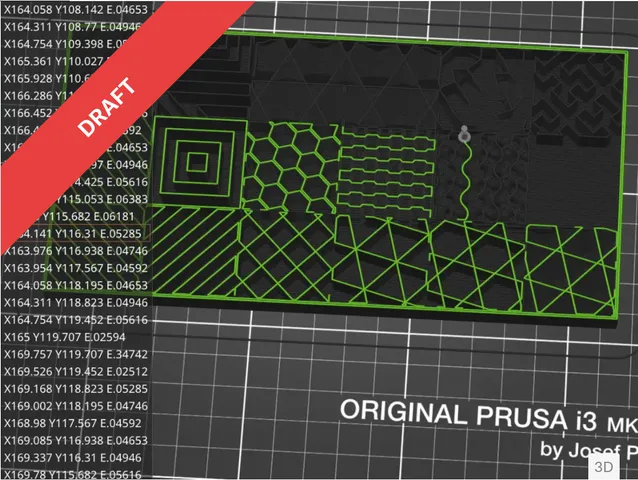
TL;DRA simple model with one bottom layer and all default prusaslicer infills, 15%, single perimeter, parts, modifiers, color change, first layer, fun to print and very decorative. infill cheat sheetThis model is a nice print to start your 3D printing hobby. It looks good and shows you all infill variants prusaslicer has today. Print it and pin it like me, near your computer so you have all infills visibly and can choose - infill matters. "I like to print now, and (maybe) read later"Select printer, nozzle size, your filament - click slice - print. The default is 0.6 nozzle size and a very good general PLA but it will print with any nozzle size and any filament. Dual Color - maybe your first timeDon't worry be happy, it is Stress Free like my Stress Free First Layer calibration.After the first layer, which is the bottom of this print, the printer will ask you to press the knob and pull out the filament, then he likes you to put in the second filament and press the knob again.The printer asks if the color is OK, select no until you see the new color in the purge, than select yes and the print goes on.That's all - so easy - now you know how to print multi color models on your single color printer. The rabbit holeIf you choose the red pill, here we go - to see how this is done - nothing is hidden.It all starts in FreeCAD, the realthunder branch, i can not recommend the mainstream vanilla version today. The model is build out of 19 solids. The first is - the first layer (of course) - the other 18 solids are identical clones of each other and differ only in position. This is all together exported as one STL file to import it into the mighty prusaslicer.Solid Adamantium! But prusaslicer is harder than adamantium and breaks it down in parts.19 parts and each part can be modified by itself.Modifiers are a more or less hidden magic superpower of prusaslicer. All these modifiers do this to the block of solid Adamantium.Experts see how hard it is to differ between “adaptive cubic” and “support cubic”, that's because 10 mm are to less to show the difference. The PrintThat was done with a prusa mk3s+, a 0.6 mm hardened steel brozzl nozzle and black and orange PLA from extrudr. Slicer was Version "2.5.0-beta1+linux-x64-GTK2" default values - nothing changed. Experts see the perimeter failures, very visibly in concentric and honeycomb.Each of these infills has its place. WatchingIf you don't change the default values you will see your printer on steroids between the first layer and the infills. While the first layer is done slow and precise the infill did not need perfection and so the printer speeds up. And finally The bottom layer on a textured sheet, i like that. If you fail to print that…Don't worry! Go to https://www.printables.com/model/251587-stress-free-first-layer-calibration-in-less-than-5 and come back to succeed.
With this file you will be able to print infill cheat sheet with your 3D printer. Click on the button and save the file on your computer to work, edit or customize your design. You can also find more 3D designs for printers on infill cheat sheet.
