In Place Z Height Calibration Assistant
prusaprinters
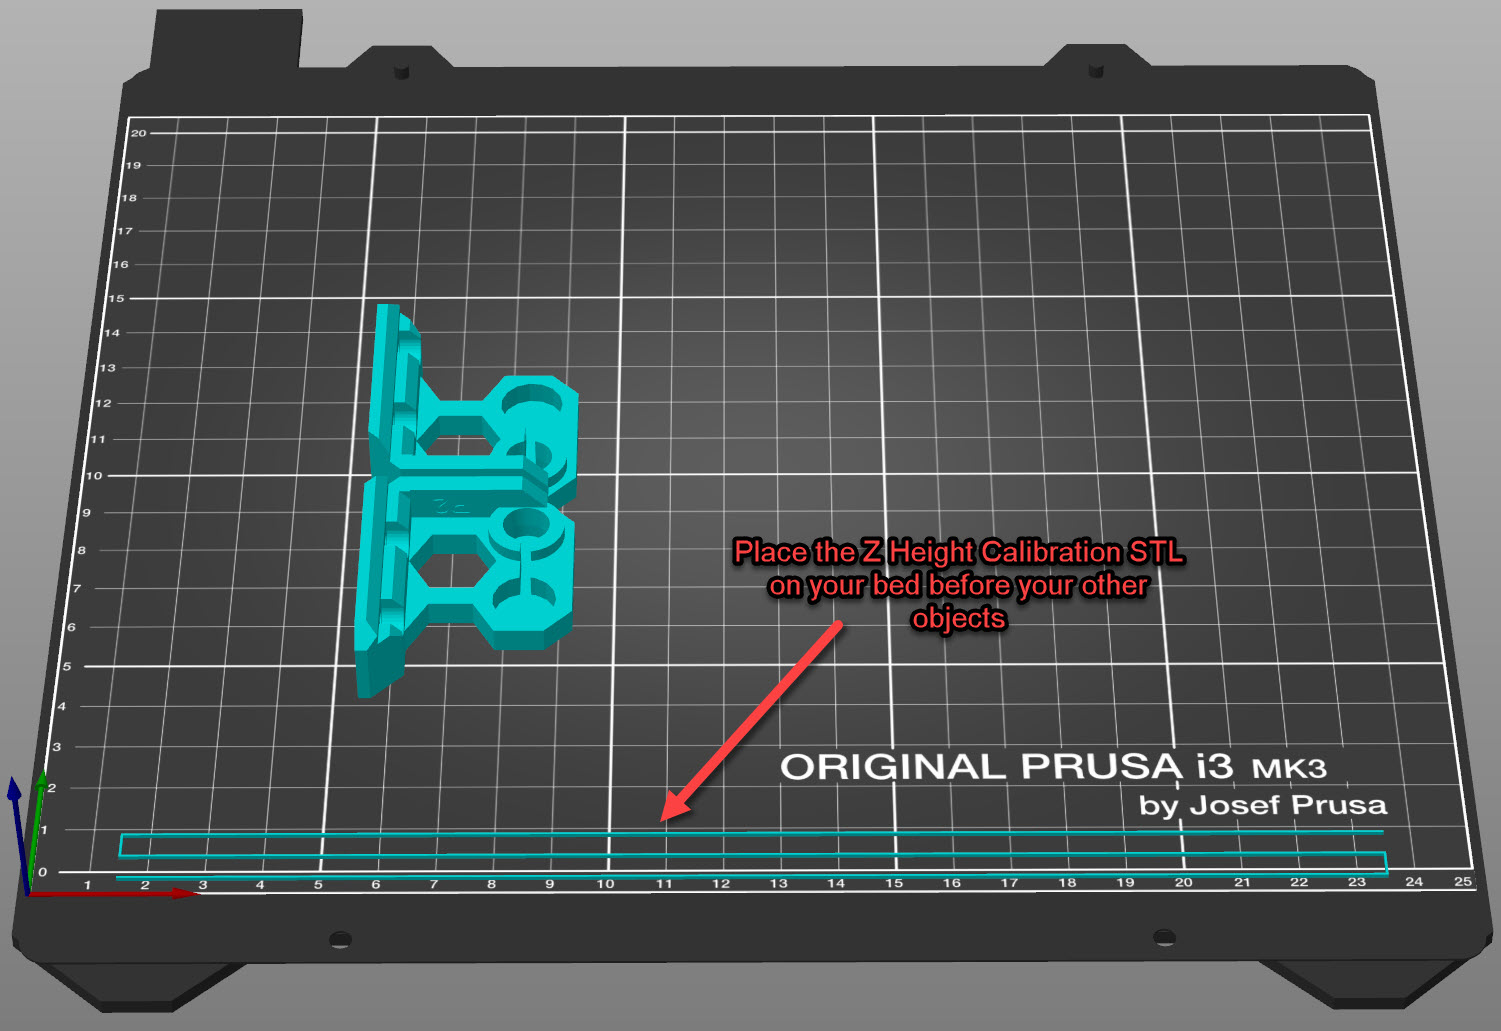
<p>A helpful little tool for calibrating your Z height whilst printing your objects. The idea is to place this on the bed in your slicer first and then your other objects to be printed. When you print, this should print first and give you a chance to adjust your Live Z Height before your objects start to print (work this way with Prusa Slicer anyway).</p> <p>Start the print and jump into your Live Z Height adjustment. As the test line prints, feel the height with your finger and adjust accordingly. You have 3 lines to get it perfect and I have found that to be more than enough.</p> <p>I have found this to be perfect for obtaining the perfect first layer given that an initial Z Height Calibration before you start to print may not be exactly where you want it to be during the actual print due to temperature error and other factors. I have not had a bad first layer since coming up with this idea!</p> <p>Lines are 0.4 x 0.4mm at 5mm spacing so not much bed real estate is used. It is designed to print two layers (with 0.2mm layer height) so it is easier to remove after the print finishes (especially important for textured sheets and filaments where the first layer height was originally too low leaving a thin smear of plastic. The second layer should bond to it and remove all filament when removing off the bed)</p> <p>I hope you find this useful. Happy First Layers!</p> <h3>Print instructions</h3><h3>Category: 3D Printing Print Settings</h3> <p><strong>Printer Brand:</strong> Prusa</p> <p><strong>Printer:</strong> I3 MK3S</p> <p><strong>Rafts:</strong> No</p> <p><strong>Supports:</strong> No</p>
With this file you will be able to print In Place Z Height Calibration Assistant with your 3D printer. Click on the button and save the file on your computer to work, edit or customize your design. You can also find more 3D designs for printers on In Place Z Height Calibration Assistant.