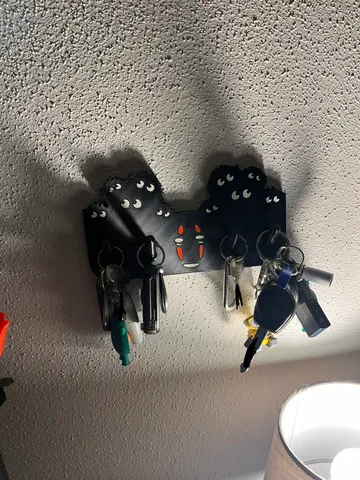
Improved Spirited Away Keyrack
prusaprinters
I really like the original model by Shaun_Sin, but the pins didn't look optimized for printing and overall not rigid to me. Then, because I made the base thicker, the wall wasn't very visible anymore through the gaps and the nice look-through effect didn't come through as well as originally intended. So I added printable inserts which I printed in red and white, to give it a nice multi colored touch. ImprovementsThicker base to allow for angled screw-throughSeparated pins which can be printed straightAdded bore for M3x25 screws to secure the pinsAdded holes in the back for mounting to nails/small screws in the wallAdded printed colored inserts BOM4x M3x254x M3 washerMounting hardware for the wall, I used 2 nails[optional] Superglue, if you want to secure the inserts Printed insertsNamingSusuwataris are counted from left to right, top to bottominsert-<susuwatari no>-<eye-no (1 = left, 2 = right)>Noface inserts are separated into column and row:insert-noface-<column (1 = left, 2 = right)>-<row>TolerancesA note on tolerances: The pins have a fair amount of play, but are held in position by the bolts. The inserts have a 0.1mm offset around the hole they go in, which is still a tiny bit too much for my taste. You can scale them up or down a little (x & y axis only), or adjust the offset in the CAD file yourself via the “tolerance” variable. PrintingI printed everything with:PLA0.2mm layer height20% infill3 perimeters, 3 top- & bottom-layers
With this file you will be able to print Improved Spirited Away Keyrack with your 3D printer. Click on the button and save the file on your computer to work, edit or customize your design. You can also find more 3D designs for printers on Improved Spirited Away Keyrack.
