Improved Azul Overlay Board and Insert
prusaprinters
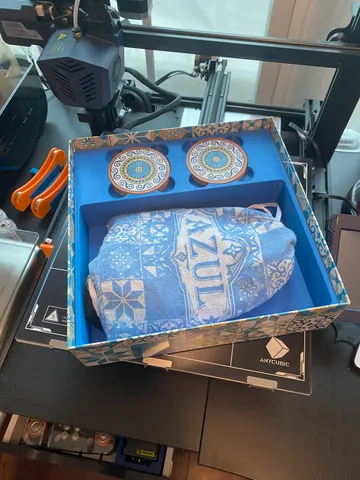
I really liked Jacques Botha's Azul overlay, but I didn't want to glue clips to my overlay. I have a large format printer so I had plenty of room to make an overlay that fit over the entire board. The overlay is 242mm x 242mm so it should fit on any printer with a bed 250mm bed or larger.After printing the overlays, I found that putting them in the box with the included insert caused box lift. So back to the drawing board and I came up with this insert.This insert uses a ton of filament, but you can use lightning infill or gradual infill steps to cut down on the amount of infill required. The insert also measures 250x250mm so you will need a large format printer to handle this job in one print.Insert Print SettingsFilament:Overture Matte Blue PLAQuality Layer Height: 0.2 mmLine Width: 0.4 mmWall Line Count: 3 Top Thickness: 1.2 mmBottom Thickness: 1.2 mm Infill Infill Density: 15% Infill Pattern: gridMaterial Printing Temperature: 215°C Build Plate Temperature: 60°C Speed Print Speed: 80 mm/sFan Speed: 100%Build Plate Adhesion Type: brim For the overlays, the .stl is face down and will print with no supports. Print it with no top or bottom layers, three walls, and with grid infill at 25%.PRINT SETTINGSFilament: Inland Blue PLAQuality Layer Height: 0.2 mmLine Width: 0.4 mmWall Line Count: 3 Top Thickness: 1.2 mmBottom Thickness: 1.2 mm Infill Density: 25% Infill Pattern: grid Material Printing Temperature: 215°CBuild Plate Temperature: 60°C Speed Print Speed: 80 mm/s Fan Speed: 100% Build Plate Adhesion Type: skirt
With this file you will be able to print Improved Azul Overlay Board and Insert with your 3D printer. Click on the button and save the file on your computer to work, edit or customize your design. You can also find more 3D designs for printers on Improved Azul Overlay Board and Insert.
